Introduction to Homemade Espresso Coffee Ice Cream
Are you ready to treat yourself to something special? Homemade Espresso Coffee Ice Cream is a delightful dessert that brings together the rich, bold flavors of espresso and the creamy sweetness of ice cream. This frozen treat is not just a dessert; it’s an experience that coffee lovers will cherish. Whether you’re enjoying a sunny day or winding down after dinner, this ice cream is the perfect companion.
What Makes Homemade Espresso Coffee Ice Cream Special?
What sets this ice cream apart? First, it’s made with real espresso, which gives it a deep, robust flavor that store-bought versions often lack. The process of making it at home allows you to control the ingredients, ensuring that every scoop is fresh and delicious. Plus, you can customize it to your taste! Want it sweeter? Add more sugar. Prefer a stronger coffee flavor? Just increase the espresso. The possibilities are endless!
The Perfect Treat for Coffee Lovers
If you love coffee, this ice cream is a must-try. It’s a wonderful way to enjoy your favorite beverage in a new form. Imagine the smooth, creamy texture melting in your mouth, combined with that familiar coffee kick. It’s a delightful way to cool down on a hot day or to satisfy your sweet tooth after a meal. With each bite, you’ll be reminded of your favorite coffee shop, but from the comfort of your own home.
So, grab your ingredients and get ready to whip up a batch of Homemade Espresso Coffee Ice Cream. It’s easy, fun, and oh-so-rewarding!
Ingredients for Homemade Espresso Coffee Ice Cream
To create your own Homemade Espresso Coffee Ice Cream, you’ll need a few simple ingredients. Each one plays a vital role in achieving that creamy texture and rich coffee flavor. Here’s what you’ll need:
- 2 cups heavy cream: This is the base of your ice cream, providing a rich and creamy texture.
- 1 cup whole milk: Whole milk adds creaminess and balances the richness of the heavy cream.
- 1 cup brewed espresso: Freshly brewed espresso is essential for that bold coffee flavor. Make sure it’s cooled before using.
- 3/4 cup granulated sugar: This sweetens the ice cream and enhances the flavors of the espresso.
- 1 teaspoon vanilla extract: Vanilla adds a lovely depth of flavor that complements the coffee.
- Pinch of salt: A little salt helps to balance the sweetness and enhance the overall taste.
These ingredients are easy to find and can be adjusted based on your preferences. For instance, if you prefer a sweeter ice cream, feel free to add a bit more sugar. If you want a stronger coffee flavor, simply increase the amount of espresso. The beauty of making ice cream at home is that you can tailor it to your liking!
Now that you have your ingredients ready, let’s move on to the next step: preparing your Homemade Espresso Coffee Ice Cream!
Step-by-Step Preparation of Homemade Espresso Coffee Ice Cream
Now that you have your ingredients ready, it’s time to dive into the fun part: making your Homemade Espresso Coffee Ice Cream! Follow these simple steps to create a delicious frozen treat that will impress your family and friends.
Step 1: Brew the Espresso
First things first, you need to brew your espresso. Start by using high-quality coffee beans for the best flavor. If you have an espresso machine, that’s perfect! Brew one cup of espresso and let it cool down to room temperature. This step is crucial because hot espresso can melt your ice cream base, affecting the texture. If you don’t have an espresso machine, you can use a stovetop Moka pot or a French press to make a strong coffee. Just remember, the stronger, the better!
Step 2: Prepare the Ice Cream Base
Next, it’s time to prepare the ice cream base. In a large mixing bowl, combine the heavy cream, whole milk, granulated sugar, vanilla extract, and a pinch of salt. Whisk these ingredients together until the sugar is fully dissolved. This mixture should be smooth and creamy. The heavy cream and milk will create that luscious texture, while the sugar adds sweetness. Make sure everything is well combined for the best flavor!
Step 3: Combine Espresso with Ice Cream Base
Once your espresso has cooled, it’s time to mix it into the ice cream base. Pour the cooled espresso into the bowl with the cream mixture. Gently stir until everything is well blended. This is where the magic happens! The rich coffee flavor will infuse into the creamy base, creating a delightful combination. Taste the mixture and adjust the sweetness if needed. If you want a stronger coffee flavor, feel free to add a bit more espresso!
Step 4: Churn the Mixture
Now comes the fun part—churning! If you have an ice cream maker, pour the mixture into the machine and churn according to the manufacturer’s instructions. This process usually takes about 20 to 30 minutes. If you don’t have an ice cream maker, don’t worry! You can still make this ice cream. Just pour the mixture into a shallow dish and place it in the freezer. Every 30 minutes, stir the mixture with a fork to break up any ice crystals until it reaches a creamy consistency.
Step 5: Freeze the Ice Cream
After churning, transfer your ice cream to an airtight container. Smooth the top with a spatula and cover it tightly. Place it in the freezer for at least 4 hours, or until it’s firm. This final freezing step is essential for achieving that perfect scoopable texture. Once it’s ready, you can enjoy your Homemade Espresso Coffee Ice Cream!
And there you have it! A simple, step-by-step guide to making your very own ice cream at home. It’s a fun activity that results in a delicious treat. Now, let’s explore some variations to make your ice cream even more exciting!
Variations of Homemade Espresso Coffee Ice Cream
Once you’ve mastered the basic recipe for Homemade Espresso Coffee Ice Cream, you might want to get creative! There are many fun variations you can try to make this dessert even more exciting. Let’s explore some delicious options!
Adding Flavors and Mix-Ins
One of the best parts about making ice cream at home is the ability to customize it. Here are some ideas for flavors and mix-ins that can elevate your espresso ice cream:
- Chocolate Chips: Add semi-sweet or dark chocolate chips for a delightful crunch and a rich chocolate flavor.
- Caramel Swirls: Drizzle in some caramel sauce before freezing for a sweet and salty contrast.
- Nutty Goodness: Chopped nuts like almonds or hazelnuts can add a nice texture and flavor.
- Spices: A pinch of cinnamon or nutmeg can enhance the coffee flavor and add warmth.
- Mint Extract: For a refreshing twist, add a few drops of mint extract to the mixture.
Feel free to mix and match these ideas! Just remember to keep the total amount of add-ins to about one cup to maintain the right texture. This way, your ice cream will still churn beautifully and freeze well.
Dairy-Free Options for Homemade Espresso Coffee Ice Cream
If you’re looking for a dairy-free version of this delicious treat, you can easily make some substitutions. Here’s how:
- Coconut Milk: Use full-fat coconut milk instead of heavy cream and whole milk. This will give your ice cream a creamy texture and a hint of coconut flavor.
- Almond Milk: Unsweetened almond milk can be a lighter alternative. Just make sure to add a bit more sugar to balance the flavors.
- Cashew Cream: Blend soaked cashews with water to create a rich cashew cream. This can be a great base for your ice cream.
When using dairy-free alternatives, the process remains the same. Just follow the steps as outlined, and you’ll have a delightful dairy-free Homemade Espresso Coffee Ice Cream that everyone can enjoy!
Now that you have some exciting variations in mind, let’s move on to cooking notes to ensure your ice cream turns out perfectly!
Cooking Note for Homemade Espresso Coffee Ice Cream
When making Homemade Espresso Coffee Ice Cream, a few cooking notes can help you achieve the best results. These tips will ensure that your ice cream is creamy, flavorful, and a true delight to enjoy.
First, always use fresh ingredients. Fresh heavy cream and whole milk will provide the best texture and flavor. If possible, opt for high-quality espresso beans. The quality of your coffee will significantly impact the final taste of your ice cream.
Next, temperature matters! Make sure your espresso is completely cooled before mixing it with the ice cream base. Hot espresso can cause the mixture to become too runny, which can affect the churning process. If you’re in a hurry, you can place the brewed espresso in the refrigerator to speed up the cooling process.
Additionally, when churning your ice cream, keep an eye on the consistency. You want it to be thick and creamy, but not overly frozen. If you’re using an ice cream maker, follow the manufacturer’s instructions closely. If you’re using the manual method, remember to stir every 30 minutes until it reaches the desired texture.
Lastly, patience is key! After churning, allow your ice cream to freeze for at least four hours. This step is crucial for achieving that perfect scoopable texture. If you try to scoop it too early, it may be too soft and difficult to serve.
By following these cooking notes, you’ll be well on your way to creating a delicious batch of Homemade Espresso Coffee Ice Cream that everyone will love. Now, let’s explore some serving suggestions to make your dessert even more enjoyable!
Serving Suggestions for Homemade Espresso Coffee Ice Cream
Now that you’ve made your delicious Homemade Espresso Coffee Ice Cream, it’s time to think about how to serve it! Presentation can elevate your dessert experience, making it even more enjoyable. Here are some creative ways to serve your ice cream and pair it with other delightful treats.
Creative Ways to Serve Your Ice Cream
Serving your ice cream can be as fun as making it! Here are some ideas to make your dessert stand out:
- Ice Cream Sundae: Create a classic sundae by scooping your espresso ice cream into a bowl and topping it with whipped cream, chocolate syrup, and a cherry on top.
- Affogato Style: For a coffee lover’s dream, pour a shot of hot espresso over a scoop of your ice cream. The hot espresso will melt the ice cream slightly, creating a deliciously creamy treat.
- Ice Cream Sandwich: Use two cookies or brownies to make an ice cream sandwich. The rich flavors of the espresso ice cream will pair perfectly with chocolate or oatmeal cookies.
- In a Cone: Serve your ice cream in a waffle cone for a fun, handheld treat. You can even dip the cone in melted chocolate and sprinkle it with nuts for added flair.
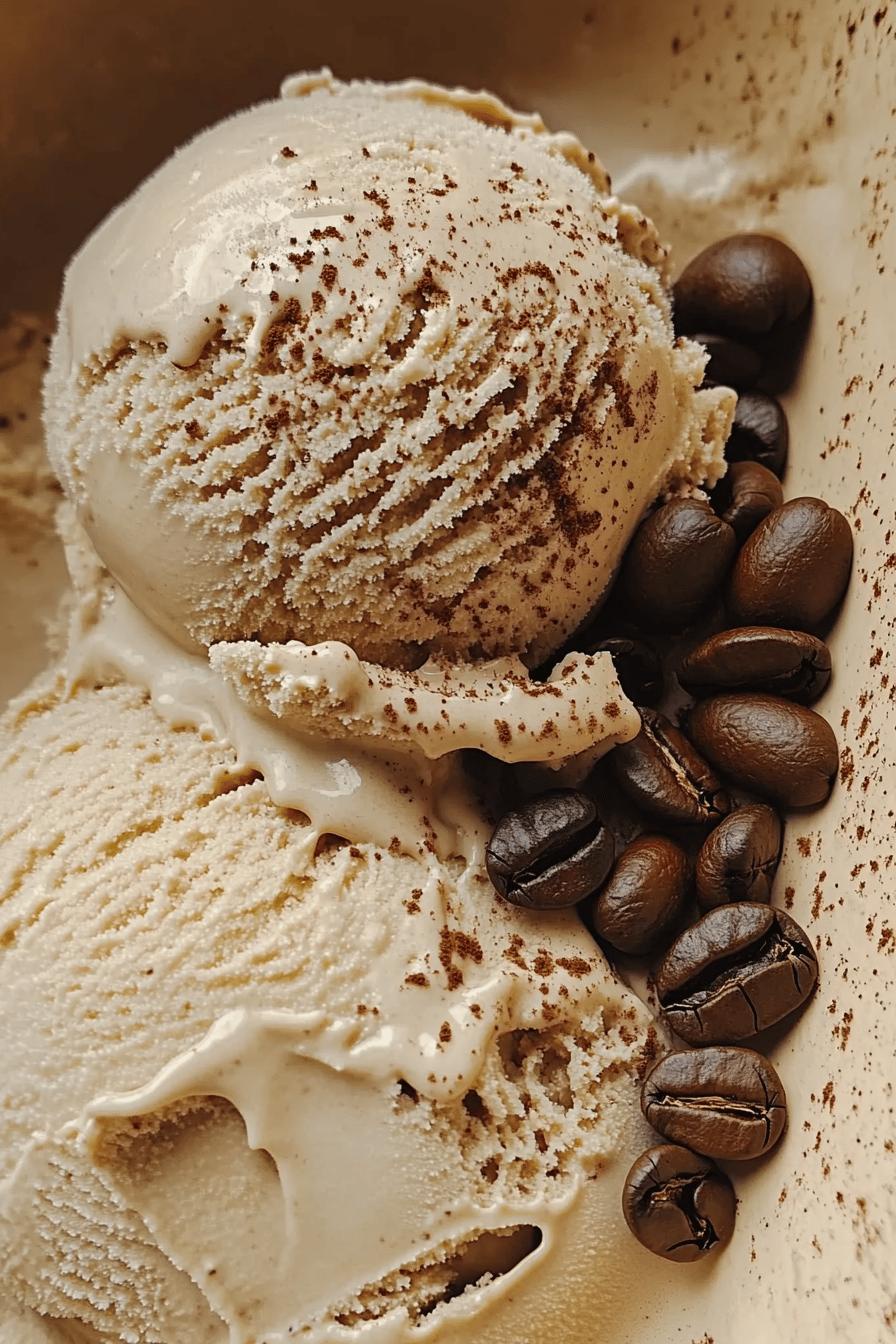
- Garnish with Coffee Beans: For an elegant touch, sprinkle some chocolate-covered coffee beans on top of your ice cream before serving.
These creative serving ideas will not only make your dessert look appealing but also enhance the overall flavor experience. Now, let’s explore how to pair your Homemade Espresso Coffee Ice Cream with other desserts!
Pairing with Other Desserts
Pairing your ice cream with other desserts can create a delightful combination of flavors and textures. Here are some tasty pairings to consider:
- Chocolate Cake: The rich, moist texture of chocolate cake complements the bold coffee flavor of the ice cream beautifully.
- Brownies: Serve your ice cream alongside warm brownies for a decadent dessert experience. The fudgy texture pairs perfectly with the creamy ice cream.
- Fruit Tart: A fresh fruit tart can provide a refreshing contrast to the rich flavors of the espresso ice cream. The sweetness of the fruit balances the coffee notes.
- Cheesecake: A slice of cheesecake, especially chocolate or coffee-flavored, can be a delightful companion to your ice cream.
- Cookies: Pair your ice cream with freshly baked cookies for a classic dessert duo. Chocolate chip or snickerdoodle cookies work wonderfully!
These pairing suggestions will enhance your dessert experience, making it even more enjoyable. Whether you choose to serve your Homemade Espresso Coffee Ice Cream creatively or pair it with other desserts, you’re sure to impress your family and friends!
Tips for Making the Best Homemade Espresso Coffee Ice Cream
Creating the perfect Homemade Espresso Coffee Ice Cream is all about attention to detail. Here are some helpful tips to ensure your ice cream turns out creamy, flavorful, and absolutely delicious!
First, always use high-quality espresso. The flavor of your ice cream heavily relies on the coffee you choose. Freshly ground coffee beans will give you the best taste. If possible, brew your espresso just before mixing it into the ice cream base. This way, you capture the full aroma and flavor.
Next, don’t skip the chilling step! After preparing your ice cream base, let it chill in the refrigerator for at least an hour. This helps the flavors meld together and improves the texture. A cold base churns better, resulting in a smoother ice cream.
When it comes to sugar, consider using a mix of granulated sugar and brown sugar. Brown sugar adds a hint of caramel flavor, which pairs beautifully with espresso. Just remember to adjust the amount to your taste preference.
Another tip is to keep your ice cream maker bowl in the freezer. If you have a bowl-style ice cream maker, make sure it’s frozen solid before you start churning. This ensures that your ice cream freezes quickly, preventing ice crystals from forming.
Lastly, patience is key! After churning, allow your ice cream to freeze for several hours. This step is crucial for achieving that perfect scoopable texture. If you try to serve it too soon, it may be too soft. So, resist the temptation and let it firm up!
By following these tips, you’ll be well on your way to making the best Homemade Espresso Coffee Ice Cream. Your friends and family will be amazed at your delicious creation!
Breakdown of Time for Homemade Espresso Coffee Ice Cream
Understanding the time needed to make Homemade Espresso Coffee Ice Cream can help you plan your dessert-making adventure. Here’s a simple breakdown of the time involved in each step of the process.
Prep Time
The prep time for this delightful ice cream is about 15 to 20 minutes. This includes gathering your ingredients, brewing the espresso, and mixing the ice cream base. Make sure to have everything ready before you start. It makes the process smoother and more enjoyable!
Cooking Time
Cooking time is minimal for this recipe. The actual cooking, or rather mixing, takes about 10 minutes. This is when you combine the heavy cream, milk, sugar, and espresso. If you’re using an ice cream maker, churning the mixture will take around 20 to 30 minutes. If you’re using the manual method, remember to stir every 30 minutes until it reaches the right consistency, which can take about 2 to 3 hours.
Total Time
In total, you should expect to spend about 4 to 5 hours to make your Homemade Espresso Coffee Ice Cream. This includes the prep time, cooking time, and the freezing time needed for the ice cream to firm up. While it may seem like a long process, most of that time is hands-off, allowing you to relax while your ice cream freezes!
Now that you have a clear understanding of the time involved, you can easily plan your ice cream-making day. It’s a fun and rewarding experience that results in a delicious treat!
Nutritional Information for Homemade Espresso Coffee Ice Cream
Understanding the nutritional information of your Homemade Espresso Coffee Ice Cream can help you enjoy it even more. While this treat is indulgent, knowing what’s in it can assist you in making informed choices. Here’s a breakdown of the key nutritional components:
Calories
Each serving of Homemade Espresso Coffee Ice Cream contains approximately 250 to 300 calories. This number can vary based on the specific ingredients you use, such as the type of milk or the amount of sugar. While it’s a rich dessert, enjoying it in moderation can be part of a balanced diet.
Protein
In terms of protein, each serving provides about 4 to 5 grams. The protein mainly comes from the milk and cream used in the recipe. This amount can help contribute to your daily protein intake, making it a satisfying treat.
Sodium
As for sodium, Homemade Espresso Coffee Ice Cream contains roughly 50 to 70 milligrams per serving. This is relatively low, especially for a dessert. The pinch of salt added to the recipe helps enhance the flavors without significantly increasing the sodium content.
Overall, while Homemade Espresso Coffee Ice Cream is a delightful treat, it’s essential to enjoy it in moderation. Knowing the nutritional information allows you to savor each scoop while being mindful of your dietary choices. Now that you’re informed, let’s move on to some frequently asked questions about this delicious dessert!
FAQs about Homemade Espresso Coffee Ice Cream
Can I use instant coffee instead of espresso?
Yes, you can use instant coffee if you don’t have espresso on hand. However, keep in mind that the flavor may not be as rich or bold. To achieve a stronger coffee taste, dissolve about 2 tablespoons of instant coffee in 1 cup of hot water. Let it cool before adding it to your ice cream base. This way, you can still enjoy a delicious coffee flavor in your ice cream!
How long does Homemade Espresso Coffee Ice Cream last in the freezer?
Your Homemade Espresso Coffee Ice Cream can last in the freezer for about 2 to 3 weeks. To keep it fresh, store it in an airtight container. Make sure to press a piece of plastic wrap directly onto the surface of the ice cream before sealing the container. This helps prevent ice crystals from forming and keeps your ice cream creamy and delicious!
Can I make this ice cream without an ice cream maker?
Absolutely! You can make Homemade Espresso Coffee Ice Cream without an ice cream maker. After mixing your ingredients, pour the mixture into a shallow dish and place it in the freezer. Every 30 minutes, stir the mixture with a fork to break up any ice crystals. Repeat this process until the ice cream reaches a creamy consistency, which usually takes about 2 to 3 hours. It’s a simple method that yields tasty results!
What can I do if my ice cream is too hard?
If your ice cream turns out too hard, don’t worry! Simply take it out of the freezer and let it sit at room temperature for about 10 to 15 minutes before scooping. This will soften it enough to make serving easier. You can also try mixing in a little milk or cream to help adjust the texture. Just remember to store it in an airtight container to maintain its creaminess!
Conclusion on Homemade Espresso Coffee Ice Cream
In conclusion, Homemade Espresso Coffee Ice Cream is a delightful treat that combines the rich flavors of espresso with the creamy goodness of ice cream. It’s a perfect dessert for coffee lovers and a fun project to undertake in your kitchen. With simple ingredients and easy steps, you can create a frozen dessert that rivals any coffee shop offering.
Whether you enjoy it on its own, as part of a sundae, or paired with other desserts, this ice cream is sure to impress. Plus, the ability to customize flavors and mix-ins means you can make it uniquely yours. From chocolate chips to caramel swirls, the options are endless!
Remember to follow the tips and cooking notes provided to ensure your ice cream turns out perfectly every time. With a little patience and creativity, you’ll be able to whip up a batch that your friends and family will rave about.
So, why not treat yourself to this delicious Homemade Espresso Coffee Ice Cream? It’s a sweet way to cool down and enjoy the rich taste of coffee in a new form. Happy ice cream making!
Relevant Recipes Link:
Craving more frozen dessert delights? You’ll love these flavorful recipes:
- Homemade Vanilla Ice Cream: A Cool Delight
- Homemade Chocolate Covered Ice Cream Bars: Irresistible Goodness
- Rose Milk Tres Leches Ice Cream: A Floral Fusion
For more fantastic recipes and food inspiration, follow us on Pinterest!