Introduction to Homemade Cappuccino Ice Cream
What Makes Homemade Cappuccino Ice Cream Special?
Homemade Cappuccino Ice Cream is not just any dessert; it’s a delightful experience! This creamy treat brings together the rich flavors of coffee and the smoothness of ice cream. What sets it apart is the use of fresh espresso, which gives it a bold coffee taste. Unlike store-bought versions, making it at home allows you to control the ingredients. You can adjust the sweetness and even add your favorite mix-ins. Plus, the joy of creating something delicious from scratch is truly special!
The Perfect Dessert for Coffee Lovers
If you love coffee, this ice cream is a dream come true! Imagine enjoying a scoop of creamy ice cream that tastes just like your favorite cappuccino. It’s perfect for hot summer days or as a cozy treat on chilly nights. You can serve it after dinner or enjoy it as a midday pick-me-up. With its rich flavor and smooth texture, Homemade Cappuccino Ice Cream is sure to impress your friends and family. So, grab your ingredients and get ready to indulge in this delightful dessert!
Ingredients for Homemade Cappuccino Ice Cream
To create your own Homemade Cappuccino Ice Cream, you’ll need a few simple ingredients. Each one plays a vital role in achieving that creamy, coffee-flavored delight. Here’s what you’ll need:
- 2 cups heavy cream: This gives the ice cream its rich and creamy texture.
- 1 cup whole milk: Whole milk adds creaminess while balancing the heaviness of the cream.
- 1 cup freshly brewed espresso: The star of the show! Fresh espresso provides that bold coffee flavor.
- ½ cup granulated sugar: This sweetens the mixture, making it a delightful treat.
- 1 teaspoon vanilla extract: Vanilla enhances the overall flavor, adding a hint of sweetness.
- 2 tablespoons coffee granules: For an extra coffee kick, these granules intensify the flavor.
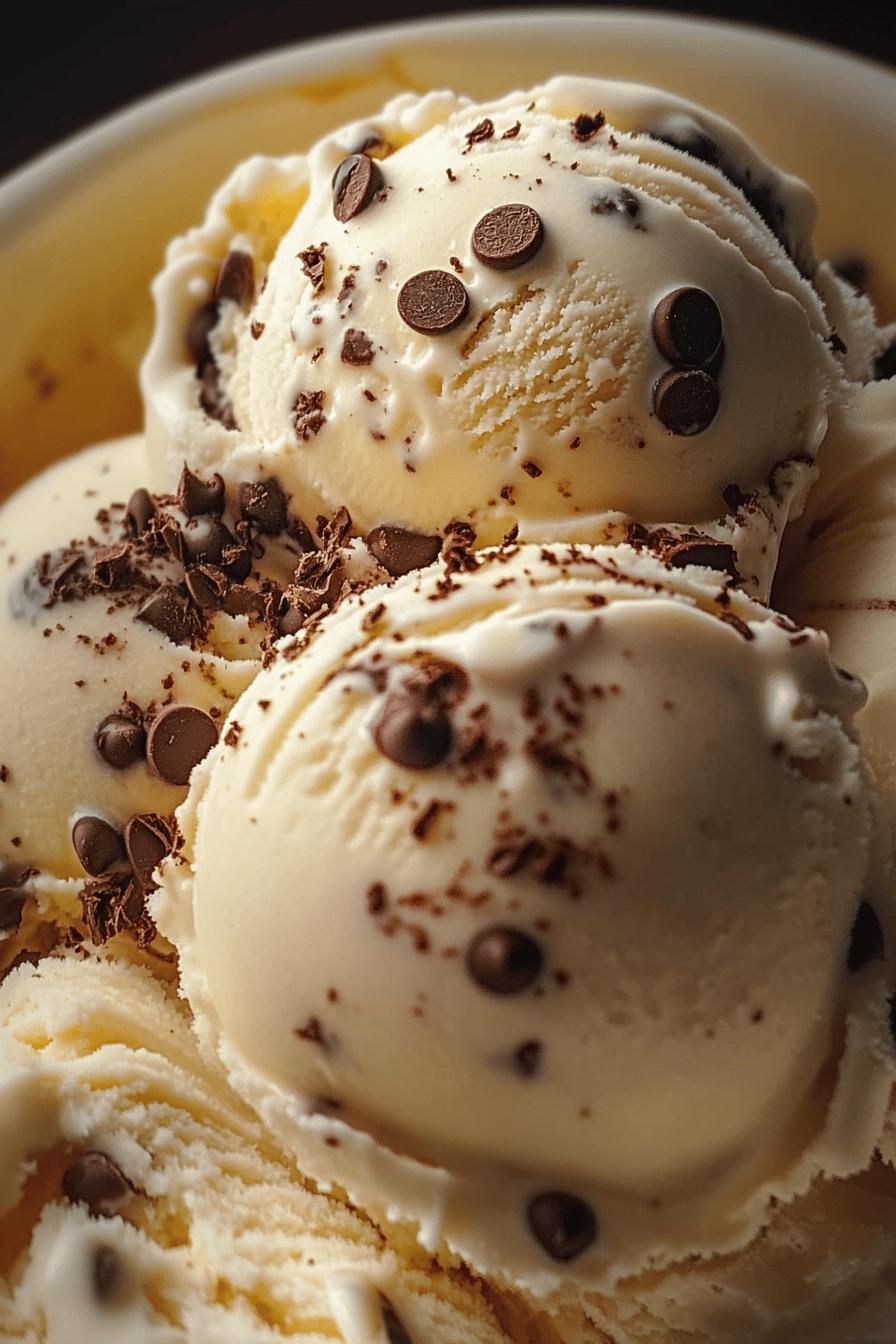
- Optional: ½ cup chocolate chips: If you love chocolate, these add a delicious twist!
Gather these ingredients, and you’re ready to start your ice cream-making adventure! Each component contributes to the overall taste and texture, ensuring that every scoop is a delightful experience. Now, let’s move on to the preparation steps!
Step-by-Step Preparation of Homemade Cappuccino Ice Cream
Step 1: Gather Your Ingredients
Before you start, make sure you have all your ingredients ready. This will make the process smooth and enjoyable. Gather your heavy cream, whole milk, freshly brewed espresso, granulated sugar, vanilla extract, coffee granules, and optional chocolate chips. Having everything at hand will help you focus on creating your delicious ice cream!
Step 2: Prepare the Espresso
Next, it’s time to brew your espresso. Use a good quality coffee maker or espresso machine to make one cup of fresh espresso. The flavor of the espresso is crucial, so choose a coffee bean you love. Once brewed, let it cool for a few minutes. This step ensures that the hot espresso doesn’t melt your cream mixture when combined.
Step 3: Mix the Cream and Milk
In a large mixing bowl, combine the heavy cream and whole milk. Use a whisk to blend them together until they are well mixed. This combination creates a rich base for your ice cream. The heavy cream adds creaminess, while the whole milk balances it out. Make sure there are no lumps, and the mixture is smooth.
Step 4: Combine Espresso with Cream Mixture
Now, it’s time to add the cooled espresso to your cream and milk mixture. Pour the espresso in slowly while stirring gently. This helps to evenly distribute the coffee flavor throughout the mixture. The rich aroma of coffee will fill your kitchen, making it hard to resist tasting it right away!
Step 5: Add Sweeteners and Flavorings
To sweeten your ice cream, add the granulated sugar and vanilla extract to the mixture. Stir well until the sugar is fully dissolved. Then, sprinkle in the coffee granules. These granules will enhance the coffee flavor, making your ice cream even more delicious. Mix everything until it’s well combined.
Step 6: Churn the Mixture
Now comes the fun part! If you have an ice cream maker, pour the mixture into it and churn according to the manufacturer’s instructions. This process incorporates air, making your ice cream light and fluffy. If you don’t have an ice cream maker, don’t worry! You can still make it by placing the mixture in a shallow dish and stirring it every 30 minutes until it’s frozen.
Step 7: Freeze the Ice Cream
Once the mixture is churned to a soft-serve consistency, transfer it to an airtight container. If you’re adding chocolate chips, fold them in gently at this stage. Cover the container and place it in the freezer for at least 4 hours or until it’s firm. This step is essential for achieving that perfect scoopable texture.
Step 8: Serve and Enjoy
After your ice cream has frozen, it’s time to serve! Scoop out generous portions into bowls or cones. You can top it with whipped cream, chocolate syrup, or even a sprinkle of cocoa powder for an extra treat. Enjoy your Homemade Cappuccino Ice Cream with family and friends, and savor every creamy, coffee-flavored bite!
Variations of Homemade Cappuccino Ice Cream
Adding Chocolate Chips
For those who can’t resist chocolate, adding chocolate chips to your Homemade Cappuccino Ice Cream is a fantastic idea! The rich, creamy coffee flavor pairs beautifully with the sweetness of chocolate. To incorporate chocolate chips, simply fold in ½ cup of semi-sweet or dark chocolate chips during the last few minutes of churning. This way, the chips will be evenly distributed throughout the ice cream. Each scoop will be a delightful surprise, combining the boldness of coffee with the sweetness of chocolate!
Dairy-Free Options
If you’re looking for a dairy-free version of this delicious treat, you can easily make adjustments. Substitute the heavy cream and whole milk with coconut cream and almond milk. Coconut cream provides a rich, creamy texture, while almond milk adds a subtle nutty flavor. Use the same amount of espresso and sugar as in the original recipe. This dairy-free Homemade Cappuccino Ice Cream will still be creamy and satisfying, making it a perfect treat for everyone to enjoy!
Flavor Enhancements with Spices
To elevate the flavor of your Homemade Cappuccino Ice Cream, consider adding spices! A pinch of cinnamon or nutmeg can add warmth and depth to the coffee flavor. Simply mix in ½ teaspoon of your chosen spice when you add the sugar and vanilla extract. For a more adventurous twist, try adding a splash of coffee liqueur for an adult version of this dessert. These enhancements will make your ice cream unique and even more enjoyable!
Cooking Note for Homemade Cappuccino Ice Cream
When making Homemade Cappuccino Ice Cream, a few cooking notes can help ensure your dessert turns out perfectly. First, always use fresh ingredients. Fresh espresso is key to achieving that rich coffee flavor. If your espresso is stale, it can affect the overall taste of your ice cream.
Next, pay attention to the temperature of your ingredients. For the best results, make sure your heavy cream and milk are cold before mixing. This helps the mixture churn better and results in a creamier texture. If you’re using an ice cream maker, pre-chill the bowl according to the manufacturer’s instructions. A cold bowl will help the ice cream freeze faster, which is essential for a smooth consistency.
Additionally, don’t rush the freezing process. Allow your ice cream to freeze for at least four hours, or until it’s firm. If you try to scoop it out too soon, it may be too soft and difficult to serve. Once frozen, let it sit at room temperature for a few minutes before serving. This will make scooping easier and enhance the overall experience.
Lastly, feel free to experiment! Homemade ice cream is all about creativity. Try different coffee blends, sweeteners, or mix-ins to find your perfect combination. Enjoy the process, and most importantly, have fun making your delicious Homemade Cappuccino Ice Cream!
Serving Suggestions for Homemade Cappuccino Ice Cream
Pairing with Toppings
When it comes to serving your Homemade Cappuccino Ice Cream, the right toppings can elevate your dessert to a whole new level! Here are some delightful options to consider:
- Whipped Cream: A dollop of fluffy whipped cream adds a light and airy touch. It complements the rich coffee flavor beautifully.
- Chocolate Syrup: Drizzling chocolate syrup over your ice cream creates a sweet contrast. The combination of coffee and chocolate is simply irresistible!
- Cocoa Powder: For a sophisticated touch, sprinkle a little cocoa powder on top. It enhances the chocolate flavor and adds a nice visual appeal.
- Caramel Sauce: A drizzle of caramel sauce brings a sweet, buttery flavor that pairs wonderfully with coffee. It’s a match made in dessert heaven!
- Chopped Nuts: Add some crunch with chopped nuts like almonds or hazelnuts. They provide a delightful texture and nutty flavor that complements the ice cream.
Feel free to mix and match these toppings to create your perfect scoop. The possibilities are endless, and each combination can offer a unique taste experience!
Creative Serving Ideas
Serving your Homemade Cappuccino Ice Cream can be just as fun as making it! Here are some creative ideas to impress your guests:
- Ice Cream Sundae: Create a cappuccino ice cream sundae by layering your ice cream with toppings in a tall glass. Start with a scoop of ice cream, add whipped cream, drizzle with chocolate syrup, and top with nuts.
- Affogato Style: For a delightful twist, serve a scoop of your ice cream in a cup and pour a shot of hot espresso over it. This creates a delicious affogato, blending hot and cold flavors.
- Ice Cream Sandwiches: Use your favorite cookies to make ice cream sandwiches. Place a scoop of cappuccino ice cream between two cookies for a fun and portable treat!
- Milkshake: Blend your ice cream with a splash of milk to create a creamy cappuccino milkshake. Serve it in a tall glass with a straw for a refreshing drink.
- Chocolate-Covered Cones: Dip the edges of ice cream cones in melted chocolate and let them harden. Fill them with cappuccino ice cream for a fun and tasty treat!
These serving suggestions will not only enhance the flavor of your Homemade Cappuccino Ice Cream but also make it a visually appealing dessert. Enjoy sharing your creation with family and friends!
Tips for Perfect Homemade Cappuccino Ice Cream
Choosing the Right Coffee
When it comes to making Homemade Cappuccino Ice Cream, the coffee you choose can make a big difference. Opt for high-quality coffee beans that you enjoy drinking. Freshly roasted beans will provide a rich and aromatic flavor. If you have a favorite coffee shop, consider asking them for recommendations on beans that work well for espresso.
For the best results, grind your coffee beans just before brewing. This ensures maximum freshness and flavor. If you prefer a milder taste, you can use a lighter roast. On the other hand, a dark roast will give your ice cream a bolder coffee flavor. Experiment with different blends to find the perfect match for your taste buds!
Storage Tips for Ice Cream
Proper storage is essential to keep your Homemade Cappuccino Ice Cream fresh and delicious. After freezing, transfer the ice cream to an airtight container. This helps prevent ice crystals from forming and keeps the texture smooth. If you have a lot of ice cream, consider dividing it into smaller containers for easier access.
Store your ice cream in the coldest part of the freezer, usually at the back. Avoid leaving it in the door, as the temperature fluctuates more there. Homemade ice cream is best enjoyed within two weeks for optimal flavor and texture. However, it can last up to a month if stored properly.
When you’re ready to serve, let the ice cream sit at room temperature for a few minutes. This will make scooping easier and enhance the creamy texture. With these tips, you can enjoy your Homemade Cappuccino Ice Cream at its best!
Breakdown of Time for Homemade Cappuccino Ice Cream
Prep Time
Preparing your Homemade Cappuccino Ice Cream is a breeze! The prep time typically takes about 15 to 20 minutes. This includes gathering your ingredients, brewing the espresso, and mixing everything together. Make sure to have all your ingredients ready to streamline the process. The quicker you can get everything mixed, the sooner you can enjoy your delicious treat!
Cooking Time
When it comes to cooking time, the actual churning of the ice cream takes around 20 to 30 minutes if you’re using an ice cream maker. This step is crucial as it incorporates air into the mixture, giving it that light and fluffy texture. If you’re opting for the no-churn method, you’ll need to stir the mixture every 30 minutes until it’s frozen, which can take about 2 to 3 hours. Regardless of the method, patience is key to achieving the perfect consistency!
Total Time
In total, you should plan for about 4 to 5 hours to make your Homemade Cappuccino Ice Cream. This includes the prep time, cooking time, and the freezing time required for the ice cream to set properly. While the active time is relatively short, the waiting period is essential for that creamy, scoopable texture. So, grab a book or enjoy some time with family while your ice cream freezes. The wait will be worth it when you finally get to indulge in your homemade delight!
Nutritional Information for Homemade Cappuccino Ice Cream
Calories and Macronutrients
Understanding the nutritional content of your Homemade Cappuccino Ice Cream can help you enjoy it guilt-free. Here’s a general breakdown of the calories and macronutrients per serving (1/2 cup):
- Calories: Approximately 250 calories
- Fat: 15 grams
- Saturated Fat: 9 grams
- Carbohydrates: 25 grams
- Sugar: 20 grams
- Protein: 3 grams
These values can vary based on the specific ingredients you use, especially if you add chocolate chips or other mix-ins. If you’re looking to reduce calories, consider using lower-fat milk or sugar substitutes. However, keep in mind that these changes may affect the creaminess and flavor of your ice cream.
Health Considerations
While Homemade Cappuccino Ice Cream is a delightful treat, it’s important to enjoy it in moderation. The combination of heavy cream and sugar makes it a rich dessert. If you’re watching your calorie intake or sugar consumption, consider having smaller portions or saving it for special occasions.
On the positive side, this ice cream contains real coffee, which can provide some health benefits. Coffee is known for its antioxidants and may even boost your metabolism. Additionally, using high-quality ingredients can enhance the overall nutritional profile of your dessert.
For those with dietary restrictions, remember that you can easily modify the recipe. Opt for dairy-free alternatives or natural sweeteners to make it more suitable for your needs. Always consult with a healthcare professional if you have specific dietary concerns.
FAQs about Homemade Cappuccino Ice Cream
Can I make Homemade Cappuccino Ice Cream without an ice cream maker?
Absolutely! You can make Homemade Cappuccino Ice Cream without an ice cream maker. Simply pour your mixture into a shallow dish and place it in the freezer. Every 30 minutes, take it out and stir vigorously with a fork. This helps break up ice crystals and keeps the texture creamy. Continue this process until the ice cream is firm, which usually takes about 2 to 3 hours. It’s a simple method that yields delicious results!
How long does Homemade Cappuccino Ice Cream last in the freezer?
Your Homemade Cappuccino Ice Cream can last in the freezer for about 2 weeks for the best flavor and texture. After that, it may still be safe to eat, but the quality might decline. To keep it fresh, store it in an airtight container. This prevents ice crystals from forming and helps maintain that creamy consistency. Just remember to let it sit at room temperature for a few minutes before scooping for easier serving!
Can I use decaf coffee for Homemade Cappuccino Ice Cream?
Yes, you can definitely use decaf coffee for your Homemade Cappuccino Ice Cream! If you prefer to enjoy the rich flavor of coffee without the caffeine, decaf is a great option. Just brew your decaf espresso as you would with regular coffee. The taste will still be delightful, and you can enjoy your ice cream any time of day without worrying about caffeine jitters!
What are some alternative sweeteners for Homemade Cappuccino Ice Cream?
If you’re looking for alternative sweeteners, there are several options you can try! Natural sweeteners like honey or maple syrup can add a unique flavor to your ice cream. You can also use sugar substitutes like stevia or erythritol for a lower-calorie option. Just keep in mind that some sweeteners may alter the texture slightly, so you might need to adjust the amount based on your taste preferences. Experimenting with different sweeteners can lead to a deliciously customized treat!
Conclusion on Homemade Cappuccino Ice Cream
Final Thoughts on Making Your Own Ice Cream
Making your own Homemade Cappuccino Ice Cream is not just about creating a delicious dessert; it’s about the joy of crafting something special. With simple ingredients and a few easy steps, you can whip up a creamy treat that’s perfect for any occasion. Whether you’re enjoying it on a hot summer day or serving it at a cozy gathering, this ice cream is sure to impress.
As you experiment with flavors and variations, you’ll discover new ways to make this dessert your own. From adding chocolate chips to trying dairy-free options, the possibilities are endless. Plus, the satisfaction of sharing your homemade creation with family and friends makes it even more rewarding.
So, gather your ingredients, follow the steps, and dive into the delightful world of homemade ice cream. With each scoop of your Homemade Cappuccino Ice Cream, you’ll savor the rich coffee flavor and creamy texture that only a homemade treat can offer. Enjoy the process, and most importantly, enjoy every delicious bite!
Relevant Recipes Link:
Craving more homemade ice cream recipes to sweeten your day? Try these delightful treats:
- Homemade Coconut Ice Cream: A Creamy Delight
- Homemade Vanilla Ice Cream: A Delightful Treat
- Homemade Peach Ice Cream: A Summer Delight
For more fantastic recipes and food inspiration, follow us on Pinterest!