Introduction to Cherry Garcia Ice Cream
Cherry Garcia Ice Cream is a delightful treat that brings joy to many. This creamy dessert combines the sweetness of cherries with rich chocolate, creating a flavor explosion in every bite. Whether you’re enjoying it on a hot summer day or as a comforting dessert after dinner, this ice cream is sure to please. Let’s dive into what makes this ice cream so special and explore its fascinating history.
What Makes Cherry Garcia Ice Cream Special?
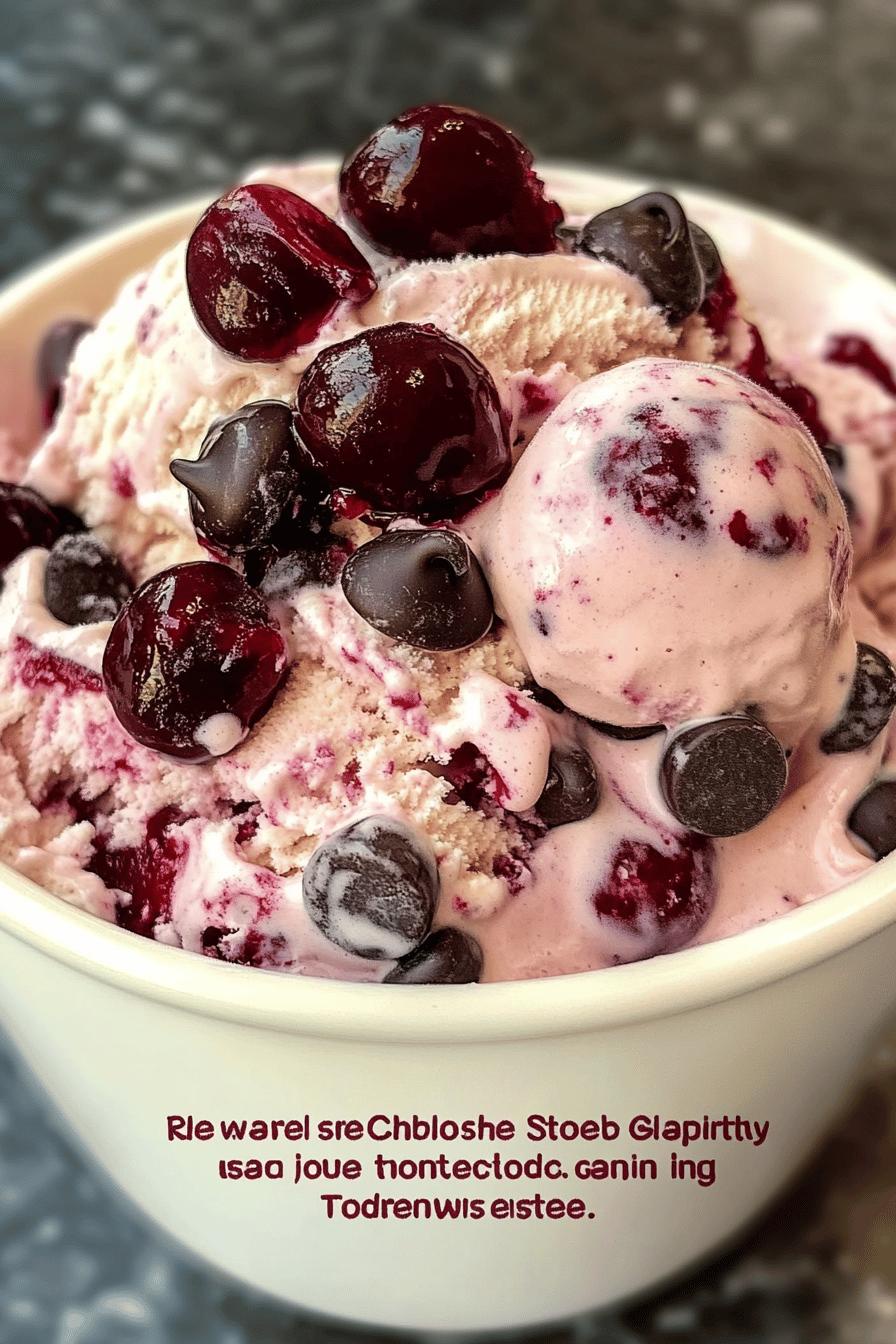
What sets Cherry Garcia Ice Cream apart? It’s all about the unique combination of flavors and textures. The smooth, creamy base made from heavy cream provides a rich canvas for the vibrant cherry puree. Fresh cherries add a burst of fruity goodness, while chocolate chips introduce a delightful crunch. This perfect blend creates a balance of sweetness and richness that is hard to resist. Plus, it’s a homemade treat, which means you can customize it to your liking!
The History Behind Cherry Garcia Ice Cream
Cherry Garcia Ice Cream has an interesting backstory. It was created by the famous ice cream company Ben & Jerry’s in 1987. The flavor was named after the legendary musician Jerry Garcia, who was a member of the Grateful Dead. The founders, Ben Cohen and Jerry Greenfield, wanted to honor Garcia’s love for cherries and chocolate. Since then, this flavor has become a classic, loved by many ice cream enthusiasts around the world. Its unique name and delicious taste have made it a staple in ice cream shops and freezers alike.
Ingredients for Cherry Garcia Ice Cream
To create your own Cherry Garcia Ice Cream, you’ll need a few simple yet essential ingredients. Each component plays a vital role in achieving that creamy, dreamy texture and delightful flavor. Here’s what you’ll need:
- 2 cups heavy cream: This is the base of your ice cream, providing a rich and creamy texture.
- 1 cup whole milk: Whole milk adds creaminess while balancing the richness of the heavy cream.
- 3/4 cup granulated sugar: Sugar sweetens the mixture and enhances the flavors of the cherries and chocolate.
- 1 teaspoon vanilla extract: Vanilla adds a warm, aromatic flavor that complements the cherries and chocolate.
- 1 cup cherry puree: Fresh or frozen cherries blended into a smooth puree will give your ice cream its signature cherry flavor.
- 1 cup fresh cherries: Chopped fresh cherries add texture and bursts of flavor throughout the ice cream.
- 1/2 cup chocolate chips: Semi-sweet or dark chocolate chips provide a delightful crunch and rich chocolate flavor.
These ingredients come together to create a deliciously creamy Cherry Garcia Ice Cream that you can enjoy any time. Make sure to use high-quality ingredients for the best results. Now that you have everything you need, let’s move on to the preparation steps!
Step-by-Step Preparation of Cherry Garcia Ice Cream
Now that you have gathered all your ingredients, it’s time to bring your Cherry Garcia Ice Cream to life! Follow these simple steps to create a deliciously creamy treat that will impress your family and friends.
Step 1: Prepare the Cherry Puree
Start by preparing the cherry puree. If you’re using fresh cherries, wash them thoroughly and remove the pits. Then, place the cherries in a blender or food processor. Blend until smooth. If you prefer a chunkier texture, you can pulse the cherries a few times instead of blending them completely. If you’re using frozen cherries, let them thaw slightly before blending. This puree will be the heart of your ice cream, giving it that delightful cherry flavor!
Step 2: Mix the Cream Base
Next, it’s time to create the cream base. In a large mixing bowl, combine the heavy cream, whole milk, granulated sugar, and vanilla extract. Whisk the mixture until the sugar is fully dissolved. This step is crucial as it ensures a smooth and creamy texture in your ice cream. The combination of heavy cream and whole milk will create a rich base that complements the cherry puree beautifully.
Step 3: Combine Ingredients
Once your cream base is ready, it’s time to combine it with the cherry puree. Gently fold the cherry puree into the cream mixture. Be careful not to overmix; you want to maintain some of the beautiful swirls of cherry throughout the ice cream. After that, add the chopped fresh cherries and chocolate chips. Stir them in gently, ensuring they are evenly distributed. This will give your ice cream those delightful bursts of flavor and texture!
Step 4: Churn the Ice Cream
Now comes the fun part—churning! Pour the mixture into your ice cream maker. Follow the manufacturer’s instructions for churning time, usually around 20 to 30 minutes. As the mixture churns, it will thicken and become creamy. Keep an eye on it; you want it to reach a soft-serve consistency. If you don’t have an ice cream maker, don’t worry! You can still make this ice cream by placing the mixture in a shallow dish and stirring it every 30 minutes until it reaches the desired consistency.
Step 5: Freeze the Ice Cream
After churning, transfer the ice cream to an airtight container. Smooth the top with a spatula and cover it tightly. Place the container in the freezer for at least 4 hours, or until the ice cream is firm. This final freezing step is essential for achieving that perfect scoopable texture. Once it’s ready, you can enjoy your homemade Cherry Garcia Ice Cream!
Variations of Cherry Garcia Ice Cream
If you love Cherry Garcia Ice Cream but want to try something a little different, you’re in luck! There are several fun variations you can make. These alternatives cater to different dietary needs and preferences while still delivering that delicious cherry and chocolate flavor. Let’s explore two popular variations: Dairy-Free Cherry Garcia Ice Cream and Cherry Garcia Ice Cream with Nuts.
Dairy-Free Cherry Garcia Ice Cream
For those who are lactose intolerant or prefer a dairy-free option, this variation is perfect! You can easily swap out the dairy ingredients for plant-based alternatives. Here’s how:
- Use coconut cream: Instead of heavy cream, use full-fat coconut cream. It provides a rich and creamy texture.
- Substitute almond or oat milk: Replace whole milk with almond milk or oat milk for a deliciously creamy base.
- Choose a dairy-free chocolate chip: Make sure to use dairy-free chocolate chips to keep the recipe completely dairy-free.
Follow the same preparation steps as the original recipe, and you’ll have a delightful Dairy-Free Cherry Garcia Ice Cream that everyone can enjoy!
Cherry Garcia Ice Cream with Nuts
If you love a little crunch in your ice cream, adding nuts is a fantastic idea! Nuts not only enhance the flavor but also add a delightful texture. Here’s how to incorporate them:
- Choose your nuts: Chopped walnuts or pecans work wonderfully with the cherry and chocolate flavors.
- Toast the nuts: For an extra layer of flavor, consider toasting the nuts in a dry skillet for a few minutes before adding them to the ice cream mixture.
- Add at the right time: Gently fold the toasted nuts into the mixture along with the fresh cherries and chocolate chips.
This Cherry Garcia Ice Cream with Nuts variation will give you a delightful crunch in every scoop, making it a perfect treat for nut lovers!
Cooking Note for Cherry Garcia Ice Cream
When making Cherry Garcia Ice Cream, a few cooking notes can help ensure your ice cream turns out perfectly. First, always use high-quality ingredients. Fresh cherries and premium chocolate chips can significantly enhance the flavor of your ice cream. If possible, opt for organic cherries to avoid pesticides and enjoy a more natural taste.
Another important tip is to chill your mixing bowl and ice cream maker bowl before starting. This helps the mixture freeze faster, resulting in a creamier texture. You can place them in the freezer for about 30 minutes before you begin. Additionally, if you find your ice cream is too soft after churning, simply give it more time in the freezer. This will help it firm up to the perfect scoopable consistency.
Lastly, remember that homemade ice cream can be a bit softer than store-bought varieties. This is due to the lack of stabilizers and preservatives. If you prefer a firmer texture, let it freeze for a longer period after churning. Enjoy the process, and don’t hesitate to experiment with flavors and mix-ins to make this Cherry Garcia Ice Cream your own!
Serving Suggestions for Cherry Garcia Ice Cream
Once your Cherry Garcia Ice Cream is ready, it’s time to serve it up! This delicious treat can be enjoyed in many creative ways. Whether you’re hosting a summer gathering or simply treating yourself, here are some fun serving suggestions to elevate your ice cream experience.
Creative Ways to Serve Cherry Garcia Ice Cream
Get creative with how you present your Cherry Garcia Ice Cream! Here are some delightful ideas:
- Ice Cream Sundae: Scoop your Cherry Garcia Ice Cream into a bowl and top it with whipped cream, a drizzle of chocolate syrup, and a cherry on top. This classic sundae is sure to impress!
- Ice Cream Sandwich: Use two cookies, like chocolate chip or oatmeal, to create a delicious ice cream sandwich. Simply scoop the ice cream between the cookies and enjoy a fun, handheld treat.
- Cherry Garcia Milkshake: Blend a scoop of Cherry Garcia Ice Cream with milk for a creamy milkshake. Top it with whipped cream and a sprinkle of chocolate chips for an extra treat!
- Fruit Parfait: Layer Cherry Garcia Ice Cream with fresh fruits like strawberries or bananas in a glass. This not only looks beautiful but adds a refreshing twist!
These creative serving ideas will make your Cherry Garcia Ice Cream even more enjoyable. Feel free to mix and match toppings and presentations to suit your taste!
Pairing Cherry Garcia Ice Cream with Other Desserts
Cherry Garcia Ice Cream pairs wonderfully with a variety of desserts. Here are some delicious combinations to consider:
- Brownies: Serve a scoop of Cherry Garcia Ice Cream on top of warm brownies. The combination of rich chocolate and creamy ice cream is simply divine!
- Chocolate Cake: A slice of moist chocolate cake with a scoop of Cherry Garcia Ice Cream creates a delightful contrast of flavors and textures.
- Fruit Tart: Pair your ice cream with a fresh fruit tart for a light and refreshing dessert option. The tartness of the fruit complements the sweetness of the ice cream.
- Crepes: Fill crepes with Cherry Garcia Ice Cream and drizzle with chocolate sauce for a gourmet dessert experience.
These pairing suggestions will enhance your dessert experience and make your Cherry Garcia Ice Cream the star of the show. Enjoy experimenting with different combinations!
Tips for Making the Perfect Cherry Garcia Ice Cream
Creating the perfect Cherry Garcia Ice Cream is all about attention to detail and a few helpful tips. With these suggestions, you can ensure your homemade ice cream turns out creamy, flavorful, and absolutely delightful. Let’s explore some essential tips to elevate your ice cream-making game!
Choose Quality Ingredients
First and foremost, always opt for high-quality ingredients. Fresh cherries will provide the best flavor, while premium chocolate chips will enhance the overall taste. If possible, select organic cherries to avoid pesticides and enjoy a more natural sweetness.
Chill Your Equipment
Before you start mixing, chill your mixing bowl and ice cream maker bowl in the freezer for about 30 minutes. This helps the mixture freeze faster, resulting in a creamier texture. A cold environment is key to achieving that perfect scoopable consistency.
Don’t Overmix
When combining the cherry puree with the cream base, be gentle. Overmixing can lead to a uniform color, losing the beautiful swirls of cherry. Aim for a marbled effect to keep the visual appeal intact.
Adjust Sweetness to Taste
Everyone has different preferences when it comes to sweetness. Feel free to adjust the amount of sugar in the recipe based on your taste. If you prefer a less sweet ice cream, reduce the sugar slightly. Remember, the sweetness of the cherries will also contribute to the overall flavor.
Experiment with Mix-Ins
Don’t hesitate to get creative with mix-ins! While chocolate chips and fresh cherries are classic, you can try adding other ingredients like crushed cookies, nuts, or even a swirl of fudge. This allows you to personalize your Cherry Garcia Ice Cream to your liking.
Let It Firm Up
After churning, transfer your ice cream to an airtight container and let it freeze for at least 4 hours. This final freezing step is crucial for achieving that perfect scoopable texture. If you find your ice cream is too soft after churning, give it more time in the freezer.
By following these tips, you’ll be well on your way to making the perfect Cherry Garcia Ice Cream. Enjoy the process and have fun experimenting with flavors and textures!
Breakdown of Time for Cherry Garcia Ice Cream
Understanding the time needed to make Cherry Garcia Ice Cream can help you plan your dessert-making adventure. Here’s a simple breakdown of the time involved in each step of the process. This way, you can enjoy your homemade treat without any surprises!
Prep Time
The prep time for Cherry Garcia Ice Cream is approximately 30 minutes. This includes washing and pitting the cherries, blending the cherry puree, and mixing the cream base. Taking your time during this step ensures that you get the best flavors and textures in your ice cream.
Cooking Time
Cooking time, or rather churning time, typically takes about 20 to 30 minutes. This is when your ice cream maker works its magic, transforming the mixture into a creamy delight. If you don’t have an ice cream maker, you can still make it by stirring the mixture every 30 minutes until it reaches the desired consistency, which may take a bit longer.
Total Time
In total, you should expect to spend around 4 to 5 hours to make Cherry Garcia Ice Cream. This includes the prep time, churning time, and the final freezing time of at least 4 hours. While it may seem like a long process, the delicious result is well worth the wait!
Nutritional Information for Cherry Garcia Ice Cream
Understanding the nutritional content of your homemade Cherry Garcia Ice Cream can help you enjoy it guilt-free. While this treat is indulgent, it can also be part of a balanced diet when enjoyed in moderation. Let’s break down the key nutritional components of this delicious dessert.
Calories in Cherry Garcia Ice Cream
One serving of Cherry Garcia Ice Cream, which is about half a cup, contains approximately 250 to 300 calories. The calorie count can vary based on the specific ingredients you use, such as the type of cream and sugar. If you’re looking to reduce calories, consider using less sugar or opting for lighter cream alternatives.
Protein Content
In terms of protein, each serving of Cherry Garcia Ice Cream provides around 4 to 5 grams. The protein mainly comes from the heavy cream and whole milk used in the recipe. If you choose to make a dairy-free version, the protein content may be lower, depending on the plant-based milk you select.
Sodium Levels
Cherry Garcia Ice Cream typically contains about 50 to 70 milligrams of sodium per serving. This amount is relatively low, making it a suitable treat for most diets. However, if you’re watching your sodium intake, be mindful of the ingredients you choose, especially if you add any salty mix-ins.
Overall, Cherry Garcia Ice Cream can be a delightful addition to your dessert repertoire. By being aware of its nutritional information, you can enjoy this sweet treat while keeping your dietary goals in mind. Remember, moderation is key!
FAQs About Cherry Garcia Ice Cream
Can I use frozen cherries for Cherry Garcia Ice Cream?
Absolutely! Frozen cherries work wonderfully in Cherry Garcia Ice Cream. They can be blended into a smooth puree just like fresh cherries. Just make sure to let them thaw slightly before blending to achieve the best texture. Using frozen cherries can also be a great way to enjoy this delicious treat year-round, even when fresh cherries are out of season!
How long does Cherry Garcia Ice Cream last in the freezer?
Homemade Cherry Garcia Ice Cream can last in the freezer for about 2 to 3 weeks when stored in an airtight container. However, for the best flavor and texture, it’s recommended to enjoy it within the first week. Over time, ice crystals may form, which can affect the creaminess of your ice cream. So, it’s best to indulge while it’s fresh!
Can I make Cherry Garcia Ice Cream without an ice cream maker?
Yes, you can definitely make Cherry Garcia Ice Cream without an ice cream maker! Simply pour the mixture into a shallow dish and place it in the freezer. Every 30 minutes, stir the mixture vigorously with a fork to break up any ice crystals. Repeat this process until the ice cream reaches your desired consistency, which may take about 3 to 4 hours. This method may take a bit longer, but it will still yield delicious results!
What can I substitute for heavy cream in Cherry Garcia Ice Cream?
If you’re looking for a substitute for heavy cream, there are several options you can try. Full-fat coconut cream is a popular choice for a dairy-free version, providing a rich and creamy texture. You can also use cashew cream or a blend of silken tofu and almond milk for a lighter alternative. Keep in mind that these substitutes may slightly alter the flavor and texture, but they can still create a delightful Cherry Garcia Ice Cream!
Conclusion on Cherry Garcia Ice Cream
In conclusion, making Cherry Garcia Ice Cream at home is a rewarding experience that brings joy to your taste buds. This delightful treat combines the sweetness of cherries with rich chocolate, creating a flavor that is both refreshing and indulgent. With simple ingredients and easy steps, you can whip up this creamy dessert in no time.
Why You Should Try Making Cherry Garcia Ice Cream at Home
There are many reasons to try making Cherry Garcia Ice Cream at home. First, it allows you to control the ingredients, ensuring that you use only the freshest and highest quality items. You can customize the sweetness and even experiment with different mix-ins to suit your taste. Plus, there’s something special about enjoying a homemade treat that you created yourself.
Additionally, making ice cream at home can be a fun activity for the whole family. Involve your kids in the process, from pitting cherries to mixing the ingredients. It’s a great way to bond and create lasting memories. And let’s not forget the satisfaction of serving your loved ones a delicious dessert that you made from scratch!
Finally, homemade Cherry Garcia Ice Cream is perfect for any occasion. Whether it’s a summer barbecue, a birthday party, or just a cozy night in, this ice cream is sure to impress. So, gather your ingredients, follow the steps, and treat yourself to a scoop (or two) of this delightful dessert. You won’t regret it!
Relevant Recipes Link:
Craving more delightful ice cream recipes? Don’t miss out on these tempting treats:
- Creamy Vanilla Ice Cream: A Delicious Classic
- Very Chocolate Ice Cream: The Perfect Summer Indulgence
- Blackberry Pie Ice Cream: A Flavorful Dessert You’ll Love
For more fantastic recipes and food inspiration, follow us on Pinterest!