Introduction to Strawberry Vanilla Bean Ice Cream
The Allure of Homemade Ice Cream
There’s something magical about homemade ice cream. It’s not just a dessert; it’s an experience. When you make ice cream at home, you control every ingredient. You can choose fresh fruits, rich creams, and natural flavors. This means you can create a treat that’s not only delicious but also free from artificial additives. Plus, the process of making ice cream can be a fun activity for the whole family. Imagine the joy of churning your own ice cream and then savoring the first scoop. It’s a delightful way to spend a warm summer day!
Why Choose Strawberry Vanilla Bean Ice Cream?
Strawberry Vanilla Bean Ice Cream is a classic favorite for many reasons. First, the combination of sweet strawberries and fragrant vanilla bean creates a flavor profile that’s simply irresistible. The fresh strawberries add a burst of fruity goodness, while the vanilla bean lends a warm, aromatic touch. This ice cream is not only refreshing but also comforting, making it perfect for any occasion.
Moreover, this recipe is easy to follow, even for beginners. With just a few simple steps, you can whip up a batch that rivals any store-bought version. Whether you’re hosting a summer barbecue or enjoying a quiet evening at home, this ice cream is sure to impress. So, why not treat yourself and your loved ones to a scoop of homemade Strawberry Vanilla Bean Ice Cream? You won’t regret it!
Ingredients for Strawberry Vanilla Bean Ice Cream
To create your own Strawberry Vanilla Bean Ice Cream, you’ll need a few simple yet high-quality ingredients. Each component plays a vital role in achieving that creamy texture and delightful flavor. Here’s what you’ll need:
- Fresh Strawberries: 2 cups, hulled and sliced. Choose ripe strawberries for the best flavor.
- Granulated Sugar: 3/4 cup. This sweetener enhances the natural sweetness of the strawberries.
- Heavy Cream: 2 cups. This rich cream is essential for a smooth and creamy ice cream.
- Whole Milk: 1 cup. Whole milk adds a lighter texture while still being rich.
- Vanilla Bean: 1 pod. The seeds from a fresh vanilla bean provide an aromatic flavor that elevates the ice cream.
- Egg Yolks: 4 large. These create a custard base that gives the ice cream its luxurious creaminess.
- Salt: A pinch. This enhances the overall flavor of the ice cream.
Gathering these ingredients is the first step toward making your delicious Strawberry Vanilla Bean Ice Cream. Make sure to use the freshest strawberries you can find, as they will significantly impact the taste. Now that you have everything ready, let’s move on to the preparation steps!
Step-by-Step Preparation of Strawberry Vanilla Bean Ice Cream
Step 1: Preparing the Strawberries
Start by washing your fresh strawberries thoroughly. Remove the green tops and slice them into small pieces. This helps release their natural juices. Next, place the sliced strawberries in a bowl and sprinkle them with a couple of tablespoons of granulated sugar. This step is crucial as it enhances the sweetness and flavor of the strawberries. Let them sit for about 15 minutes. During this time, the strawberries will macerate, creating a delicious syrup that will infuse your ice cream with fruity goodness.
Step 2: Making the Custard Base
In a medium saucepan, combine the heavy cream, whole milk, and a pinch of salt. Heat the mixture over medium heat until it’s warm but not boiling. In a separate bowl, whisk the egg yolks and the remaining sugar until the mixture is pale and creamy. This step is important as it helps to create a rich custard base. Gradually pour the warm cream mixture into the egg yolks while whisking continuously. This process is called tempering and prevents the eggs from scrambling. Once combined, return the mixture to the saucepan and cook over low heat, stirring constantly until it thickens slightly. This usually takes about 5-7 minutes.
Step 3: Infusing the Vanilla Bean
While your custard base is still warm, it’s time to infuse it with the wonderful flavor of vanilla. Take your vanilla bean pod and slice it lengthwise. Use the back of a knife to scrape out the tiny seeds. Add both the seeds and the pod to the custard mixture. Stir well to ensure the vanilla flavor is evenly distributed. Allow the mixture to cool for a few minutes, then remove the vanilla pod. This step adds a rich, aromatic flavor that makes your ice cream truly special.
Step 4: Combining Ingredients
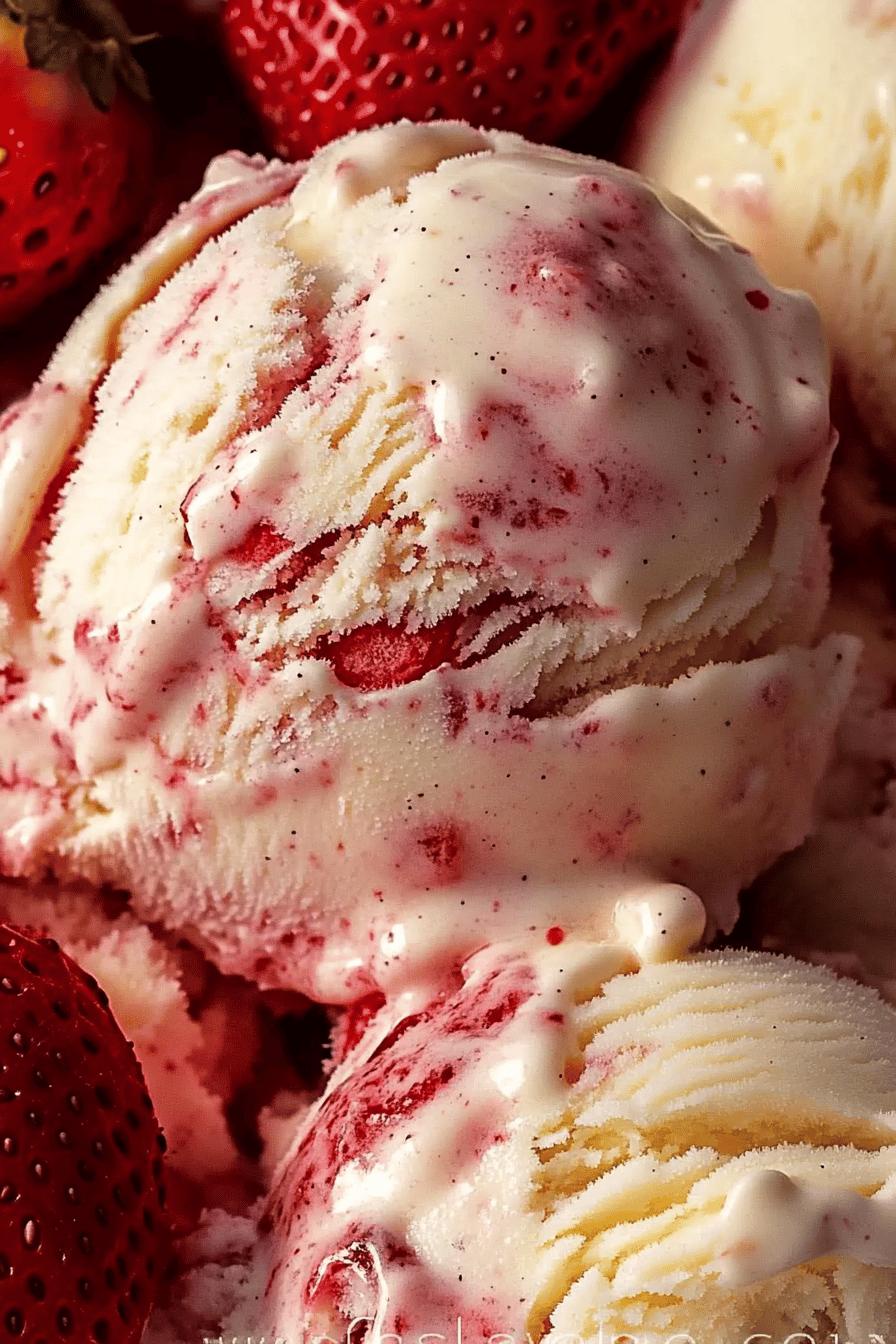
Now that your custard base is ready, it’s time to combine it with the prepared strawberries. Pour the macerated strawberries, along with their syrup, into the custard mixture. Stir gently to combine, ensuring that the strawberries are evenly distributed throughout the base. This combination of flavors is what makes Strawberry Vanilla Bean Ice Cream so delightful. The vibrant color of the strawberries will also give your ice cream a beautiful pink hue!
Step 5: Churning the Ice Cream
Next, it’s time to churn your ice cream! Pour the combined mixture into your ice cream maker. Follow the manufacturer’s instructions for churning. Typically, this process takes about 20-30 minutes. As the mixture churns, it will become thick and creamy. This is where the magic happens! If you don’t have an ice cream maker, you can pour the mixture into a shallow dish and freeze it. Stir every 30 minutes for about 3-4 hours to achieve a similar texture.
Step 6: Freezing the Ice Cream
Once your ice cream has reached a soft-serve consistency, transfer it to an airtight container. Smooth the top with a spatula and cover it tightly. Place the container in the freezer for at least 4 hours, or until the ice cream is firm. This final freezing step is essential for achieving that perfect scoopable texture. When you’re ready to enjoy your Strawberry Vanilla Bean Ice Cream, let it sit at room temperature for a few minutes before scooping. This will make it easier to serve!
Variations of Strawberry Vanilla Bean Ice Cream
Adding Other Fruits
One of the best things about making your own Strawberry Vanilla Bean Ice Cream is the ability to customize it. You can easily add other fruits to create exciting new flavors. For instance, consider mixing in some ripe bananas or blueberries. These fruits pair wonderfully with strawberries and add a unique twist to your ice cream. Simply prepare the additional fruits in the same way as the strawberries. Slice them up and let them macerate with a bit of sugar. Then, combine them with your custard base just like you did with the strawberries. This way, you can enjoy a delightful medley of flavors in every scoop!
Swirling in Chocolate or Caramel
If you’re a fan of rich flavors, try swirling in some chocolate or caramel sauce. This addition can elevate your Strawberry Vanilla Bean Ice Cream to a whole new level. To do this, simply prepare your ice cream as usual. Once it reaches a soft-serve consistency in the ice cream maker, drizzle in your favorite chocolate or caramel sauce. Use a spatula or a spoon to gently fold the sauce into the ice cream. Be careful not to overmix; you want to create beautiful swirls rather than fully combine the flavors. This technique adds a delightful surprise in every bite, making your homemade ice cream even more indulgent!
Cooking Note for Strawberry Vanilla Bean Ice Cream
When making Strawberry Vanilla Bean Ice Cream, attention to detail is key. Each step in the process contributes to the final product’s flavor and texture. Here are some important cooking notes to keep in mind:
- Fresh Ingredients Matter: Always opt for the freshest strawberries and high-quality dairy products. The flavor of your ice cream will greatly depend on the quality of the ingredients you use. Fresh strawberries will provide a vibrant taste, while rich cream and milk will ensure a creamy texture.
- Temperature Control: When heating the cream and milk, avoid boiling. Boiling can alter the texture and flavor of your custard base. Instead, heat it gently until warm, allowing the flavors to meld without compromising quality.
- Tempering the Eggs: This step is crucial to prevent the eggs from scrambling. Always whisk continuously while adding the warm cream mixture to the egg yolks. This gradual process helps maintain a smooth custard base.
- Cooling the Mixture: After cooking, allow the custard to cool before adding the strawberries. This helps preserve the fresh flavor of the fruit and prevents it from cooking in the warm mixture.
- Churning Time: Follow your ice cream maker’s instructions for churning time. Over-churning can lead to a grainy texture, while under-churning may result in a softer ice cream. Aim for a thick, creamy consistency.
- Storage Tips: Store your ice cream in an airtight container to prevent ice crystals from forming. If you notice any ice crystals, simply stir the ice cream before serving to restore its creamy texture.
By keeping these cooking notes in mind, you’ll be well on your way to creating a delicious batch of Strawberry Vanilla Bean Ice Cream that’s sure to impress everyone. Enjoy the process and the delightful results!
Serving Suggestions for Strawberry Vanilla Bean Ice Cream
Pairing with Other Desserts
Strawberry Vanilla Bean Ice Cream is a versatile treat that pairs beautifully with a variety of desserts. One delightful option is to serve it alongside warm desserts, such as chocolate lava cake or apple pie. The contrast between the warm, gooey cake and the cold, creamy ice cream creates a heavenly experience for your taste buds.
Another fantastic pairing is with freshly baked cookies. Imagine a scoop of your homemade ice cream nestled between two chocolate chip cookies. This classic combination is sure to please both kids and adults alike. You can also serve it atop a slice of rich cheesecake for an extra indulgent dessert. The creamy texture of the ice cream complements the dense cheesecake perfectly, making each bite a delicious treat.
For a lighter option, consider serving your Strawberry Vanilla Bean Ice Cream with a fruit salad. The fresh fruits will enhance the strawberry flavor while adding a refreshing touch. You can even drizzle a bit of honey or a sprinkle of mint for an extra burst of flavor. These pairings not only elevate your dessert experience but also make it visually appealing!
Creative Serving Ideas
When it comes to serving Strawberry Vanilla Bean Ice Cream, creativity can take your presentation to the next level. One fun idea is to create an ice cream sundae bar. Set out various toppings like crushed nuts, sprinkles, whipped cream, and chocolate syrup. Let your guests build their own sundaes, allowing them to customize their dessert just the way they like it. This interactive experience is perfect for parties or family gatherings.
Another creative serving idea is to use waffle cones or bowls. Instead of traditional scoops, fill waffle cones with your ice cream for a fun and portable treat. You can even dip the tops of the cones in melted chocolate and sprinkle them with nuts or sprinkles for an extra special touch. If you prefer bowls, consider layering the ice cream with granola and fresh fruit for a delightful parfait.
Lastly, for a unique twist, try making ice cream sandwiches using your favorite cookies or brownies. Simply scoop the ice cream between two cookies or brownie pieces, and you have a delicious handheld dessert. These creative serving ideas will not only impress your guests but also make your Strawberry Vanilla Bean Ice Cream even more enjoyable!
Tips for Perfect Strawberry Vanilla Bean Ice Cream
Choosing the Right Strawberries
When it comes to making Strawberry Vanilla Bean Ice Cream, the quality of your strawberries is crucial. Always opt for fresh, ripe strawberries. Look for berries that are bright red, firm, and fragrant. Avoid any that are dull or have blemishes, as these may not have the best flavor. If possible, visit a local farmer’s market to find the freshest strawberries in season. The natural sweetness and vibrant flavor of ripe strawberries will elevate your ice cream, making it truly irresistible.
Additionally, consider the variety of strawberries you choose. Some varieties, like June-bearing strawberries, are known for their sweetness and juiciness. Others, like everbearing strawberries, can provide a different flavor profile. Experimenting with different types can lead to exciting new tastes in your ice cream. Remember, the better the strawberries, the better your ice cream will be!
Ensuring Creamy Texture
A creamy texture is key to a delightful ice cream experience. To achieve this, pay attention to the fat content in your ingredients. Using heavy cream and whole milk is essential, as they provide the richness needed for a smooth and creamy base. Avoid using low-fat or skim milk, as they can result in a less satisfying texture.
Another important factor is the churning process. Make sure your ice cream maker is properly chilled before use. If the bowl isn’t cold enough, it can affect the texture of your ice cream. Churn the mixture until it reaches a thick, soft-serve consistency. If you don’t have an ice cream maker, remember to stir the mixture every 30 minutes while it freezes. This helps incorporate air and prevents ice crystals from forming, ensuring a creamy final product.
Lastly, allow your ice cream to sit at room temperature for a few minutes before scooping. This will soften it slightly, making it easier to serve while maintaining that luscious, creamy texture. With these tips, you’ll be well on your way to creating the perfect Strawberry Vanilla Bean Ice Cream!
Breakdown of Time for Strawberry Vanilla Bean Ice Cream
Prep Time
Preparing your Strawberry Vanilla Bean Ice Cream is a delightful process that doesn’t take too long. The prep time for this recipe is approximately 30 minutes. This includes washing and slicing the strawberries, making the custard base, and infusing the vanilla bean. It’s a great way to spend some time in the kitchen, especially when you know a delicious treat awaits you!
Cooking Time
The cooking time for the custard base is about 10-15 minutes. During this time, you’ll gently heat the cream and milk, temper the egg yolks, and cook the mixture until it thickens. It’s important to keep an eye on the mixture to ensure it doesn’t boil. This careful cooking is what gives your ice cream that rich, creamy texture. After cooking, allow the mixture to cool for about 15 minutes before combining it with the strawberries.
Total Time
In total, you can expect to spend around 1 hour on the entire process, not including the freezing time. After you’ve prepared and cooked your ice cream mixture, it will need to freeze for at least 4 hours to achieve the perfect scoopable consistency. So, while the active time is relatively short, be sure to plan ahead for the freezing time. Once it’s ready, you’ll have a delightful homemade Strawberry Vanilla Bean Ice Cream to enjoy!
Nutritional Information for Strawberry Vanilla Bean Ice Cream
Calories
When indulging in homemade Strawberry Vanilla Bean Ice Cream, it’s good to be aware of the calories. A typical serving size of about half a cup contains approximately 200-250 calories. This can vary slightly based on the specific ingredients you use, especially the cream and sugar content. While it’s a sweet treat, enjoying it in moderation can fit nicely into a balanced diet. Remember, the joy of homemade ice cream is not just in the taste but also in the experience of making it!
Protein
Protein is an essential nutrient, and your Strawberry Vanilla Bean Ice Cream provides a modest amount. Each serving contains around 3-4 grams of protein. This comes mainly from the egg yolks and dairy products used in the recipe. While it’s not a high-protein dessert, it does contribute to your daily intake. Pairing it with a protein-rich snack, like nuts or yogurt, can help balance your meal.
Sodium
Sodium content in your Strawberry Vanilla Bean Ice Cream is relatively low. A serving typically contains about 50-70 milligrams of sodium. This is mainly from the pinch of salt added to enhance the flavor. For those watching their sodium intake, this dessert is a great option. Just be mindful of any toppings you might add, as they can increase the sodium levels. Overall, this ice cream is a delightful treat that can be enjoyed without too much concern for sodium content!
FAQs about Strawberry Vanilla Bean Ice Cream
Can I use frozen strawberries for this recipe?
Yes, you can use frozen strawberries for your Strawberry Vanilla Bean Ice Cream! However, keep in mind that fresh strawberries provide a brighter flavor and better texture. If you choose to use frozen strawberries, let them thaw completely before preparing them. This will help release their juices, making it easier to create that delicious syrup. Just remember, the taste may vary slightly, but your ice cream will still be delightful!
How long does homemade ice cream last?
Homemade Strawberry Vanilla Bean Ice Cream can last in the freezer for about 2-3 weeks. To keep it fresh, store it in an airtight container. This helps prevent ice crystals from forming and keeps your ice cream creamy. However, for the best flavor and texture, it’s recommended to enjoy it within the first week. After that, the quality may start to decline, but it will still be safe to eat!
What can I substitute for vanilla bean?
If you don’t have a vanilla bean on hand, you can substitute it with vanilla extract. Use about 1-2 teaspoons of pure vanilla extract in place of one vanilla bean. While the flavor may not be as intense as using a fresh bean, it will still add a lovely vanilla taste to your ice cream. Just remember to add the extract to the custard base after cooking, as this will help preserve its flavor.
Is it possible to make this ice cream dairy-free?
Absolutely! You can make a dairy-free version of Strawberry Vanilla Bean Ice Cream by using coconut milk or almond milk instead of heavy cream and whole milk. Look for full-fat coconut milk for a rich and creamy texture. Additionally, you can use a dairy-free alternative for the egg yolks, such as silken tofu or a commercial egg replacer. This way, you can enjoy a delicious, creamy treat without any dairy!
Conclusion on Strawberry Vanilla Bean Ice Cream
Final Thoughts on Making Your Own Ice Cream
Making your own Strawberry Vanilla Bean Ice Cream is a rewarding experience. Not only do you get to enjoy a delicious treat, but you also have the satisfaction of creating it from scratch. The process allows you to connect with your ingredients, ensuring that every scoop is filled with fresh flavors and creamy goodness. Plus, there’s something special about sharing homemade ice cream with family and friends. It’s a delightful way to celebrate summer and create lasting memories.
As you embark on this ice cream-making journey, remember that practice makes perfect. Don’t be discouraged if your first batch isn’t exactly how you envisioned. Each attempt will teach you something new, and soon you’ll be a pro at crafting your own frozen delights. So, gather your ingredients, roll up your sleeves, and dive into the world of homemade ice cream!
Encouragement to Experiment with Flavors
One of the best parts of making ice cream at home is the freedom to experiment with flavors. While Strawberry Vanilla Bean Ice Cream is a classic, don’t hesitate to get creative! Try adding different fruits, nuts, or even spices to your base. You might discover a new favorite combination that surprises your taste buds. For instance, consider adding a hint of mint for a refreshing twist or mixing in some crushed cookies for added texture.
Remember, the sky’s the limit! Each flavor you try can lead to exciting new creations. So, gather your loved ones, brainstorm flavor ideas, and have fun in the kitchen. Your homemade ice cream adventures await, and who knows? You might just create the next big flavor sensation!
Relevant Recipes Link:
Craving more delightful ice cream recipes? Try these out:
- Homemade Strawberry Vanilla Bean Ice Cream: A Delightful Treat
- Another Variation of Homemade Strawberry Vanilla Bean Ice Cream
- Creamy Vanilla Ice Cream: A Classic Delight
For more fantastic recipes and food inspiration, follow us on Pinterest!