Introduction to Cookies & Cream Cheesecake Deep-Fried Oreos
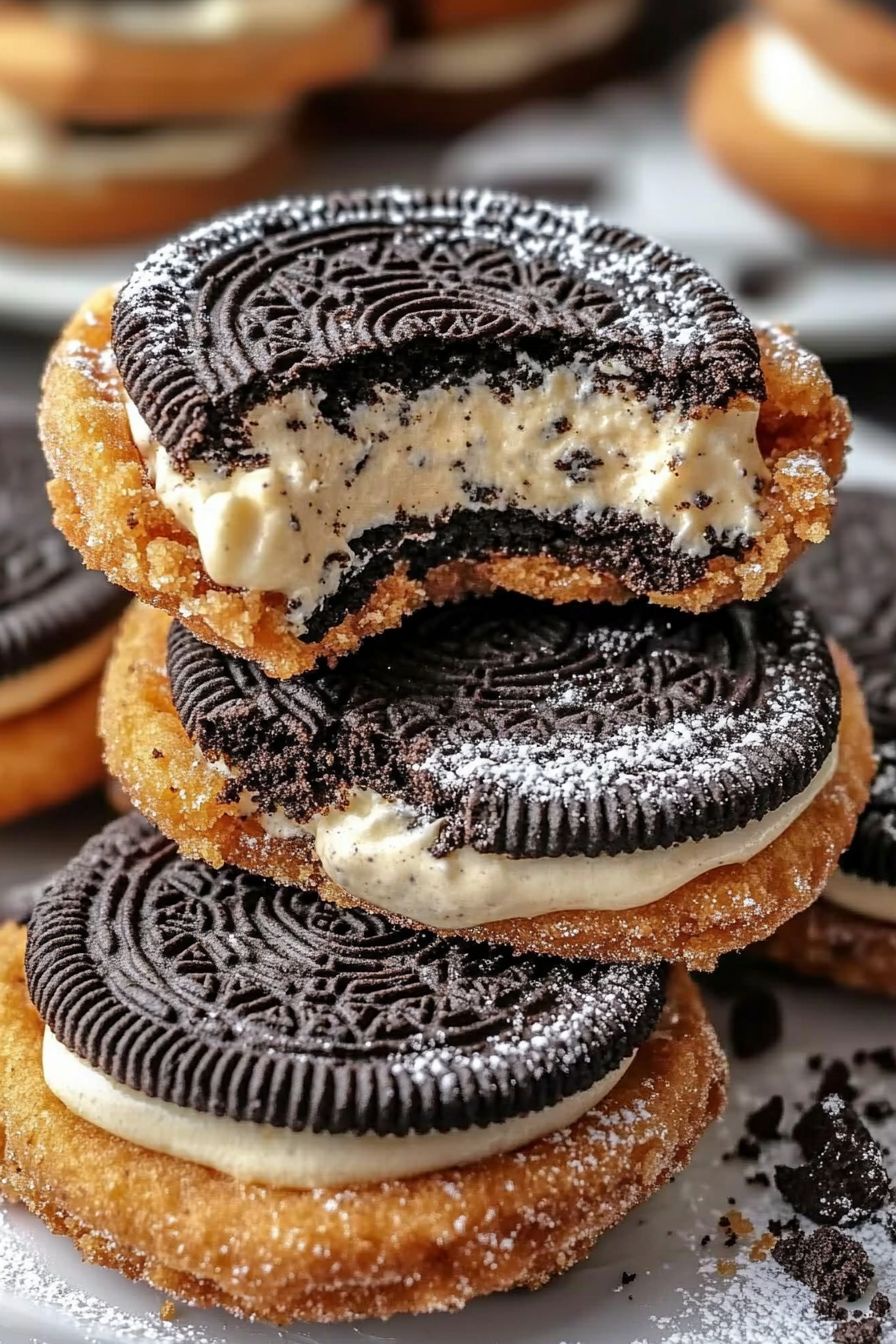
Are you ready to dive into a world of sweet indulgence? The Cookies & Cream Cheesecake Deep-Fried Oreos are not just a dessert; they are an experience! Imagine biting into a warm, crispy shell that gives way to a creamy cheesecake filling, all while enjoying the classic taste of Oreos. This delightful treat is perfect for parties, family gatherings, or simply when you want to treat yourself. Let’s explore what makes this dessert so special and take a quick look at the history of deep-fried treats.
What Makes This Dessert Special?
What sets these deep-fried Oreos apart? First, it’s the combination of flavors. The rich cream cheese filling mixed with crushed Oreos creates a delightful taste that is both familiar and exciting. The crispy outer layer adds a satisfying crunch, making each bite a perfect balance of textures. Plus, they are easy to make and can be served warm, which enhances the overall experience. Whether you’re a fan of cheesecake or just love Oreos, this dessert is sure to please everyone!
A Brief History of Deep-Fried Treats
Deep-fried treats have a long and delicious history. They date back to ancient times when people would fry dough in oil. Over the years, various cultures have embraced this cooking method, creating unique and tasty dishes. In the United States, deep-fried Oreos became popular at fairs and carnivals in the 1990s. They quickly gained fame for their unique taste and fun presentation. Today, deep-fried desserts, including our Cookies & Cream Cheesecake Deep-Fried Oreos, continue to be a favorite among dessert lovers everywhere.
Ingredients for Cookies & Cream Cheesecake Deep-Fried Oreos
To create the delightful Cookies & Cream Cheesecake Deep-Fried Oreos, you’ll need a few simple ingredients. Each component plays a vital role in achieving that perfect balance of flavors and textures. Here’s what you’ll need:
- 8 oz cream cheese, softened
- 1/4 cup granulated sugar
- 1/2 teaspoon vanilla extract
- 1/2 cup crushed Oreos
- 1 cup all-purpose flour
- 1/4 cup granulated sugar
- 1/2 teaspoon baking powder
- 1/4 teaspoon salt
- 1 large egg
- 1 cup milk
- Vegetable oil, for frying
- 12 Oreo cookies
- Powdered sugar, for dusting
- Additional crushed Oreos, for sprinkling
These ingredients come together to create a rich and creamy filling, surrounded by a crispy, golden-brown coating. The combination of cream cheese and crushed Oreos gives a delightful twist to the classic deep-fried Oreo. Make sure to gather everything before you start cooking, as it will make the process smoother and more enjoyable!
Step-by-Step Preparation of Cookies & Cream Cheesecake Deep-Fried Oreos
Now that you have all your ingredients ready, it’s time to dive into the fun part: making your Cookies & Cream Cheesecake Deep-Fried Oreos. Follow these simple steps to create this delicious treat that will surely impress your friends and family!
Step 1: Prepare the Cheesecake Filling
Start by making the creamy cheesecake filling. In a mixing bowl, beat the softened cream cheese until it’s smooth and fluffy. This step is crucial, as a well-mixed filling will ensure a delightful texture. Next, add in the granulated sugar and vanilla extract. Mix these ingredients together until they are fully combined. Finally, fold in the crushed Oreos. This will give your filling that signature cookies and cream flavor. Set this mixture aside while you prepare the Oreo sandwiches.
Step 2: Create Oreo Sandwiches
Now, let’s assemble the Oreo sandwiches! Take one Oreo cookie and place a generous dollop of the cheesecake filling on top. Then, gently press another Oreo on top to create a sandwich. Make sure the filling is evenly spread between the cookies. Repeat this process until you have used all your Oreo cookies. You should have 12 delicious Oreo sandwiches ready to be coated and fried!
Step 3: Prepare the Coating
Next, it’s time to prepare the coating for your Oreo sandwiches. In a separate bowl, whisk together the all-purpose flour, granulated sugar, baking powder, and salt. This dry mixture will create a crispy outer layer when fried. In another bowl, combine the egg and milk, whisking them together until well blended. This egg mixture will help the flour coating stick to the Oreo sandwiches. Now, you’re ready to coat your Oreo sandwiches!
Step 4: Frying the Oreo Sandwiches
Heat vegetable oil in a deep pan or fryer to 350°F (175°C). This temperature is key for achieving that perfect golden-brown color. While the oil heats up, take each Oreo sandwich and dip it first into the flour mixture, then into the egg mixture, and back into the flour mixture. Make sure each sandwich is well-coated. Once the oil is hot, carefully place the coated Oreo sandwiches into the oil. Fry them for about 2-3 minutes, or until they are golden brown. Be sure to fry in batches to avoid overcrowding the pan.
Step 5: Finishing Touches
After frying, use a slotted spoon to remove the deep-fried Oreos from the oil. Place them on a paper towel-lined plate to drain any excess oil. While they are still warm, dust them with powdered sugar for a sweet finish. For an extra touch, sprinkle some additional crushed Oreos on top. This not only adds flavor but also makes them look irresistible! Serve your Cookies & Cream Cheesecake Deep-Fried Oreos warm and enjoy the delightful combination of flavors and textures!
Variations of Cookies & Cream Cheesecake Deep-Fried Oreos
If you love the idea of Cookies & Cream Cheesecake Deep-Fried Oreos but want to switch things up, you’re in luck! There are many fun variations you can try. From alternative fillings to different coating options, these tweaks can make your dessert even more exciting. Let’s explore some delicious ideas!
Alternative Fillings
While the classic cheesecake filling is delightful, you can experiment with other flavors to create your own unique twist. Here are a few ideas:
- Chocolate Cream Cheese: Mix in some cocoa powder with the cream cheese for a rich chocolate flavor. This pairs wonderfully with the Oreo cookies.
- Peanut Butter Cheesecake: Add creamy peanut butter to the filling for a nutty twist. This combination is sure to please peanut butter lovers!
- Mint Chocolate Chip: Incorporate mint extract and mini chocolate chips into the filling for a refreshing minty flavor.
- Fruit Flavored: Blend in fruit purees like strawberry or raspberry for a fruity cheesecake filling. This adds a fresh taste to your deep-fried treat.
Feel free to mix and match these ideas to create a filling that suits your taste buds. The possibilities are endless!
Different Coating Options
The coating is just as important as the filling. You can try different coatings to enhance the flavor and texture of your deep-fried Oreos. Here are some fun options:
- Coconut Flakes: Add shredded coconut to the flour mixture for a tropical twist. This gives a nice crunch and a hint of sweetness.
- Crushed Nuts: Mix in crushed almonds or walnuts with the flour for a nutty flavor and extra crunch.
- Spiced Coating: Add a pinch of cinnamon or nutmeg to the flour mixture for a warm, spiced flavor that complements the sweetness.
- Chocolate Coating: After frying, dip the Oreos in melted chocolate for an extra layer of indulgence. You can also drizzle chocolate on top for a beautiful presentation.
These variations can take your Cookies & Cream Cheesecake Deep-Fried Oreos to a whole new level. Don’t hesitate to get creative and find the combination that you love the most!
Cooking Note for Cookies & Cream Cheesecake Deep-Fried Oreos
When preparing your Cookies & Cream Cheesecake Deep-Fried Oreos, there are a few important cooking notes to keep in mind. These tips will help ensure that your deep-fried treats turn out perfectly every time!
First, make sure your oil is at the right temperature. Using a thermometer can help you achieve the ideal frying temperature of 350°F (175°C). If the oil is too hot, the outside may burn before the inside is cooked. Conversely, if the oil is not hot enough, the Oreos will absorb too much oil and become greasy.
Next, avoid overcrowding the pan while frying. Frying too many Oreos at once can lower the oil temperature, leading to uneven cooking. Instead, fry in small batches to maintain that perfect golden-brown color and crispy texture.
Additionally, be cautious when handling the hot oil. Use a slotted spoon to carefully place the Oreo sandwiches into the oil and to remove them once they are done frying. This will help prevent any splashes that could cause burns.
Lastly, let the fried Oreos drain on paper towels to remove excess oil. This step is crucial for achieving a light and crispy finish. Dusting them with powdered sugar while they are still warm will help the sugar stick better, enhancing the overall sweetness of your treat.
By following these cooking notes, you’ll be well on your way to creating delicious Cookies & Cream Cheesecake Deep-Fried Oreos that everyone will love!
Serving Suggestions for Cookies & Cream Cheesecake Deep-Fried Oreos
Once you’ve made your Cookies & Cream Cheesecake Deep-Fried Oreos, it’s time to think about how to serve them. Presentation and pairing can elevate your dessert experience. Here are some delightful serving suggestions to make your treat even more enjoyable!
Pairing with Dips and Sauces
Enhancing your deep-fried Oreos with dips and sauces can add an extra layer of flavor. Here are some tasty options to consider:
- Chocolate Sauce: Drizzle warm chocolate sauce over the fried Oreos for a rich and indulgent touch. You can also serve it on the side for dipping.
- Caramel Sauce: A sweet caramel sauce pairs beautifully with the creamy filling. The combination of flavors is simply irresistible!
- Whipped Cream: A dollop of freshly whipped cream adds a light and airy contrast to the rich Oreos. You can even flavor the whipped cream with vanilla or cocoa powder.
- Fruit Compote: A berry compote made from strawberries or raspberries can provide a refreshing tartness that balances the sweetness of the Oreos.
Feel free to mix and match these dips to find your favorite combination. Your guests will love the added options!
Presentation Ideas
How you present your Cookies & Cream Cheesecake Deep-Fried Oreos can make a big difference. Here are some creative ideas to impress your family and friends:
- Platter Display: Arrange the fried Oreos on a large platter. Dust them with powdered sugar and sprinkle crushed Oreos on top for a beautiful presentation.
- Individual Servings: Serve each Oreo on a small dessert plate with a side of dipping sauce. This makes it easy for guests to enjoy their treat without sharing!
- Garnish with Fresh Berries: Add fresh berries like strawberries or blueberries around the Oreos for a pop of color and freshness.
- Use Fun Serving Containers: Consider using mason jars or small cups to hold the fried Oreos. This adds a rustic charm and makes for a fun serving style.
With these serving suggestions, your Cookies & Cream Cheesecake Deep-Fried Oreos will not only taste amazing but also look stunning on the table. Enjoy sharing this delightful treat with your loved ones!
Tips for Perfect Cookies & Cream Cheesecake Deep-Fried Oreos
Creating the perfect Cookies & Cream Cheesecake Deep-Fried Oreos can be a delightful adventure. However, there are a few common mistakes that can happen along the way. By being aware of these pitfalls and following some helpful storage tips, you can ensure that your deep-fried treats turn out delicious every time!
Common Mistakes to Avoid
Even the best cooks can make mistakes! Here are some common errors to watch out for:
- Not Softening the Cream Cheese: Make sure your cream cheese is at room temperature before mixing. Cold cream cheese can lead to a lumpy filling that doesn’t blend well.
- Overmixing the Batter: When preparing the coating, mix just until combined. Overmixing can make the batter tough, resulting in a less crispy texture.
- Incorrect Oil Temperature: If the oil is too hot, the outside will burn while the inside remains cold. If it’s too cool, the Oreos will absorb too much oil. Use a thermometer to check the temperature.
- Frying Too Many at Once: Frying too many Oreo sandwiches at once can lower the oil temperature. This can lead to soggy Oreos instead of crispy ones. Fry in small batches for the best results.
- Skipping the Drainage Step: After frying, always let the Oreos drain on paper towels. This step is crucial for removing excess oil and achieving a light, crispy finish.
By avoiding these common mistakes, you’ll be well on your way to making perfect deep-fried Oreos that everyone will love!
Storage Tips
If you happen to have leftovers (though they might not last long!), here are some storage tips to keep your Cookies & Cream Cheesecake Deep-Fried Oreos fresh:
- Cool Completely: Allow the fried Oreos to cool completely before storing them. This helps prevent moisture buildup, which can make them soggy.
- Use an Airtight Container: Store the cooled Oreos in an airtight container. This will help keep them fresh and prevent them from absorbing any odors from the fridge.
- Refrigerate for Short-Term Storage: If you plan to eat them within a few days, keep them in the refrigerator. They can last for about 3-4 days when stored properly.
- Freeze for Long-Term Storage: For longer storage, you can freeze the fried Oreos. Place them in a single layer on a baking sheet to freeze, then transfer them to a freezer-safe bag. They can last up to 2 months in the freezer.
- Reheat Before Serving: If you’re reheating, place them in an oven at 350°F (175°C) for about 5-10 minutes. This will help restore their crispy texture.
With these tips, you can enjoy your Cookies & Cream Cheesecake Deep-Fried Oreos even after the initial frying. Happy cooking!
Breakdown of Time for Cookies & Cream Cheesecake Deep-Fried Oreos
Understanding the time needed to prepare your Cookies & Cream Cheesecake Deep-Fried Oreos can help you plan better. Whether you’re making them for a special occasion or just a fun treat, knowing the breakdown of time will make the process smoother. Here’s how the timing works out:
Prep Time
The prep time for these delicious deep-fried Oreos is approximately 20 minutes. This includes gathering all your ingredients, preparing the cheesecake filling, and assembling the Oreo sandwiches. Make sure to have everything ready before you start, as this will make the process more efficient and enjoyable!
Cooking Time
Once your Oreo sandwiches are ready, the cooking time is about 10 minutes. This includes heating the oil and frying the sandwiches until they are golden brown. Keep an eye on them while they fry to ensure they reach that perfect crispy texture. Remember, frying in small batches will help maintain the oil temperature and ensure even cooking.
Total Time
In total, you’ll need about 30 minutes to make your Cookies & Cream Cheesecake Deep-Fried Oreos. This quick preparation and cooking time make it easy to whip up this indulgent treat whenever the craving strikes. With just a little bit of time, you can enjoy a delightful dessert that’s sure to impress!
Nutritional Information for Cookies & Cream Cheesecake Deep-Fried Oreos
When indulging in a sweet treat like Cookies & Cream Cheesecake Deep-Fried Oreos, it’s important to be aware of the nutritional content. Understanding the calories and macronutrients can help you enjoy this dessert while keeping your dietary goals in mind. Let’s break down the nutritional information for this delicious treat!
Calories and Macronutrients
Each serving of Cookies & Cream Cheesecake Deep-Fried Oreos contains approximately 250 calories. Here’s a closer look at the macronutrient breakdown:
- Calories: 250
- Protein: 3g
- Carbohydrates: 30g
- Fat: 14g
- Sugar: 10g
This dessert is rich in carbohydrates and fats, primarily due to the deep-frying process and the ingredients used. The cream cheese and Oreos contribute to the overall calorie count, making it a decadent treat. While it’s not the healthiest option, it’s perfect for special occasions or when you want to indulge a little!
Health Considerations
While Cookies & Cream Cheesecake Deep-Fried Oreos are undeniably delicious, it’s essential to enjoy them in moderation. Here are a few health considerations to keep in mind:
- Occasional Treat: This dessert is best enjoyed as an occasional treat rather than a regular part of your diet. Balance is key when it comes to enjoying sweets.
- Dietary Restrictions: If you have dietary restrictions, consider alternatives. For example, you can use low-fat cream cheese or gluten-free Oreos to make a lighter version.
- Portion Control: Be mindful of portion sizes. Sharing with friends or family can help you enjoy the flavors without overindulging.
- Active Lifestyle: If you lead an active lifestyle, treating yourself to a dessert like this can be a fun reward after a workout or a long day.
By keeping these health considerations in mind, you can savor your Cookies & Cream Cheesecake Deep-Fried Oreos while maintaining a balanced approach to your diet. Enjoy every bite of this delightful dessert!
FAQs about Cookies & Cream Cheesecake Deep-Fried Oreos
Can I make these in advance?
Yes, you can prepare the Cookies & Cream Cheesecake Deep-Fried Oreos in advance! You can make the cheesecake filling and assemble the Oreo sandwiches ahead of time. Just store them in the refrigerator until you’re ready to fry. However, it’s best to fry them just before serving to enjoy that crispy texture. If you want to fry them later, you can freeze the assembled sandwiches. Just remember to thaw them before frying for the best results!
What can I substitute for cream cheese?
If you’re looking for a substitute for cream cheese, there are a few options you can try. One popular alternative is mascarpone cheese, which has a similar creamy texture. You can also use Greek yogurt for a lighter option, but keep in mind that it may alter the flavor slightly. For a dairy-free version, consider using vegan cream cheese made from nuts or soy. Each substitute will give a unique twist to your Cookies & Cream Cheesecake Deep-Fried Oreos, so feel free to experiment!
How do I store leftover deep-fried Oreos?
If you have any leftover Cookies & Cream Cheesecake Deep-Fried Oreos, it’s important to store them properly. Allow them to cool completely, then place them in an airtight container. They can be stored in the refrigerator for about 3-4 days. If you want to keep them longer, consider freezing them. Just make sure to wrap them well to prevent freezer burn. When you’re ready to enjoy them again, reheat in the oven to restore their crispy texture!
Can I bake these instead of frying?
Yes, you can bake the Cookies & Cream Cheesecake Deep-Fried Oreos if you prefer a healthier option! Preheat your oven to 350°F (175°C) and place the coated Oreo sandwiches on a baking sheet lined with parchment paper. Bake for about 10-12 minutes or until they are golden brown. While they won’t have the same crispy texture as the fried version, baking will still yield a delicious treat that’s lower in fat. Enjoy your baked Oreos with a sprinkle of powdered sugar for a sweet finish!
Conclusion on Cookies & Cream Cheesecake Deep-Fried Oreos
Final Thoughts on This Decadent Treat
In conclusion, Cookies & Cream Cheesecake Deep-Fried Oreos are a delightful dessert that combines the best of both worlds: the rich, creamy filling of cheesecake and the beloved crunch of Oreos, all enveloped in a crispy, golden coating. This treat is not just about taste; it’s about the experience of enjoying something truly special. Whether you’re serving them at a party, sharing with family, or treating yourself after a long day, these deep-fried delights are sure to bring smiles and satisfaction.
As you embark on your culinary adventure to create these indulgent treats, remember that the joy of cooking lies in experimentation. Feel free to try out different fillings and coatings to make this recipe your own. The possibilities are endless, and each variation can lead to a new favorite. So gather your ingredients, follow the steps, and get ready to impress your friends and family with your delicious creations!
Lastly, don’t forget to savor every bite. The combination of flavors and textures in Cookies & Cream Cheesecake Deep-Fried Oreos is a celebration of sweetness that deserves to be enjoyed. Happy cooking, and may your kitchen be filled with the delightful aroma of these decadent treats!