Introduction to Homemade Rustic Bread Rolls
What Makes Homemade Rustic Bread Rolls Special?
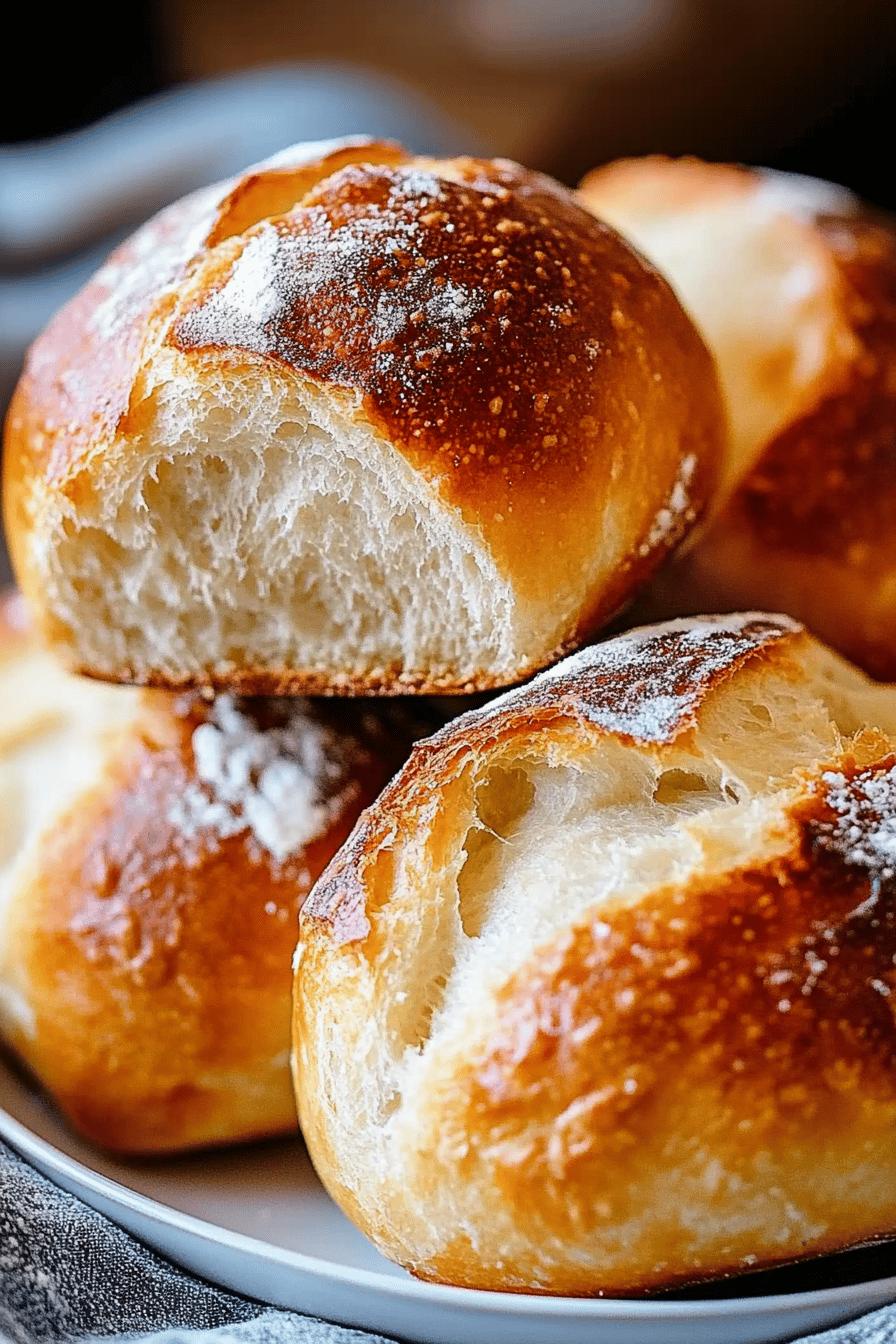
Homemade rustic bread rolls are not just any ordinary bread. They carry a unique charm that store-bought rolls simply can’t match. First, the aroma of freshly baked bread fills your kitchen, creating a warm and inviting atmosphere. The texture is another highlight; these rolls are crusty on the outside and soft on the inside. This delightful contrast makes them perfect for any meal. Plus, you can customize them to suit your taste. Whether you prefer them plain or with added herbs, the choice is yours!
The Joy of Baking Bread at Home
Baking bread at home is a rewarding experience. It allows you to connect with the ingredients and the process. As you mix, knead, and shape the dough, you become part of a time-honored tradition. The satisfaction of pulling a batch of warm rolls from the oven is unmatched. Not only do you get to enjoy delicious bread, but you also create lasting memories with family and friends. Imagine gathering around the table, sharing stories, and breaking bread together. That’s the joy of baking homemade rustic bread rolls!
Ingredients for Homemade Rustic Bread Rolls
To create your own batch of homemade rustic bread rolls, you’ll need a few simple ingredients. Each component plays a vital role in achieving that perfect texture and flavor. Here’s what you’ll need:
- 4 cups all-purpose flour: This is the base of your rolls, providing structure and chewiness.
- 1 packet (2 ¼ teaspoons) active dry yeast: Yeast is essential for making the dough rise and gives the rolls their airy texture.
- 1 ½ cups warm water: The warmth activates the yeast, helping it to work effectively.
- 2 tablespoons sugar: Sugar feeds the yeast and adds a hint of sweetness to the rolls.
- 2 teaspoons salt: Salt enhances the flavor and controls the fermentation process.
- 2 tablespoons olive oil: This adds moisture and richness to the rolls.
Optional ingredients can also elevate your rustic bread rolls. Consider adding:
- Herbs: Fresh or dried herbs like rosemary or thyme can add a delightful flavor.
- Cheese: Shredded cheese, such as cheddar or parmesan, can create a savory twist.
- Seeds: Topping your rolls with sesame or poppy seeds adds a nice crunch.
Gather these ingredients, and you’re ready to embark on your baking adventure. The simplicity of these components makes it easy for anyone, even beginners, to create delicious homemade rustic bread rolls!
Step-by-Step Preparation of Homemade Rustic Bread Rolls
Step 1: Gather Your Ingredients
Before you start baking, it’s important to have everything ready. Gather all your ingredients listed above. Make sure your flour is measured accurately, and your yeast is fresh. Having everything in one place will make the process smoother and more enjoyable. Plus, it’s a great way to get excited about your baking adventure!
Step 2: Mix the Dough
In a large mixing bowl, combine the warm water and sugar. Stir gently until the sugar dissolves. Next, sprinkle the yeast over the water and let it sit for about 5-10 minutes. You’ll notice bubbles forming, which means the yeast is active. Now, add the flour and salt to the bowl. Mix everything together until a shaggy dough forms. This is where the magic begins!
Step 3: Knead the Dough
Once your dough is mixed, it’s time to knead! Lightly flour a clean surface and turn the dough out onto it. Knead the dough for about 8-10 minutes. You want it to become smooth and elastic. If it’s too sticky, sprinkle a little more flour as needed. Kneading is a fun way to get your hands involved, and it helps develop the gluten, giving your rolls that perfect texture.
Step 4: First Rise
After kneading, place the dough in a lightly greased bowl. Cover it with a clean kitchen towel or plastic wrap. Let it rise in a warm place for about 1 hour, or until it doubles in size. This is called the first rise. The warmth helps the yeast work its magic, creating those lovely air pockets in your rolls.
Step 5: Shape the Rolls
Once the dough has risen, punch it down gently to release the air. Turn it out onto a floured surface again. Divide the dough into equal pieces, about 12-16, depending on how big you want your rolls. Shape each piece into a ball by tucking the edges under. This helps create a nice round shape. Place the shaped rolls on a baking sheet lined with parchment paper, leaving some space between them.
Step 6: Second Rise
Cover the shaped rolls with a towel and let them rise again for about 30-45 minutes. This is the second rise. During this time, the rolls will puff up and become light and airy. It’s important not to rush this step, as it greatly affects the final texture of your rolls.
Step 7: Bake the Rolls
Preheat your oven to 375°F (190°C). Once the rolls have risen, it’s time to bake! Place the baking sheet in the oven and bake for 20-25 minutes, or until the rolls are golden brown. You can check for doneness by tapping the bottom of a roll; it should sound hollow. The aroma of baking bread will fill your kitchen, making it hard to wait!
Step 8: Cool and Serve
After baking, remove the rolls from the oven and let them cool on a wire rack for about 10 minutes. This cooling period allows the rolls to set properly. Once they’re cool enough to handle, serve them warm with butter or use them for delicious sandwiches. Enjoy the fruits of your labor and share them with family and friends!
Variations of Homemade Rustic Bread Rolls
Adding Herbs and Spices
One of the best things about homemade rustic bread rolls is their versatility. You can easily customize them by adding herbs and spices. For a fragrant twist, consider mixing in fresh or dried herbs like rosemary, thyme, or basil into the dough. Just a tablespoon or two can elevate the flavor significantly. If you enjoy a bit of heat, try adding crushed red pepper flakes or garlic powder. These additions not only enhance the taste but also make your kitchen smell amazing while baking!
Incorporating Cheese or Seeds
Another delightful variation is to incorporate cheese or seeds into your rolls. Shredded cheese, such as cheddar, mozzarella, or parmesan, can be mixed into the dough for a cheesy surprise in every bite. You can also sprinkle cheese on top before baking for a golden, crispy crust. Additionally, topping your rolls with seeds like sesame, poppy, or sunflower seeds adds a nice crunch and visual appeal. Just brush the tops with a little olive oil or water before sprinkling the seeds to help them stick. These variations will make your homemade rustic bread rolls even more enjoyable!
Cooking Note for Homemade Rustic Bread Rolls
When it comes to baking homemade rustic bread rolls, a few cooking notes can help ensure your success. First, always check the freshness of your yeast. Expired yeast can lead to flat rolls that don’t rise properly. If you’re unsure, you can test it by mixing a small amount of yeast with warm water and sugar. If it bubbles and foams, it’s good to go!
Next, the temperature of your water is crucial. It should be warm, but not too hot. Ideally, it should be around 110°F (43°C). Water that’s too hot can kill the yeast, while water that’s too cold may not activate it effectively. A kitchen thermometer can be handy for this step.
Additionally, the environment where you let your dough rise matters. A warm, draft-free area is best. If your kitchen is cool, you can create a warm spot by turning on your oven for a few minutes, then turning it off and placing the dough inside. Just make sure it’s not too hot!
Lastly, don’t rush the rising times. Allowing the dough to rise fully is key to achieving light and fluffy rolls. Patience is essential in baking, and the results will be worth the wait. With these cooking notes in mind, you’re well on your way to baking perfect homemade rustic bread rolls!
Serving Suggestions for Homemade Rustic Bread Rolls
Pairing with Soups and Salads
Homemade rustic bread rolls are a fantastic addition to any meal, especially when paired with soups and salads. Their crusty exterior and soft interior make them perfect for dipping into a warm bowl of soup. Imagine enjoying a hearty vegetable soup or a creamy tomato bisque with a roll in hand. The combination is simply delightful!
For salads, these rolls can serve as a wonderful side. Whether you’re enjoying a fresh garden salad or a rich Caesar salad, a warm roll adds a comforting touch. You can even tear off pieces of the roll to scoop up salad ingredients or dressings. This not only enhances the meal but also makes it more interactive and fun!
Using for Sandwiches
Another great way to enjoy your homemade rustic bread rolls is by using them for sandwiches. Their sturdy structure holds up well against various fillings, making them ideal for both classic and gourmet sandwiches. You can create a simple turkey and cheese sandwich or get creative with roasted vegetables and hummus.
For a delightful twist, consider making sliders. These mini sandwiches are perfect for gatherings or casual meals. Fill your rolls with pulled pork, meatballs, or even a veggie patty for a tasty treat. The possibilities are endless! Plus, serving them warm adds an extra layer of comfort to your meal.
In summary, whether you’re pairing your homemade rustic bread rolls with soups and salads or using them for sandwiches, they are sure to elevate your dining experience. Enjoy the versatility and deliciousness of these rolls in various ways!
Tips for Perfect Homemade Rustic Bread Rolls
Common Mistakes to Avoid
When baking homemade rustic bread rolls, a few common mistakes can lead to less-than-perfect results. First, be cautious with your yeast. Using expired yeast can prevent your rolls from rising properly. Always check the expiration date and store it in a cool, dry place. If you’re unsure about its freshness, perform a quick test by mixing it with warm water and sugar. If it bubbles, you’re good to go!
Another mistake is not measuring your ingredients accurately. Baking is a science, and precise measurements are crucial. Use measuring cups and spoons for dry ingredients and a liquid measuring cup for water. Too much flour can make your rolls dense, while too little can lead to a sticky mess.
Additionally, don’t rush the rising times. Allowing the dough to rise fully is essential for achieving light and fluffy rolls. If you’re in a hurry, you might be tempted to skip this step, but patience is key. The dough needs time to develop flavor and texture.
Lastly, avoid opening the oven door too often while baking. Each time you open the door, heat escapes, which can affect the baking process. Instead, use the oven light to check on your rolls. If you follow these tips, you’ll be well on your way to baking perfect homemade rustic bread rolls!
Storing Your Bread Rolls
Once you’ve baked your delicious homemade rustic bread rolls, you’ll want to store them properly to maintain their freshness. If you plan to eat them within a day or two, simply place them in a breadbox or a paper bag at room temperature. This helps keep the crust crispy while preventing them from getting too dry.
If you want to store them for a longer period, consider freezing your rolls. Allow them to cool completely, then place them in a freezer-safe bag or container. Make sure to remove as much air as possible to prevent freezer burn. Homemade rustic bread rolls can be frozen for up to three months.
When you’re ready to enjoy your frozen rolls, simply take them out and let them thaw at room temperature. For a warm, fresh taste, you can reheat them in the oven at 350°F (175°C) for about 10 minutes. This will restore their crusty exterior and soft interior, making them taste just like they were freshly baked!
Breakdown of Time for Homemade Rustic Bread Rolls
Prep Time
Preparing your homemade rustic bread rolls is a straightforward process. The prep time typically takes about 15-20 minutes. This includes gathering your ingredients, mixing the dough, and kneading it. It’s a great way to get your hands involved and start the baking journey. Just remember to take your time and enjoy each step!
Cooking Time
Once your dough has risen and you’ve shaped the rolls, the cooking time is around 20-25 minutes. Preheating your oven to 375°F (190°C) is essential before placing the rolls inside. During this time, the rolls will transform into golden-brown delights, filling your kitchen with a mouthwatering aroma. It’s hard to resist the temptation to peek, but try to wait until the timer goes off!
Total Time
In total, you can expect the entire process of making homemade rustic bread rolls to take about 2 to 2.5 hours. This includes the time for both rises, which are crucial for achieving that light and fluffy texture. While it may seem like a long time, most of it is hands-off, allowing you to relax or prepare other parts of your meal. The end result is well worth the wait!
Nutritional Information for Homemade Rustic Bread Rolls
Calories and Macronutrients
Understanding the nutritional content of your homemade rustic bread rolls can help you enjoy them guilt-free. Each roll contains approximately 150 calories, depending on the size and ingredients used. Here’s a breakdown of the macronutrients:
- Carbohydrates: About 30 grams per roll, providing energy for your day.
- Protein: Roughly 4 grams, essential for muscle repair and growth.
- Fat: Approximately 2 grams, mainly from the olive oil, which adds healthy fats.
- Fiber: Around 1 gram, which aids in digestion and keeps you feeling full.
These rolls are a great source of carbohydrates, making them a perfect side for meals. However, if you want to increase the fiber content, consider using whole wheat flour instead of all-purpose flour. This simple swap can enhance the nutritional value of your rolls!
Health Benefits of Homemade Bread
Baking your own bread comes with several health benefits. First, you have complete control over the ingredients. This means you can avoid preservatives and additives often found in store-bought bread. Homemade rustic bread rolls are made with simple, wholesome ingredients, making them a healthier choice.
Additionally, the process of making bread can be therapeutic. Kneading the dough and watching it rise can be a stress-reliever. Plus, the aroma of baking bread can uplift your mood and create a cozy atmosphere in your home.
Moreover, homemade bread can be more nutritious. You can add seeds, nuts, or whole grains to boost the fiber and nutrient content. These additions can provide essential vitamins and minerals, contributing to a balanced diet.
In summary, enjoying homemade rustic bread rolls not only satisfies your taste buds but also supports your health. With their wholesome ingredients and the joy of baking, these rolls are a delightful addition to your meals!
FAQs about Homemade Rustic Bread Rolls
Can I freeze homemade rustic bread rolls?
Yes, you can freeze homemade rustic bread rolls! After baking, allow them to cool completely. Then, place the rolls in a freezer-safe bag or container. Make sure to remove as much air as possible to prevent freezer burn. They can be stored in the freezer for up to three months. When you’re ready to enjoy them, simply thaw at room temperature or reheat in the oven for a warm, fresh taste!
How do I know when the bread rolls are done baking?
To check if your bread rolls are done baking, tap the bottom of one roll gently. If it sounds hollow, they are ready! Additionally, the rolls should be golden brown on top. You can also use a kitchen thermometer; the internal temperature should reach about 190°F (88°C) for perfectly baked rolls. Trust your senses—the delightful aroma will also be a good indicator that they are close to being done!
What can I use instead of yeast in this recipe?
If you need a yeast substitute, you can use baking powder or baking soda. However, keep in mind that the texture and flavor will differ. For baking powder, use about 1 tablespoon for every cup of flour. Mix it with the dry ingredients. If using baking soda, you’ll need an acid, like yogurt or vinegar, to activate it. Remember, these substitutes will not provide the same rise as yeast, so the rolls may be denser.
How long do homemade rustic bread rolls last?
Homemade rustic bread rolls are best enjoyed fresh, but they can last for a few days when stored properly. At room temperature, they will stay fresh for about 1-2 days. To keep them longer, store them in a breadbox or a paper bag. If you want to extend their shelf life, freezing is a great option. Just remember to thaw and reheat them for the best taste!
Conclusion on Homemade Rustic Bread Rolls
Final Thoughts on Baking Your Own Bread Rolls
Baking your own homemade rustic bread rolls is not just a culinary task; it’s an experience filled with joy and satisfaction. From the moment you gather your ingredients to the delightful aroma wafting through your kitchen, each step is a celebration of creativity and comfort. These rolls are more than just a side dish; they are a canvas for your culinary imagination. You can customize them with herbs, spices, or even cheese, making each batch uniquely yours.
Moreover, the health benefits of homemade bread cannot be overlooked. You control what goes into your rolls, ensuring they are free from preservatives and packed with wholesome ingredients. This not only makes them a healthier option but also a more fulfilling one. Sharing these rolls with family and friends creates lasting memories, turning simple meals into cherished moments.
So, whether you’re a seasoned baker or a beginner, don’t hesitate to try your hand at making homemade rustic bread rolls. The process is straightforward, and the results are incredibly rewarding. Enjoy them warm with butter, use them for sandwiches, or pair them with your favorite soups and salads. The possibilities are endless!
In conclusion, embrace the art of baking and let your kitchen be filled with the warmth of homemade rustic bread rolls. Happy baking!
Looking for more homemade and delicious recipes to try at home? How about these tasty delights:
- Homemade Shrimp Egg Rolls: A Tasty Delight
- Homemade Chicken Spring Rolls: Easy and Delicious
- Homemade Marinara Sauce: Easy and Delicious
For more fantastic recipes and food inspiration, follow us on Pinterest!