Introduction to Crimson Cocoa Rhapsody Ice Cream
The Allure of Homemade Ice Cream
There’s something magical about homemade ice cream. It’s not just a dessert; it’s an experience. When you make ice cream at home, you control every ingredient. You can choose the freshest fruits, the richest chocolates, and the creamiest bases. This means you can create flavors that are unique to your taste. Plus, the joy of churning your own ice cream is unmatched. The anticipation builds as you wait for that creamy goodness to freeze. Homemade ice cream is a labor of love, and it’s always worth it!
Why Choose Crimson Cocoa Rhapsody Ice Cream?
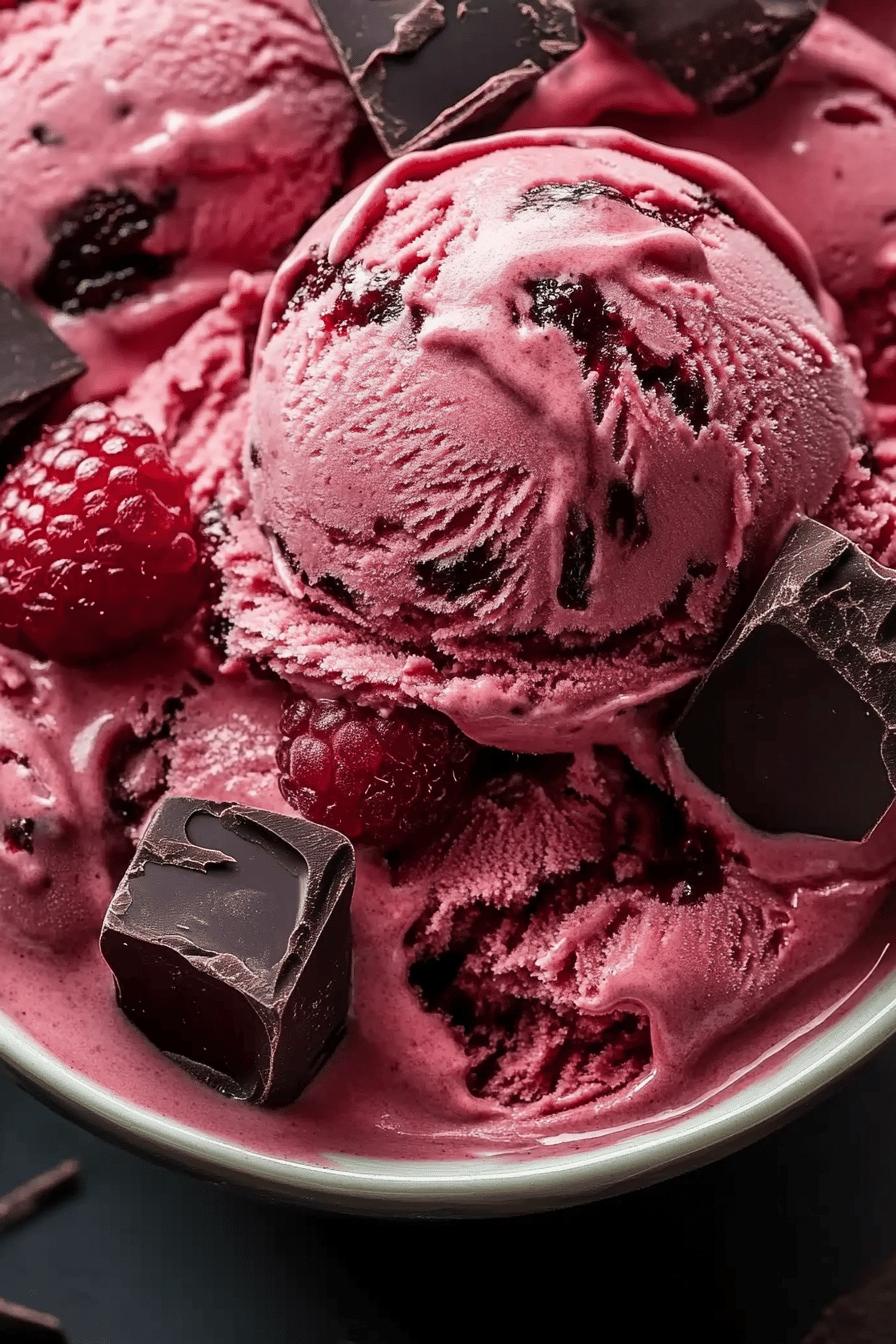
Crimson Cocoa Rhapsody Ice Cream is a delightful blend of flavors that will tantalize your taste buds. The combination of tangy raspberries and rich dark chocolate creates a perfect balance. This ice cream is not only delicious but also visually stunning. The vibrant red of the raspberries against the deep brown of the chocolate makes it a feast for the eyes. Whether you’re hosting a summer gathering or simply treating yourself, this ice cream is sure to impress. It’s easy to make, and the result is a decadent dessert that feels luxurious. So, why not indulge in this delightful treat? You deserve it!
Ingredients for Crimson Cocoa Rhapsody Ice Cream
To create your own batch of Crimson Cocoa Rhapsody Ice Cream, you’ll need a few simple yet high-quality ingredients. Each component plays a vital role in achieving that perfect blend of flavors. Here’s what you’ll need:
- 2 cups of heavy cream
- 1 cup of whole milk
- 3/4 cup of granulated sugar
- 1 cup of fresh or frozen raspberries
- 1/2 cup of dark chocolate chips or chopped dark chocolate
- 1 teaspoon of vanilla extract
- Pinch of salt
These ingredients come together to create a creamy, dreamy ice cream that’s bursting with flavor. The heavy cream and whole milk provide a rich base, while the sugar adds just the right amount of sweetness. Raspberries bring a tangy twist, and dark chocolate adds depth and richness. Don’t forget the vanilla extract; it enhances all the flavors beautifully. Lastly, a pinch of salt balances the sweetness, making every bite even more enjoyable.
When selecting your ingredients, opt for high-quality chocolate and fresh raspberries if possible. This will elevate your ice cream to a whole new level. Now that you have your ingredients ready, let’s move on to the next step in creating this delightful dessert!
Step-by-Step Preparation of Crimson Cocoa Rhapsody Ice Cream
Step 1: Preparing the Raspberry Puree
To start, you’ll need to prepare the raspberry puree. If you’re using fresh raspberries, rinse them gently under cold water. For frozen raspberries, simply let them thaw for a few minutes. Next, place the raspberries in a blender or food processor. Blend until smooth, creating a vibrant puree. If you prefer a smoother texture, you can strain the puree through a fine mesh sieve to remove the seeds. Set this aside; it will add a delightful tang to your ice cream!
Step 2: Melting the Dark Chocolate
Now, let’s melt the dark chocolate. You can do this using a double boiler or a microwave. If using a double boiler, fill the bottom pot with water and bring it to a simmer. Place the chocolate in the top pot, stirring until it melts completely. If you choose the microwave, heat the chocolate in 30-second intervals, stirring in between until smooth. Be careful not to overheat it! Once melted, let it cool slightly before adding it to the ice cream base.
Step 3: Mixing the Base
In a large mixing bowl, combine the heavy cream, whole milk, and granulated sugar. Whisk these ingredients together until the sugar dissolves completely. This creamy mixture will serve as the base for your ice cream. Next, add the vanilla extract and a pinch of salt. These ingredients enhance the flavors and create a well-rounded taste. Mix well until everything is combined.
Step 4: Combining Flavors
Now it’s time to bring everything together! Start by adding the raspberry puree to the ice cream base. Stir gently to create a beautiful marbled effect. Then, pour in the melted dark chocolate, mixing carefully to ensure it’s evenly distributed. You want to see swirls of chocolate and raspberry throughout the mixture. This step is where the magic happens, as the flavors meld together to create a deliciously decadent treat!
Step 5: Churning the Ice Cream
Once your mixture is ready, it’s time to churn the ice cream. If you have an ice cream maker, pour the mixture into the machine and churn according to the manufacturer’s instructions. This process usually takes about 20-30 minutes. If you don’t have an ice cream maker, don’t worry! You can pour the mixture into a shallow dish and place it in the freezer. Stir it every 30 minutes for about 2-3 hours until it reaches a creamy consistency.
Step 6: Freezing the Ice Cream
After churning, transfer the ice cream to an airtight container. Smooth the top with a spatula and cover it tightly. Place the container in the freezer for at least 4 hours, or until the ice cream is firm. This final freezing step is crucial for achieving that perfect scoopable texture. Once it’s ready, you can enjoy your homemade Crimson Cocoa Rhapsody Ice Cream!
Variations of Crimson Cocoa Rhapsody Ice Cream
Alternative Fruit Options
If you want to switch things up, there are plenty of alternative fruits you can use in your Crimson Cocoa Rhapsody Ice Cream. While raspberries are delicious, other fruits can add their unique twist. For instance, strawberries can provide a sweeter flavor, while blackberries offer a slightly tart taste. You could even try using cherries for a rich, fruity experience. Just remember to prepare the fruit in the same way as the raspberries—blend it into a puree for that smooth texture. Each fruit will bring its own character to the ice cream, making it a fun experiment!
Different Chocolate Types
Chocolate lovers rejoice! You can also play around with different types of chocolate in your ice cream. While dark chocolate is the star of this recipe, you might want to try milk chocolate for a creamier, sweeter flavor. White chocolate can also be an interesting choice, adding a rich sweetness that pairs beautifully with fruit. If you’re feeling adventurous, consider using flavored chocolates, like orange or mint, to create a unique taste sensation. Just remember to adjust the sweetness of your base if you choose a sweeter chocolate. The possibilities are endless, and each variation will create a delightful new version of your Crimson Cocoa Rhapsody Ice Cream!
Cooking Note for Crimson Cocoa Rhapsody Ice Cream
When making your Crimson Cocoa Rhapsody Ice Cream, there are a few important cooking notes to keep in mind. First, always use high-quality ingredients. The flavor of your ice cream greatly depends on the quality of the cream, milk, and chocolate. Opt for organic or locally sourced products whenever possible. This will enhance the overall taste and texture of your ice cream.
Next, temperature matters! Make sure your heavy cream and whole milk are cold before mixing. This helps the ice cream churn more effectively, resulting in a creamier texture. If you’re using an ice cream maker, ensure it’s properly chilled according to the manufacturer’s instructions. A well-chilled bowl will help your ice cream freeze faster, preventing ice crystals from forming.
Additionally, don’t rush the freezing process. After churning, allow your ice cream to freeze for at least four hours. This step is crucial for achieving that perfect scoopable consistency. If you’re in a hurry, you might be tempted to skip this, but trust us, patience is key!
Lastly, feel free to experiment! Ice cream making is an art, and every batch can be a little different. Adjust the sweetness or add more fruit puree based on your personal preference. The beauty of homemade ice cream is that you can tailor it to your taste. So, have fun and enjoy the process of creating your very own Crimson Cocoa Rhapsody Ice Cream!
Serving Suggestions for Crimson Cocoa Rhapsody Ice Cream
Ideal Pairings
When it comes to serving your Crimson Cocoa Rhapsody Ice Cream, the right pairings can elevate your dessert experience. This ice cream is rich and flavorful, so consider serving it alongside light and refreshing options. Here are some delightful pairings to try:
- Fresh Berries: A handful of fresh berries, like strawberries or blueberries, can complement the tangy raspberry flavor beautifully. Their natural sweetness balances the richness of the chocolate.
- Chocolate Sauce: Drizzling warm chocolate sauce over your ice cream adds an extra layer of indulgence. The warm sauce contrasts nicely with the cold ice cream, creating a delightful texture.
- Whipped Cream: A dollop of freshly whipped cream can lighten the dessert. It adds a fluffy texture that pairs wonderfully with the creamy ice cream.
- Cookies or Brownies: Serve your ice cream with a side of chocolate chip cookies or fudgy brownies. The combination of textures and flavors will make for a decadent treat.
- Mint Leaves: For a refreshing touch, garnish your ice cream with fresh mint leaves. They add a pop of color and a hint of freshness that brightens the dish.
Presentation Tips
Presentation is key when serving your Crimson Cocoa Rhapsody Ice Cream. A beautiful presentation can make your dessert feel even more special. Here are some tips to impress your guests:
- Use Elegant Bowls: Serve the ice cream in elegant bowls or glass cups. This adds a touch of sophistication to your dessert.
- Layering: Create layers by alternating scoops of ice cream with layers of raspberry puree or chocolate sauce in a tall glass. This not only looks stunning but also enhances the flavor with each bite.
- Garnish Creatively: Use garnishes like chocolate shavings, crushed nuts, or edible flowers to add visual appeal. These small touches can make a big difference.
- Serve with a Scoop: Use a warm ice cream scoop to create perfectly round scoops. This makes for a neat and appealing presentation.
- Chill Your Serving Plates: For an extra touch, chill your serving plates in the freezer before serving. This keeps the ice cream cold longer and adds a professional touch.
With these serving suggestions and presentation tips, your Crimson Cocoa Rhapsody Ice Cream will not only taste amazing but also look stunning on any table. Enjoy the delightful experience of sharing this homemade treat with family and friends!
Tips for Perfecting Crimson Cocoa Rhapsody Ice Cream
Creating the perfect Crimson Cocoa Rhapsody Ice Cream is an art that can be mastered with a few helpful tips. These suggestions will ensure your homemade ice cream turns out creamy, flavorful, and utterly delightful. Let’s dive into some essential tips to elevate your ice cream-making game!
Choose Quality Ingredients
First and foremost, the quality of your ingredients matters. Opt for high-quality heavy cream and whole milk. Organic or locally sourced products can enhance the flavor and texture of your ice cream. When it comes to chocolate, select a good quality dark chocolate. The better the ingredients, the more delicious your ice cream will be!
Chill Everything
Before you start mixing, make sure all your ingredients are cold. This includes your heavy cream, milk, and even the mixing bowl if possible. Chilling helps the ice cream churn more effectively, resulting in a smoother texture. If you’re using an ice cream maker, ensure the bowl is properly frozen according to the manufacturer’s instructions.
Don’t Rush the Freezing Process
After churning, patience is key! Allow your ice cream to freeze for at least four hours. This step is crucial for achieving that perfect scoopable consistency. If you skip this, you might end up with a soft, mushy texture that’s hard to serve. So, resist the temptation to dig in too soon!
Experiment with Flavors
Feel free to get creative! The beauty of homemade ice cream is that you can tailor it to your taste. Try adding different fruits, nuts, or even spices to your mixture. A pinch of cinnamon or a splash of almond extract can add a unique twist. Don’t be afraid to experiment and find your perfect flavor combination!
Store Properly
To keep your ice cream fresh, store it in an airtight container. This prevents ice crystals from forming and keeps your ice cream creamy. If you notice any ice crystals forming on the surface, simply stir the ice cream before serving. This will help restore its smooth texture.
By following these tips, you’ll be well on your way to perfecting your Crimson Cocoa Rhapsody Ice Cream. Each batch can be a little different, so enjoy the process and have fun creating your own delicious variations!
Breakdown of Time for Crimson Cocoa Rhapsody Ice Cream
Prep Time
Preparing your Crimson Cocoa Rhapsody Ice Cream is a delightful process that doesn’t take too long. You’ll need about 20-30 minutes for the prep work. This includes gathering your ingredients, making the raspberry puree, and melting the dark chocolate. Taking your time during this stage ensures that everything is ready for the next steps. Plus, it’s a great opportunity to enjoy the aromas of fresh raspberries and rich chocolate!
Cooking Time
The cooking time for this ice cream is minimal. Once you’ve mixed your base and combined the flavors, the actual churning process takes about 20-30 minutes if you’re using an ice cream maker. If you’re opting for the no-machine method, you’ll need to stir the mixture every 30 minutes for about 2-3 hours. This helps achieve that creamy texture without an ice cream maker. So, while the active cooking time is short, the waiting time is essential for the best results!
Total Time
In total, you should expect to spend around 4-5 hours from start to finish. This includes the prep time, cooking time, and the crucial freezing time. After churning, it’s important to let your ice cream freeze for at least 4 hours to reach that perfect scoopable consistency. While it may feel like a long wait, the end result is a deliciously creamy and decadent dessert that’s well worth the time invested!
Nutritional Information for Crimson Cocoa Rhapsody Ice Cream
Calories
When indulging in a scoop of Crimson Cocoa Rhapsody Ice Cream, it’s good to know what you’re enjoying. Each serving, which is about half a cup, contains approximately 250-300 calories. This number can vary slightly based on the specific ingredients you use, especially the type of chocolate and the amount of sugar. While this ice cream is a treat, it’s important to enjoy it in moderation as part of a balanced diet.
Protein
In terms of protein, each serving of this delightful ice cream offers around 4-5 grams. The protein primarily comes from the whole milk and heavy cream used in the recipe. While it’s not a significant source of protein, it does contribute to the overall nutritional profile of the dessert. Pairing it with fresh berries can also add a bit more protein and fiber to your treat!
Sodium
As for sodium content, a serving of Crimson Cocoa Rhapsody Ice Cream contains about 50-70 milligrams. This is relatively low, making it a suitable option for those watching their sodium intake. The pinch of salt added during preparation helps enhance the flavors without significantly increasing the sodium levels. Always check the labels of your ingredients to ensure you’re aware of the sodium content in your specific brands.
Overall, while Crimson Cocoa Rhapsody Ice Cream is a delicious dessert, it’s essential to enjoy it as an occasional treat. With its rich flavors and creamy texture, it’s sure to satisfy your sweet cravings while still being mindful of your nutritional choices!
FAQs about Crimson Cocoa Rhapsody Ice Cream
Can I use fresh raspberries instead of frozen?
Absolutely! Fresh raspberries can be used in place of frozen ones. Just make sure to wash them gently under cold water before blending. Fresh raspberries will give your ice cream a vibrant flavor and beautiful color. However, if fresh raspberries are out of season, frozen ones work just as well. They are often picked at peak ripeness and can be just as tasty!
How long can I store Crimson Cocoa Rhapsody Ice Cream?
Your homemade Crimson Cocoa Rhapsody Ice Cream can be stored in the freezer for about 2-3 weeks. To keep it fresh, make sure to store it in an airtight container. This helps prevent ice crystals from forming and keeps your ice cream creamy. If you notice any ice crystals on the surface, simply stir the ice cream before serving to restore its smooth texture.
Can I make this ice cream without an ice cream maker?
Yes, you can definitely make Crimson Cocoa Rhapsody Ice Cream without an ice cream maker! After mixing your ingredients, pour the mixture into a shallow dish and place it in the freezer. Stir the mixture every 30 minutes for about 2-3 hours. This method helps break up ice crystals and creates a creamy texture, even without a machine. It may take a bit longer, but the results will still be delicious!
What can I substitute for dark chocolate?
If you prefer a different chocolate flavor, there are several substitutes you can use. Milk chocolate is a sweeter option that will give your ice cream a creamier taste. White chocolate can also be used for a rich, sweet flavor. If you want to try something unique, consider flavored chocolates, like mint or orange. Just keep in mind that you may need to adjust the sugar in your base, depending on the sweetness of the chocolate you choose.
Conclusion on Crimson Cocoa Rhapsody Ice Cream
Final Thoughts on Making Your Own Ice Cream
Making your own Crimson Cocoa Rhapsody Ice Cream is not just about creating a delicious dessert; it’s about the joy of crafting something special. The process allows you to explore flavors, experiment with ingredients, and enjoy the satisfaction of serving a homemade treat. Each scoop of this ice cream is a celebration of the rich combination of tangy raspberries and decadent dark chocolate.
As you embark on this delightful journey, remember that the key to great ice cream lies in quality ingredients and a little patience. Whether you’re enjoying it on a hot summer day or serving it at a gathering, this ice cream is sure to impress. Plus, the vibrant colors and rich flavors make it a feast for the eyes as well as the palate.
So, gather your ingredients, follow the steps, and let your creativity shine. Don’t hesitate to try different fruits or chocolates to make this recipe your own. The beauty of homemade ice cream is that it can be tailored to your taste, making every batch a unique experience.
In the end, the joy of sharing your homemade Crimson Cocoa Rhapsody Ice Cream with family and friends is what truly makes it special. Enjoy the process, savor each bite, and relish the compliments that are sure to come your way. Happy ice cream making!
Relevant Recipes Link:
Indulge in more frozen dessert delights with these must-try recipes:
- Creamy Coconut Ice Cream: A Tropical Treat
- Caramel Chocolate Chunk Ice Cream: A Decadent Delight
- Rocky Road Ice Cream: A Classic Favorite
For more fantastic recipes and food inspiration, follow us on Pinterest!