Introduction to Crunchy & Creamy Kunafa
What is Crunchy & Creamy Kunafa?
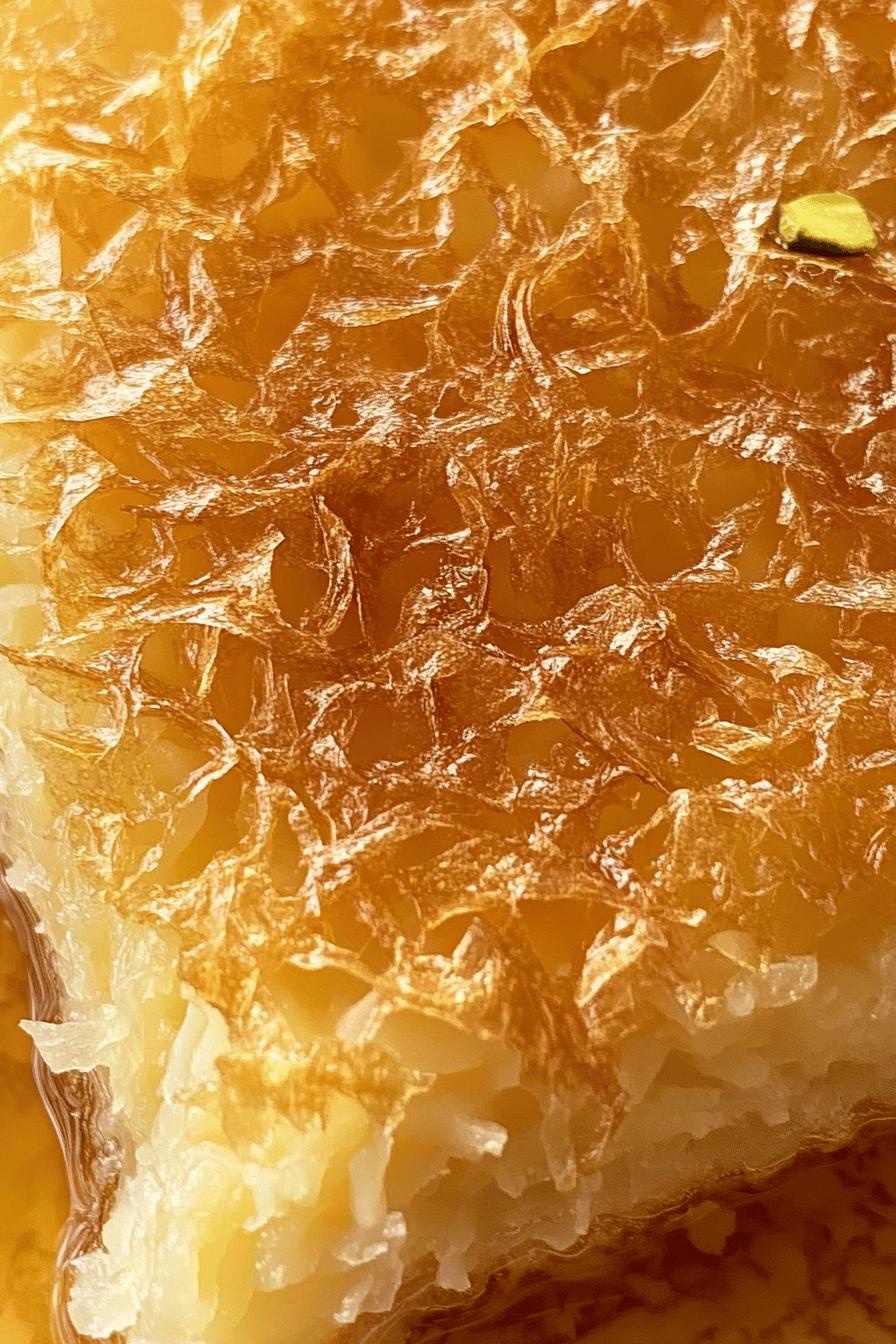
Crunchy & Creamy Kunafa is a delightful dessert that brings joy to many. This traditional Middle Eastern treat features layers of crispy, golden phyllo dough. The dough is often filled with a rich, creamy cheese or custard, making it a perfect blend of textures. When you take a bite, you experience the crunchiness of the outer layer followed by the smooth, creamy filling. To top it off, the kunafa is soaked in a fragrant syrup, adding sweetness and moisture. It’s a dessert that truly satisfies any sweet tooth!
The History of Kunafa
Kunafa has a rich history that dates back centuries. It is believed to have originated in the Middle East, particularly in the region of the Levant. The dessert has evolved over time, with various cultures adding their unique twists. In ancient times, it was often served during special occasions and celebrations. Today, kunafa is enjoyed by many around the world, especially during Ramadan and festive gatherings. Its popularity continues to grow, making it a beloved dessert for both young and old alike.
Ingredients for Crunchy & Creamy Kunafa
To create the perfect Crunchy & Creamy Kunafa, you will need a selection of fresh ingredients. Each component plays a vital role in achieving that delightful balance of crunch and creaminess. Here’s what you’ll need:
- For the Kunafa:
- 1 package of shredded phyllo dough (about 400 grams)
- 1 cup unsalted butter, melted
- 1 cup of fine semolina (optional, for added texture)
- For the Creamy Filling:
- 2 cups of ricotta cheese or mozzarella cheese
- 1 cup of heavy cream
- 1/2 cup of sugar
- 1 teaspoon of vanilla extract
- For the Syrup:
- 1 cup of sugar
- 1/2 cup of water
- 1 tablespoon of lemon juice
- 1 teaspoon of rose water or orange blossom water (optional, for flavor)
Gathering these ingredients will set you on the right path to making a delicious Crunchy & Creamy Kunafa. Each ingredient contributes to the overall flavor and texture, ensuring that every bite is a heavenly experience. Now that you have everything ready, let’s move on to the preparation steps!
Step-by-Step Preparation of Crunchy & Creamy Kunafa
Step 1: Preparing the Phyllo Dough
To start, you need to prepare the phyllo dough. First, take the package of shredded phyllo dough and gently separate the strands. This step is crucial for achieving that perfect crunch. Next, melt the unsalted butter in a small saucepan. Once melted, use a brush to coat a baking dish with some of the butter. This will help the kunafa crisp up nicely. After that, mix the remaining melted butter with the shredded phyllo dough. Make sure every strand is well-coated. This will ensure a golden, crispy texture when baked.
Step 2: Making the Creamy Filling
Now, let’s move on to the creamy filling. In a mixing bowl, combine the ricotta cheese or mozzarella cheese with heavy cream. Add the sugar and vanilla extract to the mixture. Stir everything together until it’s smooth and creamy. This filling is what makes the kunafa so delightful! Make sure there are no lumps, as a smooth filling will enhance the overall experience. Set this mixture aside while you prepare to assemble the kunafa.
Step 3: Assembling the Kunafa
Assembling the kunafa is where the magic happens! Start by spreading half of the buttered phyllo dough evenly in the bottom of your prepared baking dish. Press it down gently to create a solid base. Next, pour the creamy filling over the phyllo layer, spreading it out evenly. Finally, top it with the remaining phyllo dough, making sure to cover the filling completely. Drizzle any leftover melted butter on top. This will help achieve that beautiful golden color while baking.
Step 4: Baking the Kunafa
Preheat your oven to 350°F (175°C). Once the oven is ready, place the assembled kunafa inside. Bake it for about 30 to 40 minutes, or until the top is golden brown and crispy. Keep an eye on it to prevent burning. The aroma of baking kunafa will fill your kitchen, making it hard to resist! When it’s done, remove it from the oven and let it cool for a few minutes before soaking it in syrup.
Step 5: Soaking in Syrup
While the kunafa is cooling, prepare the syrup. In a saucepan, combine sugar, water, and lemon juice. Bring it to a boil, then reduce the heat and let it simmer for about 10 minutes. If you’re using rose water or orange blossom water, add it just before removing the syrup from the heat. Once the kunafa has cooled slightly, pour the warm syrup evenly over the top. Allow it to soak for at least 30 minutes. This step is essential, as it infuses the kunafa with sweetness and moisture, making every bite irresistible!
Variations of Crunchy & Creamy Kunafa
Different Fillings for Crunchy & Creamy Kunafa
While the classic creamy filling is delightful, there are many ways to customize your Crunchy & Creamy Kunafa. You can experiment with different fillings to suit your taste. Here are some popular options:
- Pistachio Cream: Blend pistachios with cream and sugar for a nutty twist. This filling adds a rich flavor and a beautiful green color.
- Chocolate Ganache: For chocolate lovers, a smooth chocolate ganache can be a decadent filling. Simply melt chocolate with cream and let it cool before spreading it in the kunafa.
- Fruit Compote: Fresh fruits like strawberries or mangoes can be cooked down into a compote. This adds a fruity sweetness that pairs well with the crispy layers.
- Nut Mixture: A blend of chopped nuts, such as almonds, walnuts, or hazelnuts, mixed with sugar and cinnamon can create a crunchy and flavorful filling.
Feel free to mix and match these fillings to create your own unique version of kunafa. Each variation brings a new taste experience, making this dessert even more exciting!
Flavoring the Syrup
The syrup is a key component of Crunchy & Creamy Kunafa, and you can enhance its flavor in various ways. Here are some ideas to elevate your syrup:
- Citrus Zest: Adding lemon or orange zest to the syrup gives it a refreshing twist. The citrus notes brighten the overall flavor.
- Spices: A pinch of cinnamon or cardamom can add warmth and depth to the syrup. These spices complement the sweetness beautifully.
- Herbs: Infusing the syrup with fresh mint or basil can create a unique flavor profile. This is especially refreshing during warm months.
- Vanilla Bean: For a rich aroma, consider adding a split vanilla bean to the syrup while it simmers. This will impart a lovely vanilla flavor.
By experimenting with different fillings and syrup flavors, you can create a personalized Crunchy & Creamy Kunafa that reflects your taste preferences. Enjoy the process of making this delightful dessert!
Cooking Note for Crunchy & Creamy Kunafa
When preparing Crunchy & Creamy Kunafa, a few cooking notes can help ensure your dessert turns out perfectly every time. First, always use fresh ingredients. Fresh phyllo dough and quality cheese will significantly enhance the flavor and texture of your kunafa. If you can, opt for high-quality butter, as it adds richness to the dish.
Next, pay attention to the temperature of your oven. Each oven can vary, so it’s wise to keep an eye on the kunafa as it bakes. If you notice the top browning too quickly, you can cover it loosely with aluminum foil to prevent burning while allowing the inside to cook through.
Additionally, let the kunafa cool slightly before pouring the syrup over it. This helps the syrup soak in better, ensuring that every bite is sweet and moist. If you pour the syrup on while the kunafa is too hot, it may not absorb as well, leading to a less satisfying texture.
Lastly, don’t rush the soaking process. Allowing the kunafa to sit in the syrup for at least 30 minutes is crucial. This waiting period allows the flavors to meld and the syrup to penetrate the layers, creating that signature crunchy yet creamy experience.
By following these cooking notes, you’ll be well on your way to mastering the art of making Crunchy & Creamy Kunafa. Enjoy the delightful process and the delicious results!
Serving Suggestions for Crunchy & Creamy Kunafa
Serving Crunchy & Creamy Kunafa is just as important as making it. Presentation can elevate the experience, making it even more enjoyable. Here are some delightful serving suggestions to consider:
- Garnish with Nuts: Sprinkle chopped pistachios, almonds, or walnuts on top of the kunafa before serving. This adds a crunchy texture and a pop of color, making the dessert visually appealing.
- Drizzle with Extra Syrup: For those who love sweetness, serve the kunafa with a drizzle of warm syrup on top. This enhances the flavor and adds moisture, making each bite even more delicious.
- Pair with Ice Cream: A scoop of vanilla or rose-flavored ice cream complements the warm kunafa beautifully. The cold ice cream contrasts with the warm dessert, creating a delightful balance.
- Serve with Fresh Fruits: Fresh fruits like strawberries, raspberries, or orange slices can add a refreshing touch. The fruity flavors can cut through the richness of the kunafa, providing a well-rounded dessert experience.
- Accompany with Tea or Coffee: Enjoying kunafa with a cup of mint tea or Arabic coffee can enhance the overall experience. The warm beverages pair well with the sweet flavors of the dessert.
When serving Crunchy & Creamy Kunafa, consider your guests’ preferences. You can set up a small dessert bar with various toppings and accompaniments, allowing everyone to customize their servings. This interactive approach makes the dessert even more enjoyable and memorable!
Tips for Perfecting Crunchy & Creamy Kunafa
Making the perfect Crunchy & Creamy Kunafa can be a delightful experience, but a few tips can help you achieve that ideal balance of crunch and creaminess. Here are some essential tips to keep in mind:
- Use Quality Ingredients: Always opt for fresh and high-quality ingredients. Fresh phyllo dough, good cheese, and pure butter will significantly enhance the flavor of your kunafa.
- Keep the Phyllo Dough Moist: Phyllo dough can dry out quickly. If you’re not using it immediately, cover it with a damp cloth to keep it moist. This prevents it from becoming brittle and breaking apart.
- Don’t Skimp on Butter: Generously coating the phyllo dough with melted butter is key to achieving that golden, crispy texture. It also adds richness to the flavor.
- Layering is Key: When assembling the kunafa, ensure that the layers are even. This helps in achieving a uniform texture and ensures that every bite has the perfect combination of crunch and creaminess.
- Monitor Baking Time: Every oven is different, so keep an eye on your kunafa as it bakes. Look for a golden brown color on top, and don’t hesitate to adjust the baking time as needed.
- Let it Rest: After baking, allow the kunafa to rest for a few minutes before pouring the syrup. This helps the layers settle and makes it easier to cut and serve.
- Experiment with Flavors: Don’t be afraid to try different fillings and syrup flavors. Adding spices, nuts, or fruits can create a unique twist on the traditional recipe.
- Serve Warm: Kunafa is best enjoyed warm. If it cools down, you can reheat it slightly in the oven before serving to restore its crispy texture.
By following these tips, you’ll be well on your way to mastering the art of making Crunchy & Creamy Kunafa. Each attempt will bring you closer to perfection, and soon you’ll be impressing friends and family with this delightful dessert!
Breakdown of Time for Crunchy & Creamy Kunafa
Prep Time
Preparing Crunchy & Creamy Kunafa is a fun and engaging process. The prep time typically takes about 30 to 40 minutes. This includes gathering your ingredients, preparing the phyllo dough, and making the creamy filling. Taking your time during this stage ensures that everything is ready for assembly, leading to a smoother cooking experience. Remember, the more organized you are, the easier it will be to create this delicious dessert!
Cooking Time
The cooking time for Crunchy & Creamy Kunafa is around 30 to 40 minutes. During this time, the kunafa bakes in the oven until it reaches a beautiful golden brown color. It’s essential to keep an eye on it to prevent over-baking. The aroma that fills your kitchen will be a delightful reminder that your dessert is almost ready. Once it’s done, let it cool slightly before soaking it in syrup.
Total Time
In total, you can expect to spend about 1 to 1.5 hours making Crunchy & Creamy Kunafa. This includes both prep and cooking time. While it may seem like a bit of a commitment, the end result is well worth it! You’ll have a stunning dessert that’s perfect for sharing with family and friends. Plus, the joy of creating something so delicious makes the time spent in the kitchen truly rewarding.
Nutritional Information for Crunchy & Creamy Kunafa
Calories
Crunchy & Creamy Kunafa is a rich dessert that is sure to satisfy your sweet cravings. A typical serving of kunafa (about 100 grams) contains approximately 350 to 400 calories. This calorie count can vary based on the specific ingredients used, such as the type of cheese or the amount of syrup. While it’s a decadent treat, enjoying it in moderation is key to balancing your diet.
Protein
In terms of protein, a serving of Crunchy & Creamy Kunafa provides around 8 to 10 grams. The protein mainly comes from the cheese used in the filling. Ricotta or mozzarella cheese adds not only creaminess but also a good source of protein, making this dessert a bit more satisfying. Pairing it with a protein-rich meal can help you feel fuller longer.
Sodium
When it comes to sodium content, a serving of kunafa typically contains about 300 to 400 milligrams. This sodium level can vary depending on the type of cheese and butter used. If you’re watching your sodium intake, consider using low-sodium cheese options or reducing the amount of added salt in the recipe. Being mindful of these factors can help you enjoy this delightful dessert without compromising your dietary goals.
FAQs about Crunchy & Creamy Kunafa
What is the best way to store Crunchy & Creamy Kunafa?
Storing Crunchy & Creamy Kunafa properly is essential to maintain its delightful texture. To store it, first, let the kunafa cool completely. Then, cover it tightly with plastic wrap or aluminum foil. You can also place it in an airtight container. Store it in the refrigerator for up to 3 days. When you’re ready to enjoy it again, reheat it in the oven at a low temperature to restore its crispy texture. Avoid microwaving, as this can make the kunafa soggy.
Can I make Crunchy & Creamy Kunafa ahead of time?
Yes, you can make Crunchy & Creamy Kunafa ahead of time! To do this, prepare the kunafa up to the baking stage. Assemble it in the baking dish, cover it tightly, and refrigerate for up to 24 hours. When you’re ready to bake, simply preheat your oven and bake it as directed. This method allows you to enjoy fresh kunafa without the last-minute rush, making it perfect for gatherings or special occasions.
What can I substitute for the cheese in Crunchy & Creamy Kunafa?
If you’re looking for alternatives to cheese in Crunchy & Creamy Kunafa, there are several options. You can use a dairy-free cream cheese or a vegan ricotta made from nuts. Silken tofu blended with a bit of sugar and vanilla can also work as a creamy filling. For a different flavor, consider using mascarpone cheese or a custard filling. Each substitute will give a unique twist to the dessert while still keeping it delicious!
How do I know when Crunchy & Creamy Kunafa is done baking?
Knowing when your Crunchy & Creamy Kunafa is done baking is key to achieving that perfect golden color. Keep an eye on the top; it should be a beautiful golden brown. You can also gently press the top with a spatula; it should feel firm and crispy. If the edges are browning too quickly, cover them with aluminum foil to prevent burning. Once it’s done, the aroma will fill your kitchen, signaling that your kunafa is ready to be enjoyed!
Conclusion on Crunchy & Creamy Kunafa
In conclusion, Crunchy & Creamy Kunafa is more than just a dessert; it’s a celebration of flavors and textures that brings joy to any occasion. This traditional Middle Eastern treat combines the delightful crunch of phyllo dough with a rich, creamy filling, all soaked in a fragrant syrup. Whether you’re enjoying it during a festive gathering or simply indulging in a sweet craving, kunafa is sure to impress.
As you explore the various ways to customize your kunafa, remember that the possibilities are endless. From different fillings to unique syrup flavors, each variation allows you to express your creativity in the kitchen. Plus, with the tips and techniques shared in this article, you’ll be well-equipped to master the art of making this delicious dessert.
So, gather your ingredients, invite your friends and family, and embark on a delightful culinary adventure. The joy of creating and sharing Crunchy & Creamy Kunafa will surely make your efforts worthwhile. Enjoy every bite of this heavenly dessert, and don’t forget to savor the sweet moments it brings!
Relevant Recipes Link:
Ready to explore more delightful and crunchy recipes? Don’t miss out on these must-try dishes:
- Crunchy Thai Chickpea Salad: A Flavorful Twist
- Chocolate Crunch Ice Cream Sundae: A Sweet Indulgence
- Crunchy Beer-Battered Catfish: A Seafood Delight
For more fantastic recipes and food inspiration, follow us on Pinterest!