Introduction to Fruit Salad Cheesecake
What Makes Fruit Salad Cheesecake Special?
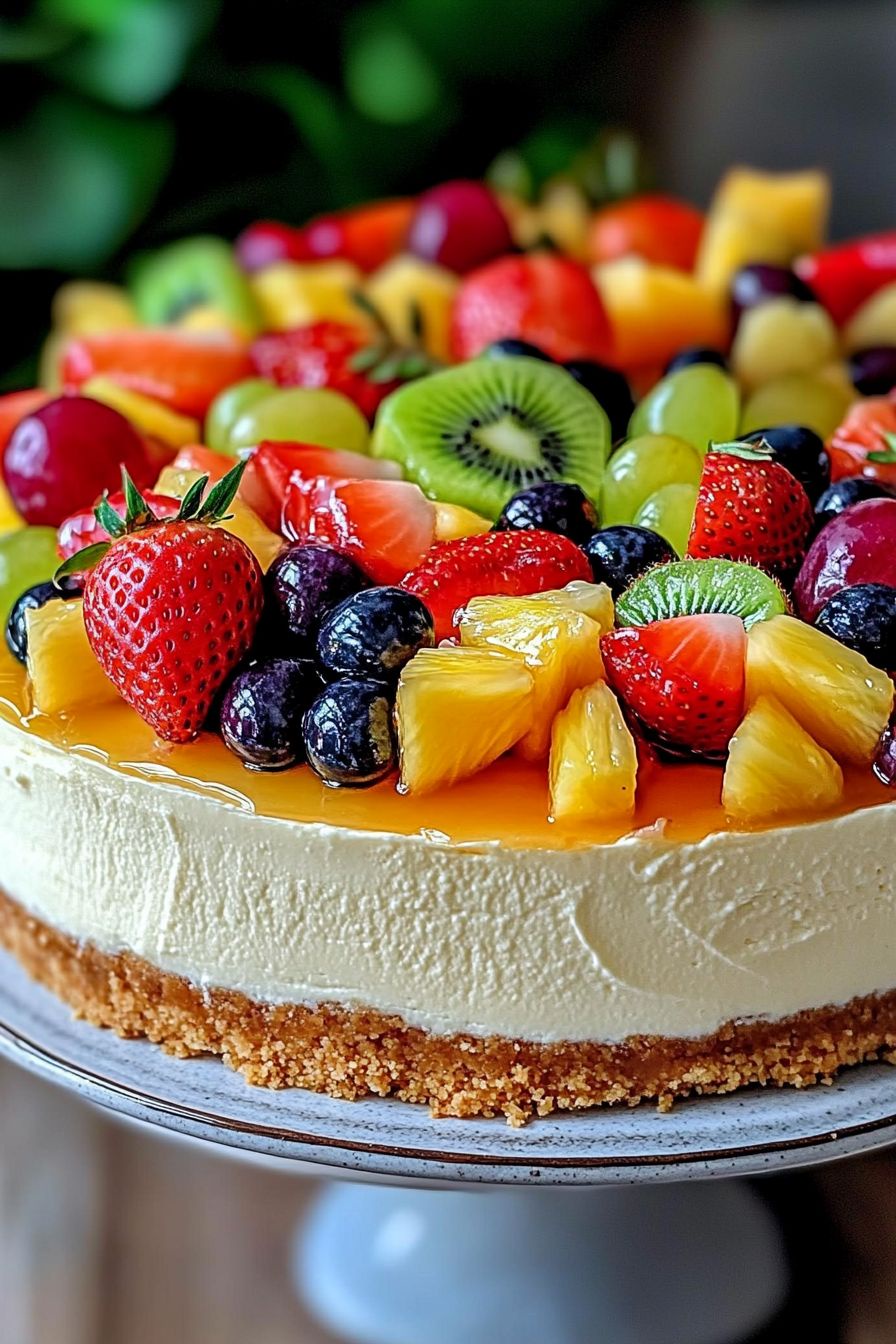
Fruit Salad Cheesecake is a delightful dessert that brings together two beloved treats: cheesecake and fresh fruit. This unique combination creates a dessert that is both rich and refreshing. The creamy cheesecake filling pairs perfectly with the vibrant, juicy fruits on top. Each bite offers a burst of flavor, making it a favorite among dessert lovers. The balance of sweetness from the cheesecake and the natural tartness of the fruits creates a harmonious taste experience. Plus, it’s visually stunning, making it a showstopper at any gathering!
Perfect Occasions for Serving Fruit Salad Cheesecake
Fruit Salad Cheesecake is versatile and can be served on various occasions. Whether it’s a birthday party, a summer barbecue, or a holiday gathering, this dessert fits right in. It’s also a fantastic choice for brunches or potlucks, where guests appreciate a light yet indulgent treat. The colorful fruit topping adds a festive touch, making it perfect for celebrations. Additionally, it’s a great way to impress family and friends with your baking skills. No matter the event, this cheesecake is sure to be a hit!
Ingredients for Fruit Salad Cheesecake
Essential Ingredients for the Crust
The crust of your Fruit Salad Cheesecake is the foundation of this delicious dessert. To create a perfect base, you will need:
- 2 cups crushed graham crackers: These provide a sweet and crunchy texture.
- 1/2 cup melted butter: This helps bind the crumbs together and adds richness.
Mix these two ingredients well, and you’ll have a crust that complements the creamy filling beautifully. Press it firmly into your springform pan for a sturdy base.
Key Components of the Cheesecake Filling
The filling is where the magic happens! For a creamy and smooth cheesecake, gather the following ingredients:
- 16 oz cream cheese, softened: This is the star of the filling, providing that rich, creamy texture.
- 1/2 cup sugar: This sweetens the cheesecake, balancing the flavors.
- 2 eggs: These help set the cheesecake and give it structure.
- 1 tsp vanilla extract: This adds a lovely aroma and flavor.
- 1/2 cup sour cream: This ingredient adds tanginess and creaminess, making the filling extra luscious.
When combined, these ingredients create a filling that is both rich and light, making it a perfect match for the fresh fruit topping.
Fresh Fruits for the Topping
The topping is what makes this cheesecake truly special. You can use a variety of fresh fruits to add color and flavor. Here are some great options:
- 1 cup strawberries, sliced: Their sweetness and vibrant color are always a hit.
- 1/2 cup pineapple chunks: These add a tropical twist and a juicy texture.
- 1/2 cup kiwi, sliced: Their tartness complements the sweetness of the other fruits.
- 1/2 cup grapes, halved: These provide a nice crunch and sweetness.
- 1/2 cup honey or fruit glaze: This drizzle adds shine and extra sweetness to the fruit.
Feel free to mix and match your favorite fruits! The more colorful, the better. This topping not only enhances the flavor but also makes your cheesecake visually appealing.
Step-by-Step Preparation of Fruit Salad Cheesecake
Step 1: Prepare the Crust for Fruit Salad Cheesecake
To start, gather your ingredients for the crust. In a mixing bowl, combine the crushed graham crackers and melted butter. Stir until the crumbs are evenly coated. This mixture should feel like wet sand. Next, take a 9-inch springform pan and grease it lightly. Press the graham cracker mixture firmly into the bottom of the pan. Make sure it’s even and compact. This step is crucial for a sturdy crust. Once done, place the pan in the refrigerator to chill while you prepare the filling. This helps the crust set nicely.
Step 2: Make the Cheesecake Filling for Fruit Salad Cheesecake
Now, let’s move on to the cheesecake filling! In a large mixing bowl, add the softened cream cheese and sugar. Using an electric mixer, beat them together until the mixture is smooth and creamy. This should take about 2-3 minutes. Next, add the eggs, vanilla extract, and sour cream. Mix everything together until it’s well combined and fluffy. Be careful not to overmix, as this can introduce too much air into the filling. Once it’s creamy and smooth, it’s ready to pour over the chilled crust.
Step 3: Bake & Cool the Fruit Salad Cheesecake
Preheat your oven to 325°F (163°C). Carefully pour the cheesecake filling over the prepared crust in the springform pan. Spread it evenly with a spatula. Place the pan in the oven and bake for 45-50 minutes. You’ll know it’s done when the edges are set, but the center still has a slight jiggle. Once baked, turn off the oven and crack the door open. Let the cheesecake cool in the oven for about an hour. This helps prevent cracks. After that, transfer it to the fridge and chill for at least 4 hours or overnight for the best results.
Step 4: Add the Fruit Topping to Fruit Salad Cheesecake
Once your cheesecake is fully chilled, it’s time to add the fruit topping! Carefully remove the cheesecake from the springform pan. Arrange the fresh fruits on top in a beautiful pattern. You can be creative here! Use the strawberries, pineapple chunks, kiwi slices, and halved grapes to create a colorful display. Finally, drizzle the honey or fruit glaze over the fruits. This not only adds sweetness but also gives a lovely shine to your cheesecake.
Step 5: Serve & Enjoy Your Fruit Salad Cheesecake
Your Fruit Salad Cheesecake is now ready to be served! For the best experience, chill it for an additional 30 minutes before slicing. This will make it easier to cut and serve. When you’re ready, slice it into wedges and plate it up. Each slice should reveal the creamy filling and vibrant fruit topping. Enjoy this delightful dessert with family and friends. It’s sure to be a crowd-pleaser!
Variations of Fruit Salad Cheesecake
Different Fruit Combinations for Fruit Salad Cheesecake
One of the best things about Fruit Salad Cheesecake is its versatility. You can easily switch up the fruit toppings to suit your taste or the season. Here are some delicious combinations to consider:
- Berry Medley: Use a mix of blueberries, raspberries, and blackberries for a tart and sweet flavor.
- Tropical Delight: Combine mango, papaya, and coconut flakes for a refreshing tropical twist.
- Citrus Burst: Add orange segments, grapefruit slices, and lemon zest for a zesty kick.
- Autumn Harvest: Top with sliced apples, pears, and a sprinkle of cinnamon for a cozy fall dessert.
- Mixed Melons: Use watermelon, cantaloupe, and honeydew for a light and hydrating option.
Feel free to experiment with your favorite fruits! The key is to balance sweetness and tartness for a delightful topping that complements the creamy cheesecake.
Alternative Crust Options for Fruit Salad Cheesecake
If you want to try something different, consider these alternative crust options for your Fruit Salad Cheesecake:
- Chocolate Cookie Crust: Use crushed chocolate sandwich cookies instead of graham crackers for a rich, chocolatey base.
- Almond Flour Crust: For a gluten-free option, mix almond flour with melted butter and a bit of sugar for a nutty flavor.
- Oreo Crust: Crushed Oreos make a deliciously sweet and crunchy crust that pairs well with the cheesecake filling.
- Shortbread Crust: Use crushed shortbread cookies for a buttery and crumbly texture that adds a unique flavor.
- Granola Crust: Combine granola with melted butter for a healthier, crunchy option that adds fiber.
These alternative crusts can add a new dimension to your cheesecake, making it even more enjoyable. Choose one that fits your flavor preferences and dietary needs!
Cooking Note for Fruit Salad Cheesecake
Tips for Perfecting Your Fruit Salad Cheesecake
Creating the perfect Fruit Salad Cheesecake is all about attention to detail. Here are some helpful tips to ensure your cheesecake turns out delicious every time:
- Use Room Temperature Ingredients: Make sure your cream cheese and eggs are at room temperature. This helps them blend smoothly, resulting in a creamy filling without lumps.
- Don’t Overmix: When mixing the filling, avoid overmixing after adding the eggs. This can introduce too much air, causing cracks during baking.
- Check for Doneness: Keep an eye on your cheesecake while it bakes. It should be set around the edges but still slightly jiggly in the center. This ensures a creamy texture.
- Cool Gradually: Allow the cheesecake to cool in the oven with the door slightly ajar. This gradual cooling helps prevent cracks from forming on the surface.
- Chill Thoroughly: Refrigerate your cheesecake for at least four hours, or overnight if possible. This allows the flavors to meld and the texture to firm up.
- Fresh Fruits: Use fresh, ripe fruits for the topping. They not only taste better but also enhance the visual appeal of your cheesecake.
- Drizzle with Care: When adding honey or fruit glaze, drizzle it gently over the fruits. This adds shine and sweetness without overwhelming the flavors.
By following these tips, you’ll be well on your way to making a stunning and delicious Fruit Salad Cheesecake that will impress everyone!
Serving Suggestions for Fruit Salad Cheesecake
Ideal Pairings with Fruit Salad Cheesecake
Fruit Salad Cheesecake is a delightful treat on its own, but pairing it with the right accompaniments can elevate your dessert experience. Here are some ideal pairings to consider:
- Fresh Mint Leaves: A sprinkle of fresh mint leaves adds a refreshing touch and enhances the fruity flavors.
- Whipped Cream: A dollop of lightly sweetened whipped cream on the side complements the cheesecake’s creaminess.
- Ice Cream: Serve with a scoop of vanilla or coconut ice cream for a delicious contrast in temperature and texture.
- Coffee or Tea: A warm cup of coffee or herbal tea pairs beautifully, balancing the sweetness of the cheesecake.
- Fruit Compote: A drizzle of homemade fruit compote can add an extra layer of flavor and moisture.
These pairings not only enhance the taste but also create a more enjoyable dining experience. Feel free to mix and match based on your preferences!
Presentation Ideas for Fruit Salad Cheesecake
Presentation is key when serving your Fruit Salad Cheesecake. A beautiful display can make your dessert even more appealing. Here are some creative ideas:
- Layered Slices: When slicing, layer the cheesecake with fruits on top for a stunning visual effect.
- Garnish with Edible Flowers: Adding edible flowers can bring a pop of color and elegance to your dessert.
- Use a Cake Stand: Present your cheesecake on a decorative cake stand to elevate its appearance.
- Serve on Colorful Plates: Brightly colored plates can enhance the vibrant colors of the fruits and make the cheesecake stand out.
- Drizzle Sauce Artistically: When adding honey or glaze, drizzle it in an artistic pattern around the plate for a professional touch.
With these presentation ideas, your Fruit Salad Cheesecake will not only taste amazing but also look like a masterpiece. Enjoy impressing your guests with both flavor and style!
Tips for Making the Best Fruit Salad Cheesecake
Common Mistakes to Avoid with Fruit Salad Cheesecake
Making a Fruit Salad Cheesecake can be a fun and rewarding experience. However, there are some common mistakes that can affect the final result. Here are a few to watch out for:
- Using Cold Ingredients: Always use room temperature cream cheese and eggs. Cold ingredients can lead to lumps in your filling, making it less creamy.
- Overmixing the Filling: Mixing too much after adding the eggs can introduce air, causing cracks during baking. Mix just until combined for a smooth texture.
- Skipping the Cooling Step: Allow your cheesecake to cool gradually in the oven. This helps prevent cracks and ensures a creamy consistency.
- Not Chilling Long Enough: Refrigerate your cheesecake for at least four hours, or overnight if possible. This helps the flavors meld and the texture firm up.
- Using Unripe Fruits: Always choose fresh, ripe fruits for the topping. Unripe fruits can taste sour and may not enhance the cheesecake’s flavor.
By avoiding these common pitfalls, you’ll be on your way to creating a perfect Fruit Salad Cheesecake that everyone will love!
Storage Tips for Leftover Fruit Salad Cheesecake
If you have any leftovers, storing your Fruit Salad Cheesecake properly is essential to maintain its freshness. Here are some helpful storage tips:
- Refrigerate Promptly: After serving, cover the cheesecake with plastic wrap or aluminum foil and place it in the refrigerator. This helps keep it fresh.
- Use an Airtight Container: If you have a large piece left, consider transferring it to an airtight container. This prevents it from absorbing other odors in the fridge.
- Consume Within a Week: For the best taste and texture, try to eat the cheesecake within 5-7 days. The fruits may start to lose their freshness after that.
- Freeze for Longer Storage: If you want to keep it longer, you can freeze the cheesecake. Wrap it tightly in plastic wrap and then in aluminum foil. It can last up to 2 months in the freezer.
- Thawing Tips: When ready to enjoy, thaw the cheesecake in the refrigerator overnight. This helps maintain its creamy texture.
By following these storage tips, you can enjoy your delicious Fruit Salad Cheesecake for days to come!
Breakdown of Time for Fruit Salad Cheesecake
Prep Time for Fruit Salad Cheesecake
Preparing your Fruit Salad Cheesecake is a straightforward process. The prep time is approximately 20 minutes. During this time, you will gather all your ingredients, prepare the crust, and mix the cheesecake filling. It’s a good idea to have everything ready before you start. This way, you can work efficiently and enjoy the process of making this delightful dessert!
Cooking Time for Fruit Salad Cheesecake
The cooking time for your cheesecake is about 50 minutes. You will bake it at 325°F (163°C). Keep an eye on it as it bakes. The edges should be set, while the center remains slightly jiggly. This ensures a creamy texture. After baking, allow the cheesecake to cool in the oven for an hour. This gradual cooling helps prevent cracks. Then, refrigerate it for at least 4 hours to let it firm up and develop its flavors.
Total Time for Fruit Salad Cheesecake
In total, the time required to make your Fruit Salad Cheesecake is about 5 hours and 10 minutes. This includes the prep time, cooking time, and chilling time. While it may seem like a long process, most of this time is hands-off. You can relax while the cheesecake cools and sets in the fridge. The wait will be worth it when you finally slice into this creamy, fruity delight!
Nutritional Information for Fruit Salad Cheesecake
Calories in Fruit Salad Cheesecake
When indulging in a slice of Fruit Salad Cheesecake, it’s good to know the calorie content. Each serving contains approximately 320 calories. This makes it a delightful treat that can fit into a balanced diet. While it’s a dessert, the combination of cream cheese and fresh fruits provides a satisfying experience without being overly heavy. Enjoying this cheesecake in moderation allows you to savor its rich flavors while keeping your calorie intake in check.
Protein Content in Fruit Salad Cheesecake
Protein is an essential nutrient, and your Fruit Salad Cheesecake offers a decent amount. Each slice contains about 6 grams of protein. The primary source of protein comes from the cream cheese and eggs used in the filling. This protein content helps to make the cheesecake more filling, allowing you to enjoy a small slice without feeling deprived. It’s a sweet way to add a bit of protein to your dessert!
Sodium Levels in Fruit Salad Cheesecake
Monitoring sodium intake is important for many people. Each serving of Fruit Salad Cheesecake has around 250 milligrams of sodium. This level is relatively moderate, especially considering the creamy and flavorful nature of the dessert. Most of the sodium comes from the cream cheese and butter used in the crust. If you’re watching your sodium intake, you can enjoy this cheesecake as an occasional treat while being mindful of your overall diet.
FAQs about Fruit Salad Cheesecake
Can I make Fruit Salad Cheesecake ahead of time?
Absolutely! Making Fruit Salad Cheesecake ahead of time is a great idea. In fact, it often tastes even better after chilling overnight. You can prepare the cheesecake a day or two in advance. Just be sure to keep it covered in the refrigerator. This allows the flavors to meld beautifully. When you’re ready to serve, simply add the fresh fruit topping. This way, your dessert will be fresh and vibrant!
What fruits work best for the topping of Fruit Salad Cheesecake?
When it comes to topping your Fruit Salad Cheesecake, the options are endless! Some of the best fruits include:
- Strawberries: Their sweetness and bright color make them a favorite.
- Pineapple: Adds a tropical flair and juicy texture.
- Kiwi: Offers a tangy contrast that complements the sweetness.
- Grapes: Their crunchiness adds a nice texture.
- Blueberries: These tiny berries are packed with flavor and nutrients.
Feel free to mix and match your favorite fruits! The key is to choose ripe, fresh options for the best taste and presentation.
Is it possible to make a no-bake version of Fruit Salad Cheesecake?
Yes, you can definitely make a no-bake version of Fruit Salad Cheesecake! To do this, simply skip the baking step. Instead, after mixing the filling, pour it into the prepared crust and refrigerate it for at least 6-8 hours or overnight. This allows the cheesecake to set without baking. You can use gelatin or whipped cream to help it firm up if desired. The result will be a creamy, delicious cheesecake that’s perfect for warm days!
How long can I store Fruit Salad Cheesecake in the fridge?
Fruit Salad Cheesecake can be stored in the refrigerator for about 5-7 days. Make sure to cover it tightly with plastic wrap or aluminum foil to keep it fresh. If you have added fresh fruit on top, it’s best to consume it within a few days to maintain the fruit’s freshness. If you want to keep it longer, consider freezing it. Just remember to thaw it in the fridge before serving!
Conclusion on Fruit Salad Cheesecake
Recap of the Delightful Experience of Making Fruit Salad Cheesecake
Making a Fruit Salad Cheesecake is not just about creating a dessert; it’s about crafting a delightful experience. From the moment you gather your ingredients to the final presentation, each step is filled with joy and anticipation. The creamy filling, combined with the vibrant fruits, creates a beautiful balance of flavors and textures. Plus, the process is simple enough for anyone to enjoy, whether you’re a seasoned baker or a beginner. The satisfaction of slicing into a perfectly set cheesecake, revealing the colorful fruit topping, is truly rewarding. It’s a dessert that brings smiles and happiness to any gathering!
Encouragement to Try Your Own Fruit Salad Cheesecake Recipe
Now that you have all the tips and tricks, it’s time to roll up your sleeves and try making your own Fruit Salad Cheesecake! Don’t be afraid to experiment with different fruits and crust options. Each variation can lead to a new favorite. Remember, the key is to have fun and enjoy the process. Whether you’re celebrating a special occasion or simply treating yourself, this cheesecake is sure to impress. So gather your ingredients, invite some friends or family, and create a delicious masterpiece that everyone will love. Happy baking!