Introduction to Homemade Krispy Kremes
The Allure of Homemade Krispy Kremes
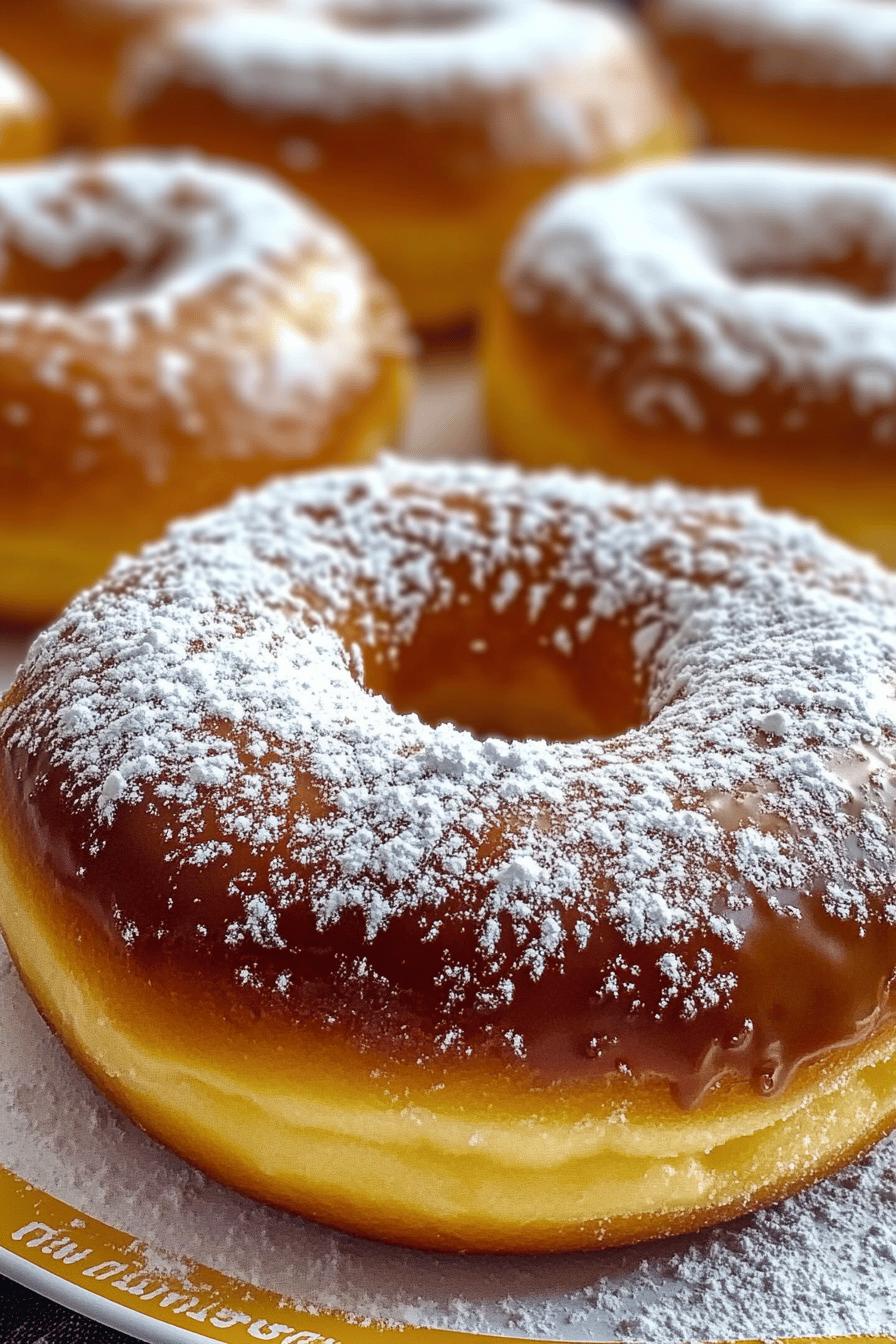
There’s something magical about biting into a warm, fluffy doughnut. Homemade Krispy Kremes capture that magic perfectly. The soft texture and sweet glaze create a delightful experience that makes every bite a treat. Imagine the aroma of freshly fried dough wafting through your kitchen, inviting everyone to gather around. These doughnuts are not just a dessert; they are a celebration of comfort and joy.
When you make Krispy Kremes at home, you get to control every ingredient. This means you can create a version that suits your taste perfectly. Whether you prefer them plain or with a twist of flavor, the possibilities are endless. Plus, there’s a special satisfaction that comes from making something delicious from scratch. It’s a fun activity to share with family and friends, making it a perfect weekend project.
Why Make Homemade Krispy Kremes?
Making Homemade Krispy Kremes is not just about enjoying a sweet treat; it’s about the experience. First, it’s a great way to bond with loved ones. Kids can help with mixing and shaping the dough, making it a fun family activity. Second, homemade doughnuts are fresher and tastier than store-bought ones. You can enjoy them warm, right out of the fryer!
Additionally, you can customize your doughnuts to fit your preferences. Want a hint of vanilla? Or maybe a sprinkle of cinnamon? You can add these flavors easily. Making them at home also allows you to experiment with different toppings and glazes. The joy of creating your own unique version of Krispy Kremes is truly rewarding.
So, roll up your sleeves and get ready to dive into the delightful world of Homemade Krispy Kremes. Your taste buds will thank you!
Ingredients for Homemade Krispy Kremes
To create the perfect batch of Homemade Krispy Kremes, you’ll need a few simple ingredients. Each one plays a vital role in achieving that fluffy texture and sweet flavor. Here’s what you’ll need:
- 2 ¼ teaspoons active dry yeast: This is essential for making the dough rise and become light and airy.
- ½ cup warm milk: Warm milk helps activate the yeast, giving your doughnuts that perfect fluffiness.
- ¼ cup granulated sugar: This adds sweetness to the dough and helps with browning during frying.
- 1 large egg: Eggs provide richness and help bind the ingredients together.
- ¼ cup unsalted butter, melted: Butter adds flavor and moisture to the dough.
- 2 cups all-purpose flour: This is the base of your doughnuts, giving them structure.
- ½ teaspoon salt: Salt enhances the flavor of the dough and balances the sweetness.
- Vegetable oil for frying: You’ll need enough oil to submerge the doughnuts for frying, ensuring they cook evenly.
- For the glaze:
- 1 cup powdered sugar: This is the main ingredient for the sweet glaze.
- 2 tablespoons milk: Milk helps create a smooth consistency for the glaze.
- 1 teaspoon vanilla extract: This adds a lovely flavor to the glaze.
Gather these ingredients, and you’ll be well on your way to making delicious Homemade Krispy Kremes. Each component is important, so make sure to measure carefully. Now, let’s move on to the fun part—preparing the dough!
Step-by-Step Preparation of Homemade Krispy Kremes
Step 1: Preparing the Dough
To start, you’ll need to prepare the dough. Begin by activating the yeast. In a small bowl, combine the warm milk and yeast. Let it sit for about 5 minutes until it becomes frothy. This shows that the yeast is alive and ready to work its magic!
Next, in a large mixing bowl, whisk together the sugar, melted butter, and egg. Once combined, add the frothy yeast mixture. Stir gently to mix everything well. Now, gradually add the flour and salt. Use a wooden spoon or your hands to combine until a soft dough forms. If the dough feels too sticky, sprinkle in a little more flour.
Step 2: Shaping the Doughnuts
Once your dough is ready, it’s time to shape the doughnuts. Lightly flour your work surface and turn the dough out onto it. Roll the dough out to about ½ inch thick. Using a doughnut cutter or two round cookie cutters (one larger and one smaller), cut out doughnut shapes. Make sure to cut the holes in the center for that classic doughnut look!
Place the shaped doughnuts on a baking sheet lined with parchment paper. Make sure to leave some space between each one. This allows them to rise without sticking together.
Step 3: Proofing the Dough
Now, it’s time to let the dough rise. Cover the baking sheet with a clean kitchen towel and let the doughnuts proof in a warm place for about 30-45 minutes. You want them to double in size. This step is crucial for achieving that light and fluffy texture.
Step 4: Frying the Doughnuts
After proofing, it’s time to fry! Heat vegetable oil in a deep pot or fryer to 350°F (175°C). Carefully drop a few doughnuts into the hot oil, making sure not to overcrowd the pot. Fry them for about 1-2 minutes on each side, or until they turn golden brown. Use a slotted spoon to remove them and place them on a paper towel-lined plate to drain excess oil.
Step 5: Glazing the Doughnuts
Finally, it’s time to glaze your doughnuts! In a medium bowl, whisk together the powdered sugar, milk, and vanilla extract until smooth. While the doughnuts are still warm, dip the tops into the glaze. Allow the excess glaze to drip off before placing them on a wire rack to set. Enjoy the sweet aroma filling your kitchen!
And there you have it! Your Homemade Krispy Kremes are ready to be devoured. They are best enjoyed fresh, but you can also store them for later. Let’s move on to some delicious variations you can try!
Variations of Homemade Krispy Kremes
Flavor Variations
While the classic Homemade Krispy Kremes are delightful on their own, you can easily add your personal touch with various flavor variations. Here are some fun ideas to get you started:
- Chocolate Krispy Kremes: Add ¼ cup of cocoa powder to the dry ingredients for a rich chocolate flavor. You can also dip the glazed doughnuts in melted chocolate for an extra treat!
- Cinnamon Sugar Krispy Kremes: Mix 1 tablespoon of cinnamon with ½ cup of granulated sugar. After frying, toss the warm doughnuts in this mixture for a sweet and spicy twist.
- Maple Krispy Kremes: Substitute maple syrup for half of the sugar in the dough. For the glaze, mix powdered sugar with maple syrup instead of milk for a delicious maple flavor.
- Fruit-Infused Krispy Kremes: Add ½ cup of pureed fruit, like strawberries or blueberries, to the dough for a fruity flavor. You can also top the glazed doughnuts with fresh fruit pieces.
Topping Ideas
Once your doughnuts are glazed, the fun doesn’t stop there! You can elevate your Homemade Krispy Kremes with a variety of toppings. Here are some tasty suggestions:
- Sprinkles: Add colorful sprinkles on top of the glaze for a festive look. This is especially fun for kids!
- Chopped Nuts: Sprinkle chopped almonds, walnuts, or pecans on the glaze for a crunchy texture.
- Shredded Coconut: For a tropical twist, add shredded coconut on top of the glaze.
- Drizzles: Create a beautiful design by drizzling melted chocolate or caramel over the glazed doughnuts.
These variations and toppings allow you to get creative in the kitchen. Feel free to mix and match to find your favorite combinations. The possibilities are endless, and your Homemade Krispy Kremes will always be a hit!
Cooking Note for Homemade Krispy Kremes
When making Homemade Krispy Kremes, a few cooking notes can help ensure your doughnuts turn out perfectly every time. First, pay attention to the temperature of your ingredients. Using warm milk is crucial for activating the yeast. If the milk is too hot, it can kill the yeast, preventing your dough from rising. Aim for a temperature around 110°F (43°C) for the best results.
Next, when frying the doughnuts, maintain the oil temperature at 350°F (175°C). If the oil is too hot, the outside will brown too quickly while the inside remains raw. Conversely, if the oil is not hot enough, the doughnuts will absorb too much oil and become greasy. A kitchen thermometer can be a handy tool to keep the oil at the right temperature.
Also, consider the size of your doughnuts. If you cut them too thick, they may not cook evenly. Aim for a thickness of about ½ inch when rolling out the dough. This will help them fry up light and fluffy.
Lastly, remember to let the doughnuts cool slightly before glazing. If they are too hot, the glaze will melt and run off, resulting in a less appealing finish. Allow them to rest on a wire rack for a few minutes after frying, and then dip them in the glaze for a beautiful, shiny coating.
By keeping these cooking notes in mind, you’ll be well on your way to creating delicious Homemade Krispy Kremes that are sure to impress your family and friends!
Serving Suggestions for Homemade Krispy Kremes
Once your Homemade Krispy Kremes are ready, it’s time to think about how to serve them. These delightful doughnuts can be enjoyed in many ways, making them perfect for any occasion. Here are some serving suggestions to elevate your doughnut experience:
- Breakfast Treat: Serve your Krispy Kremes warm alongside a cup of coffee or tea. They make a delightful breakfast option that will start your day on a sweet note.
- Brunch Delight: For a weekend brunch, arrange your doughnuts on a beautiful platter. Add fresh fruit, like berries or sliced bananas, for a colorful and inviting presentation.
- Party Platter: If you’re hosting a gathering, consider creating a doughnut bar. Offer a variety of toppings and glazes, allowing guests to customize their own Krispy Kremes. This interactive experience is sure to be a hit!
- Ice Cream Sandwich: For a fun twist, slice a Krispy Kreme in half and fill it with your favorite ice cream. This creates a delicious dessert that combines warm doughnut goodness with cold, creamy ice cream.
- Gift Idea: Package your Homemade Krispy Kremes in a decorative box or tin. They make a thoughtful gift for friends and family, especially during holidays or special occasions.
These serving suggestions not only enhance the enjoyment of your Homemade Krispy Kremes but also allow you to share the joy with others. Whether it’s a cozy breakfast at home or a festive gathering with friends, these doughnuts are sure to bring smiles and satisfaction. So, get creative and enjoy every delicious bite!
Tips for Perfect Homemade Krispy Kremes
Creating the perfect Homemade Krispy Kremes is an art that can be mastered with a few helpful tips. These suggestions will ensure your doughnuts turn out fluffy, flavorful, and absolutely delicious every time. Let’s dive into some essential tips!
- Use Fresh Ingredients: Always check the expiration dates on your yeast and other ingredients. Fresh yeast is crucial for achieving that light and airy texture. If your yeast doesn’t foam when activated, it’s best to start over with new yeast.
- Measure Accurately: Baking is a science, so precise measurements are key. Use a kitchen scale for the best accuracy, especially for flour. Too much flour can lead to dense doughnuts.
- Don’t Rush the Proofing: Allow your dough to rise fully. This step is vital for creating fluffy doughnuts. If you’re in a hurry, find a warm spot in your home, like near a sunny window, to speed up the process.
- Maintain Oil Temperature: As mentioned earlier, keeping the oil at the right temperature is crucial. Use a thermometer to monitor the heat. If the oil is too hot, the doughnuts will burn; if it’s too cool, they will absorb too much oil.
- Fry in Batches: Fry only a few doughnuts at a time. Overcrowding the pot can lower the oil temperature, resulting in greasy doughnuts. Frying in small batches ensures even cooking.
- Cool Before Glazing: Let your doughnuts cool slightly after frying. This prevents the glaze from melting off. A few minutes on a wire rack is all you need for the perfect glaze finish.
- Experiment with Flavors: Don’t hesitate to try new flavors and toppings. Whether it’s adding spices to the dough or drizzling chocolate on top, experimenting can lead to delightful surprises!
- Store Properly: If you have leftovers, store them in an airtight container at room temperature. This keeps them fresh for a day or two. For longer storage, consider freezing them without glaze.
By following these tips, you’ll be well on your way to making perfect Homemade Krispy Kremes that everyone will love. Enjoy the process, and don’t forget to share your delicious creations with family and friends!
Breakdown of Time for Homemade Krispy Kremes
Prep Time
Preparing your Homemade Krispy Kremes is a delightful process that takes about 15-20 minutes. This includes gathering your ingredients, activating the yeast, and mixing the dough. Make sure to take your time during this step to ensure everything is well combined. A little patience here will pay off with fluffy doughnuts later!
Cooking Time
The cooking time for your doughnuts is relatively quick. Frying the doughnuts will take about 10-15 minutes. This includes frying each batch for 1-2 minutes on each side until they are golden brown. Remember, frying in small batches helps maintain the oil temperature, ensuring even cooking. After frying, glazing the doughnuts will take an additional 5 minutes.
Total Time
In total, you can expect to spend around 1 hour and 15 minutes to 1 hour and 30 minutes from start to finish. This includes the proofing time, which is about 30-45 minutes. While you wait for the dough to rise, you can clean up your kitchen or prepare your toppings. The wait will be worth it when you finally bite into your warm, homemade Krispy Kremes!
Error: Request failed for https://api.openai.com returned code 502. Truncated server response:
502 Bad Gateway
<... (use muteHttpExceptions option to examine full response)
FAQs about Homemade Krispy Kremes
Can I bake Homemade Krispy Kremes instead of frying them?
Yes, you can bake Homemade Krispy Kremes if you prefer a healthier option! To do this, preheat your oven to 375°F (190°C). After shaping the doughnuts, place them on a baking sheet lined with parchment paper. Bake for about 10-12 minutes or until they are lightly golden. While they won’t have the same crispy texture as fried doughnuts, they will still be delicious and fluffy!
How do I store leftover Homemade Krispy Kremes?
To store leftover Homemade Krispy Kremes, place them in an airtight container at room temperature. This will keep them fresh for about 1-2 days. If you want to keep them longer, consider freezing them. Just make sure to freeze them without glaze. When you’re ready to enjoy them, thaw at room temperature and glaze them just before serving for the best taste!
What can I use instead of yeast in Homemade Krispy Kremes?
If you don’t have yeast, you can use baking powder as a substitute. However, the texture will be different. To make doughnuts with baking powder, mix 2 teaspoons of baking powder into your dry ingredients. This will create a denser doughnut, but they will still be tasty! Just remember that they won’t have the same rise as yeast-based doughnuts.
How long do Homemade Krispy Kremes last?
Homemade Krispy Kremes are best enjoyed fresh, but they can last for about 1-2 days at room temperature when stored properly. If you freeze them, they can last for up to 2 months. Just remember to thaw them before glazing. Enjoying them warm is always the best way to savor their deliciousness!
Conclusion on Homemade Krispy Kremes
In conclusion, making Homemade Krispy Kremes is a delightful experience that brings joy to both the cook and those who get to enjoy the treats. With their fluffy texture and sweet glaze, these doughnuts are perfect for any occasion. Whether you’re treating yourself, hosting a brunch, or sharing with friends, they are sure to impress.
By following the steps outlined in this recipe, you can create your own batch of warm, delicious doughnuts right in your kitchen. The process is not only fun but also allows for creativity with various flavors and toppings. Remember, the key to perfect Krispy Kremes lies in using fresh ingredients, maintaining the right temperatures, and allowing the dough to rise properly.
So, gather your ingredients, roll up your sleeves, and dive into the world of homemade doughnuts. Your taste buds will thank you for the effort! Enjoy every bite of your Homemade Krispy Kremes, and don’t forget to share the joy with family and friends. Happy baking!
Relevant Recipes Link:
Craving more homemade goodness? Dive into these delightful recipes:
- Easy and Delicious Homemade Marinara Sauce
- Discover a Special Homemade Recipe Here
- Indulge in Homemade Vanilla Ice Cream
For more fantastic recipes and food inspiration, follow us on Pinterest!