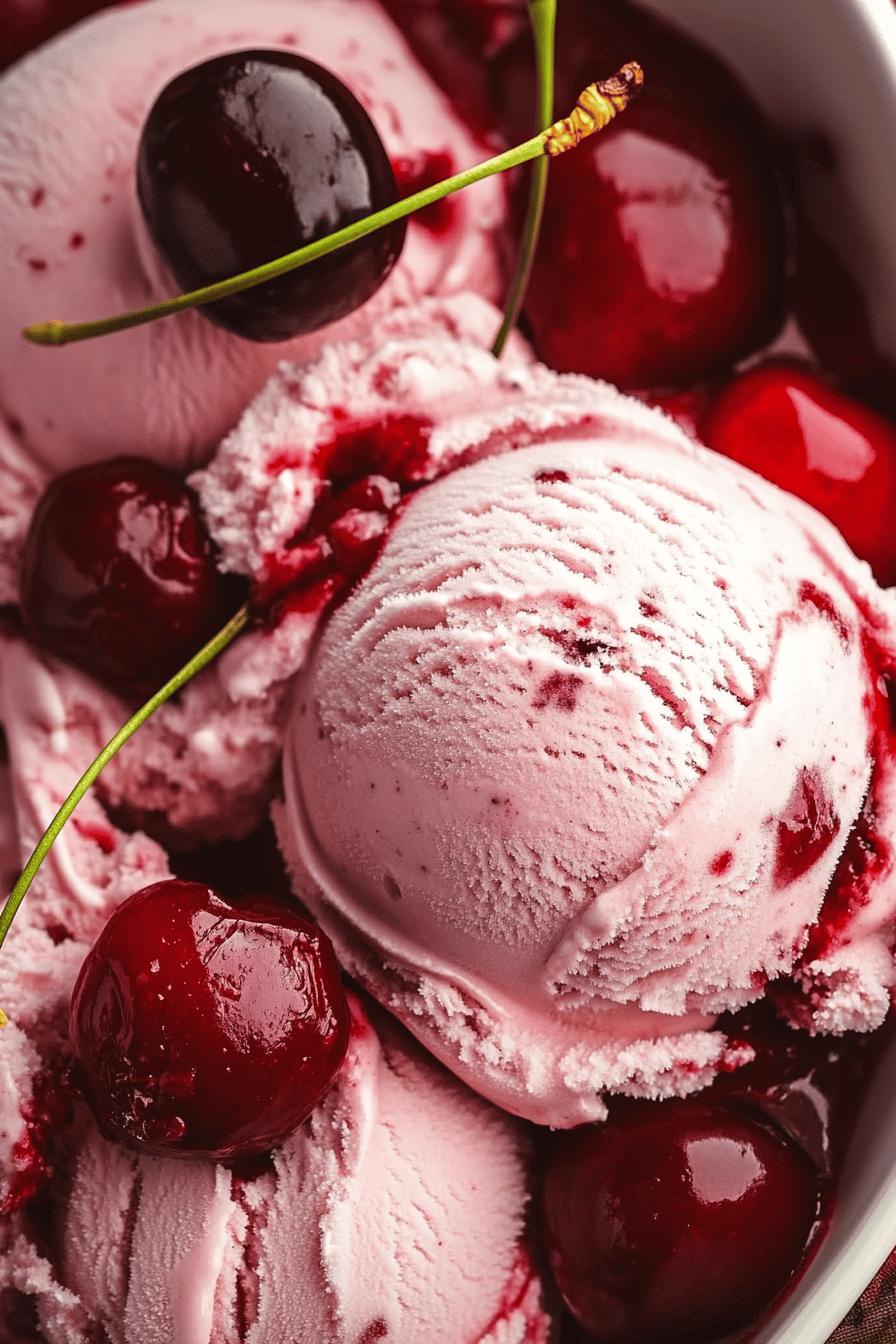
Introduction to Homemade Very Cherry Ice Cream
The Joy of Making Ice Cream at Home
Making ice cream at home is a delightful experience! It allows you to create a treat that is not only delicious but also tailored to your taste. Imagine the joy of scooping out a creamy, fruity dessert that you made yourself. The process can be fun and rewarding, especially when you see the smiles on your loved ones’ faces as they enjoy your creation. Plus, you can experiment with flavors and ingredients, making each batch unique. Homemade ice cream is a great way to bond with family and friends, turning a simple recipe into a cherished memory.
Why Choose Homemade Very Cherry Ice Cream?
Homemade Very Cherry Ice Cream stands out for several reasons. First, it uses fresh cherries, which provide a vibrant flavor that store-bought options often lack. You can control the sweetness, ensuring it’s just right for your palate. Additionally, making this ice cream at home means you can avoid artificial flavors and preservatives. This recipe is simple and quick, making it perfect for any occasion. Whether it’s a hot summer day or a cozy evening, this ice cream is sure to please. So, why not treat yourself to a scoop of homemade goodness? You deserve it!
Ingredients for Homemade Very Cherry Ice Cream
To create your own Homemade Very Cherry Ice Cream, you’ll need a few simple ingredients. Each one plays a vital role in achieving that creamy texture and delightful cherry flavor. Here’s what you’ll need:
- 2 cups fresh cherries: Pitted and halved, these will be the star of your ice cream.
- 1 cup heavy cream: This adds richness and creaminess to your ice cream.
- 1 cup whole milk: It helps to balance the creaminess and gives a smooth texture.
- ¾ cup granulated sugar: This sweetens the mixture and enhances the cherry flavor.
- 1 teaspoon vanilla extract: A touch of vanilla adds depth to the overall taste.
- Pinch of salt: This enhances the sweetness and balances the flavors.
These ingredients are easy to find and can be adjusted based on your preferences. For instance, if you prefer a sweeter ice cream, feel free to add a bit more sugar. On the other hand, if you want a more intense cherry flavor, you can increase the amount of cherries. The beauty of making ice cream at home is that you can customize it to your liking!
Step-by-Step Preparation of Homemade Very Cherry Ice Cream
Step 1: Prepare the Cherry Puree
To start, you need to prepare the cherry puree. First, take your fresh cherries and wash them thoroughly. Next, remove the pits and cut the cherries in half. Place the halved cherries in a blender or food processor. Blend them until smooth. If you prefer a chunkier texture, you can pulse the cherries a few times instead. Once blended, set the cherry puree aside. This step is crucial as it gives your ice cream that delicious cherry flavor!
Step 2: Mix the Cream and Sugar
Now, let’s move on to mixing the cream and sugar. In a large mixing bowl, combine the heavy cream and whole milk. Whisk them together until they are well blended. Then, gradually add the granulated sugar. Continue whisking until the sugar is fully dissolved. This mixture should be smooth and creamy. The sugar not only sweetens the ice cream but also helps create that delightful texture. Don’t rush this step; it’s important for the final result!
Step 3: Combine Cherry Puree with Cream Mixture
Next, it’s time to combine the cherry puree with the cream mixture. Pour the prepared cherry puree into the bowl with the cream and sugar mixture. Add the vanilla extract and a pinch of salt. Gently fold the ingredients together using a spatula. Be careful not to overmix; you want to keep some of the cherry swirls visible. This will create a beautiful marbled effect in your ice cream. Once combined, your mixture is ready for the next step!
Step 4: Churn the Mixture
Now comes the fun part—churning the mixture! If you have an ice cream maker, pour the combined mixture into the machine. Follow the manufacturer’s instructions for churning. Typically, it takes about 20 to 30 minutes for the ice cream to reach a soft-serve consistency. If you don’t have an ice cream maker, don’t worry! You can pour the mixture into a shallow dish and place it in the freezer. Stir it every 30 minutes for about 2 to 3 hours until it reaches the desired texture.
Step 5: Freeze the Ice Cream
Finally, it’s time to freeze your homemade Very Cherry Ice Cream. If you used an ice cream maker, transfer the churned ice cream into an airtight container. Smooth the top with a spatula and cover it tightly. Place it in the freezer for at least 4 hours to firm up. If you used the manual method, after stirring, let it freeze for a few hours until it’s solid. Once frozen, your ice cream is ready to be enjoyed! Scoop it into bowls or cones and savor the delightful cherry flavor.
Variations of Homemade Very Cherry Ice Cream
Adding Chocolate Chips
If you’re a fan of chocolate, why not add some chocolate chips to your Homemade Very Cherry Ice Cream? The combination of rich chocolate and sweet cherries creates a delightful contrast. To do this, simply fold in about half a cup of mini chocolate chips into the cherry and cream mixture before churning. This will give your ice cream a fun texture and an extra layer of flavor. You can use dark, milk, or even white chocolate chips, depending on your preference. Each scoop will be a delicious surprise!
Swirling in Other Fruits
Another exciting way to customize your ice cream is by swirling in other fruits. For example, you can add a swirl of raspberry or strawberry puree for a mixed berry flavor. To do this, prepare the additional fruit puree in the same way you did with the cherries. After combining the cherry puree with the cream mixture, gently swirl in the other fruit puree. This creates a beautiful marbled effect and enhances the fruity taste. You can experiment with different fruits to find your favorite combination. The possibilities are endless!
Cooking Note for Homemade Very Cherry Ice Cream
When making Homemade Very Cherry Ice Cream, a few cooking notes can help ensure your success. First, always use ripe, fresh cherries for the best flavor. The sweetness and juiciness of ripe cherries will enhance your ice cream significantly. If you can’t find fresh cherries, frozen cherries can be a good alternative. Just make sure to thaw and drain them before blending.
Next, pay attention to the temperature of your ingredients. Using cold cream and milk will help the mixture churn better, resulting in a creamier texture. If you have time, chill your mixing bowl and utensils in the refrigerator before starting. This small step can make a big difference in the final product.
Lastly, remember that homemade ice cream can be softer than store-bought versions. This is because it lacks the stabilizers and preservatives found in commercial ice creams. If your ice cream is too soft after churning, simply let it freeze longer. Patience is key! Enjoy the process, and soon you’ll have a delightful treat to share with family and friends.
Serving Suggestions for Homemade Very Cherry Ice Cream
Pairing with Toppings
When it comes to serving your Homemade Very Cherry Ice Cream, toppings can elevate the experience! Consider adding a drizzle of chocolate syrup for a rich contrast. You can also sprinkle some crushed nuts, like almonds or walnuts, for a delightful crunch. Fresh whipped cream is another fantastic option; it adds a light and airy texture that complements the creaminess of the ice cream.
For a fruity twist, try adding fresh cherry halves or slices on top. This not only enhances the cherry flavor but also makes your dessert look beautiful. If you’re feeling adventurous, a sprinkle of sea salt can bring out the sweetness of the cherries, creating a perfect balance. Don’t forget to experiment with different combinations to find your favorite topping mix!
Creative Serving Ideas
Serving your Homemade Very Cherry Ice Cream can be just as fun as making it! Instead of traditional bowls, consider using waffle cones or edible bowls made from cookie dough. This adds an extra layer of flavor and makes for a delightful presentation. You can also create an ice cream sundae bar. Set out various toppings, sauces, and even other ice cream flavors, allowing everyone to customize their own treat.
For a more elegant touch, serve the ice cream in dessert glasses. Layer the ice cream with fresh fruit or granola for a parfait-style dessert. This not only looks stunning but also adds different textures to each bite. Lastly, don’t forget to enjoy your ice cream with friends and family. Sharing this delicious treat makes it even more special!
Tips for Perfect Homemade Very Cherry Ice Cream
Choosing the Right Cherries
Choosing the right cherries is essential for making the best Homemade Very Cherry Ice Cream. Look for cherries that are firm, plump, and brightly colored. Sweet cherries, like Bing or Rainier, are perfect for this recipe. They have a rich flavor that shines through in the ice cream. If you prefer a tart flavor, you can mix in some sour cherries as well. Just remember to taste them first! The sweetness of the cherries will greatly influence the final product. If they are too tart, you may need to adjust the sugar in your recipe. Always opt for fresh cherries when possible, as they provide the best taste and texture.
Ensuring Creaminess
To achieve that creamy texture in your Homemade Very Cherry Ice Cream, there are a few key tips to keep in mind. First, use high-quality heavy cream and whole milk. The fat content in these ingredients is crucial for a smooth and rich ice cream. If you want an even creamier result, consider adding a bit of cream cheese or sweetened condensed milk to the mixture. These ingredients can enhance the texture and flavor.
Another important factor is the churning process. Make sure your ice cream maker is fully chilled before use. This helps the mixture freeze quickly, preventing ice crystals from forming. If you’re using the manual method, remember to stir the mixture every 30 minutes while it freezes. This will help incorporate air and create a lighter texture. Lastly, don’t rush the freezing time. Allow your ice cream to freeze completely for the best results. With these tips, you’ll be on your way to making a perfectly creamy and delicious Homemade Very Cherry Ice Cream!
Breakdown of Time for Homemade Very Cherry Ice Cream
Prep Time
Preparing your Homemade Very Cherry Ice Cream is a breeze! The prep time typically takes about 15 to 20 minutes. This includes washing and pitting the cherries, blending them into a puree, and mixing the cream and sugar. It’s a quick process that allows you to get right to the fun part—making ice cream! If you’re using frozen cherries, the prep time may be slightly shorter since you won’t need to pit them. Just remember to thaw and drain them before blending.
Cooking Time
The cooking time for this recipe is minimal. Once you’ve combined all the ingredients, the churning process takes about 20 to 30 minutes if you’re using an ice cream maker. If you’re opting for the manual method, you’ll need to stir the mixture every 30 minutes for about 2 to 3 hours. This helps achieve that creamy texture we all love. So, while the active cooking time is short, the waiting time is essential for the best results!
Total Time
In total, you can expect to spend around 4 to 5 hours from start to finish. This includes the prep time, cooking time, and the freezing time needed for your ice cream to firm up. While it may seem like a long wait, the delicious reward is well worth it! You’ll have a delightful Homemade Very Cherry Ice Cream ready to enjoy. So, gather your ingredients, and let the fun begin!
Nutritional Information for Homemade Very Cherry Ice Cream
Calories
When indulging in Homemade Very Cherry Ice Cream, it’s good to know the calorie content. A typical serving size of about half a cup contains approximately 200 to 250 calories. This can vary based on the specific ingredients you use, especially if you adjust the sugar or cream content. While it’s a sweet treat, enjoying it in moderation can fit nicely into a balanced diet. Remember, the joy of homemade ice cream is not just in the taste but also in the experience of making it!
Protein
In terms of protein, each serving of Homemade Very Cherry Ice Cream provides around 3 to 4 grams. The protein mainly comes from the heavy cream and whole milk used in the recipe. While this isn’t a high-protein dessert, it does contribute to your daily intake. If you’re looking to boost the protein content, consider adding a scoop of protein powder to the mixture before churning. This way, you can enjoy your ice cream while also supporting your nutritional goals!
Sodium
As for sodium, Homemade Very Cherry Ice Cream is relatively low in this mineral. A serving typically contains about 50 to 70 milligrams of sodium. This is mainly due to the pinch of salt added to enhance the flavors. For those watching their sodium intake, this dessert can be a guilt-free option. Just be mindful of any toppings you may add, as they can increase the sodium content. Overall, this ice cream is a delightful treat that can be enjoyed without too much worry about sodium levels!
FAQs about Homemade Very Cherry Ice Cream
Can I use frozen cherries for this recipe?
Yes, you can absolutely use frozen cherries for your Homemade Very Cherry Ice Cream! Frozen cherries are a great alternative, especially when fresh cherries are out of season. Just make sure to thaw them first and drain any excess liquid before blending. This will help maintain the right consistency in your ice cream. The flavor will still be delicious, and you’ll enjoy a refreshing treat any time of the year!
How long does homemade ice cream last in the freezer?
Homemade ice cream can last in the freezer for about 2 to 3 weeks. However, for the best taste and texture, it’s recommended to enjoy it within the first week. Over time, ice crystals may form, which can affect the creaminess. To keep your ice cream fresh, store it in an airtight container. This will help prevent freezer burn and keep your Homemade Very Cherry Ice Cream tasting delightful!
Can I make this ice cream without an ice cream maker?
Absolutely! You can make Homemade Very Cherry Ice Cream without an ice cream maker. Simply pour the mixture into a shallow dish and place it in the freezer. Stir the mixture every 30 minutes for about 2 to 3 hours. This will help incorporate air and create a smoother texture. While it may take a bit longer, you’ll still end up with a delicious homemade treat!
What can I substitute for heavy cream?
If you’re looking for a substitute for heavy cream, there are a few options. You can use coconut cream for a dairy-free version, which adds a lovely flavor. Another option is to use half-and-half, but keep in mind that it may result in a less creamy texture. For a lighter option, you can also use Greek yogurt mixed with milk. This will give you a tangy flavor while still being delicious. Choose the substitute that best fits your dietary needs and enjoy your ice cream!
Conclusion on Homemade Very Cherry Ice Cream
Recap of the Delightful Experience
In conclusion, making Homemade Very Cherry Ice Cream is a delightful experience that brings joy to both the maker and the eater. From the moment you blend fresh cherries into a smooth puree to the final scoop of creamy ice cream, each step is filled with excitement. The vibrant cherry flavor combined with the rich creaminess creates a treat that is hard to resist. Plus, the ability to customize your ice cream with various toppings and mix-ins makes it even more special. Whether you’re enjoying it on a hot summer day or sharing it with loved ones, this homemade dessert is sure to create lasting memories.
Encouragement to Try the Recipe
So, why not give this recipe a try? Homemade Very Cherry Ice Cream is not only easy to make but also a fun activity for the whole family. Gather your ingredients, invite your friends or family to join in, and enjoy the process of creating something delicious together. Remember, the best part of making ice cream at home is the joy of sharing it with others. Treat yourself and your loved ones to this refreshing dessert, and savor every delightful bite. You won’t regret it!
Relevant Recipes Link:
Craving more homemade ice cream delights? Indulge in these irresistible recipes:
- Homemade Peach Ice Cream: A Summer Delight
- Homemade Butter Pecan Ice Cream: A Must-Try Treat
- Another Must-Try Homemade Butter Pecan Ice Cream Recipe
For more delightful recipes and food inspiration, follow us on Pinterest!