Introduction to No-Bake Cookie Dough Bars
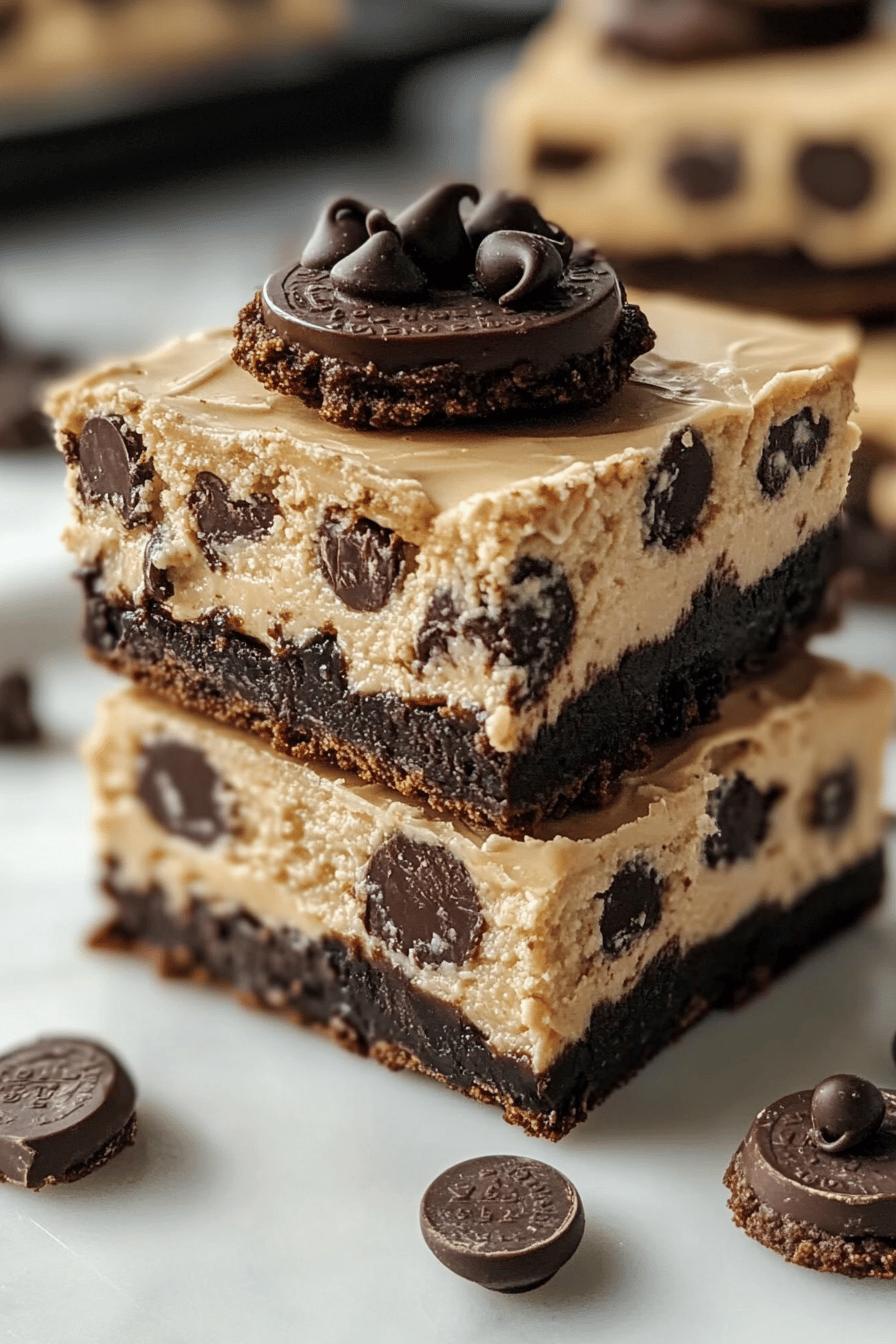
No-Bake Cookie Dough Bars are a delightful treat that everyone loves. They are easy to make and require no baking at all! Imagine a buttery cookie crust topped with a creamy cookie dough layer. It’s a sweet dream come true! These bars are perfect for satisfying your sweet cravings without the hassle of turning on the oven. Whether you’re hosting a party or just want a quick dessert, these bars are sure to impress.
What Makes No-Bake Cookie Dough Bars Special?
What sets No-Bake Cookie Dough Bars apart is their simplicity and flavor. First, you don’t need to bake anything, which saves time and energy. Second, the combination of textures is simply irresistible. The crunchy crust pairs perfectly with the soft, creamy cookie dough. Plus, you can customize them with your favorite mix-ins, like chocolate chips or nuts. This versatility makes them a favorite among dessert lovers!
The Appeal of No-Bake Desserts
No-Bake desserts are gaining popularity for many reasons. For one, they are quick and easy to prepare. You can whip them up in no time, making them ideal for last-minute gatherings. Additionally, they often require fewer ingredients than traditional baked goods. This means you can enjoy a delicious treat without a long shopping list. Lastly, no-bake desserts are perfect for warm weather. You can enjoy a sweet treat without heating up your kitchen!
Ingredients for No-Bake Cookie Dough Bars
To create these delightful No-Bake Cookie Dough Bars, you’ll need a few simple ingredients. Each component plays a vital role in achieving that perfect balance of flavor and texture. Here’s what you’ll need:
- For the Cookie Crust:
- 1 ½ cups graham cracker crumbs
- ½ cup unsalted butter, melted
- ¼ cup granulated sugar
- For the Cookie Dough Layer:
- 1 cup all-purpose flour (heat-treated for safety)
- ½ cup unsalted butter, softened
- ¾ cup brown sugar, packed
- 2 teaspoons vanilla extract
- ¼ teaspoon salt
- ½ cup chocolate chips (or more, if you love chocolate!)
These ingredients come together to create a deliciously rich dessert. The graham cracker crust provides a crunchy base, while the cookie dough layer is creamy and sweet. Feel free to get creative with your mix-ins! You can add nuts, dried fruits, or even different types of chocolate chips to make these bars your own.
Step-by-Step Preparation of No-Bake Cookie Dough Bars
Now that you have all your ingredients ready, it’s time to dive into the fun part: making your No-Bake Cookie Dough Bars! Follow these simple steps to create a delicious treat that everyone will love.
Step 1: Prepare the Cookie Crust
First, let’s make the cookie crust. In a mixing bowl, combine the graham cracker crumbs, melted butter, and granulated sugar. Stir everything together until the mixture resembles wet sand. It should hold together when pressed. Next, take a 9×9-inch baking dish and line it with parchment paper for easy removal later. Press the crust mixture firmly into the bottom of the dish. Make sure it’s even and compact. This will be the base of your bars!
Step 2: Make the Cookie Dough Layer
Now, it’s time to create the cookie dough layer. In a separate bowl, beat the softened butter and brown sugar together until creamy. This should take about 2-3 minutes. Then, add the vanilla extract and salt, mixing until well combined. Gradually add the heat-treated flour, stirring until the dough comes together. Finally, fold in the chocolate chips. Your cookie dough should be thick and delicious!
Step 3: Assemble the Bars
With both layers ready, it’s time to assemble your bars. Spread the cookie dough mixture evenly over the prepared crust. Use a spatula to smooth it out, ensuring it covers the crust completely. You can sprinkle a few extra chocolate chips on top for a decorative touch. This will make your bars look even more tempting!
Step 4: Chill and Set
The last step is to chill your bars. Cover the baking dish with plastic wrap or foil and place it in the refrigerator. Let it chill for at least 2 hours, or until the bars are firm. This step is crucial, as it helps the layers set properly. Once chilled, remove the bars from the dish using the parchment paper. Cut them into squares or rectangles, and they’re ready to serve!
Enjoy your homemade No-Bake Cookie Dough Bars as a delightful treat for any occasion. They’re sure to be a hit!
Variations of No-Bake Cookie Dough Bars
One of the best things about No-Bake Cookie Dough Bars is their versatility. You can easily customize them to suit your taste or dietary needs. Let’s explore some fun variations that will take your bars to the next level!
Adding Different Mix-Ins
Mix-ins can add exciting flavors and textures to your No-Bake Cookie Dough Bars. Here are some ideas to get you started:
- Nutty Delight: Add ½ cup of chopped nuts, like walnuts or pecans, for a crunchy twist.
- Dried Fruits: Incorporate ½ cup of dried cranberries or raisins for a chewy texture and a hint of sweetness.
- Peanut Butter Swirl: Mix in ¼ cup of creamy peanut butter into the cookie dough layer for a rich, nutty flavor.
- White Chocolate Chips: Swap out regular chocolate chips for white chocolate chips for a sweeter taste.
- Sprinkles: Add colorful sprinkles to the cookie dough for a fun, festive look, especially for parties!
Feel free to experiment with your favorite ingredients. The possibilities are endless, and you can create a unique version of these bars that everyone will love!
Gluten-Free Options
If you or your guests are following a gluten-free diet, you can still enjoy these delicious bars. Here’s how to make gluten-free No-Bake Cookie Dough Bars:
- Gluten-Free Graham Crackers: Use gluten-free graham cracker crumbs for the crust. Many brands offer tasty options that work perfectly.
- Gluten-Free Flour: Substitute all-purpose flour with a gluten-free flour blend. Make sure it’s heat-treated for safety.
By making these simple swaps, you can create a gluten-free version of No-Bake Cookie Dough Bars that everyone can enjoy. They’ll be just as delicious and satisfying!
Cooking Note for No-Bake Cookie Dough Bars
When making No-Bake Cookie Dough Bars, there are a few important cooking notes to keep in mind. These tips will help ensure your bars turn out perfectly every time. First, always use heat-treated flour. This step is crucial for safety, as raw flour can contain harmful bacteria. You can heat-treat flour by spreading it on a baking sheet and baking it at 350°F (175°C) for about 5 minutes. Let it cool before using it in your recipe.
Next, be sure to measure your ingredients accurately. Using the right amounts will help achieve the perfect texture and flavor. For example, if you add too much butter, your bars may become too soft and difficult to cut. On the other hand, too little butter can make them dry and crumbly.
Additionally, chilling the bars is essential. Allowing them to set in the refrigerator for at least 2 hours helps the layers firm up. This makes cutting them into neat squares much easier. If you’re in a hurry, you can place them in the freezer for about 30 minutes, but keep an eye on them to avoid freezing solid.
Lastly, feel free to get creative! While the classic recipe is delicious, experimenting with different flavors and mix-ins can lead to exciting new variations. Whether you add nuts, dried fruits, or different types of chocolate, the key is to have fun and enjoy the process!
Serving Suggestions for No-Bake Cookie Dough Bars
Once your No-Bake Cookie Dough Bars are ready, it’s time to think about how to serve them. These bars are not only delicious but also versatile. You can pair them with various beverages or present them in fun ways for gatherings. Let’s explore some delightful serving suggestions!
Perfect Pairings with Beverages
Choosing the right beverage can enhance the experience of enjoying your No-Bake Cookie Dough Bars. Here are some tasty pairings:
- Milk: A classic choice! The creaminess of milk complements the sweetness of the bars perfectly. You can serve it cold or warm for a cozy treat.
- Coffee: For adults, a cup of coffee adds a nice contrast to the sweetness. The rich flavors of coffee balance the cookie dough nicely.
- Hot Chocolate: On chilly days, serve your bars with a warm cup of hot chocolate. Top it with whipped cream for an extra indulgent treat!
- Fruit Juices: Fresh fruit juices, like orange or apple juice, provide a refreshing contrast. They add a fruity zing that pairs well with the rich cookie dough.
Feel free to mix and match these beverages based on your guests’ preferences. Each pairing brings out different flavors in the bars, making every bite a new experience!
Presentation Ideas for Parties
When it comes to serving No-Bake Cookie Dough Bars at parties, presentation matters! Here are some fun ideas to make your dessert table stand out:
- Decorative Platter: Arrange the bars on a colorful platter. You can cut them into fun shapes or sizes for a playful touch.
- Garnish with Sprinkles: Before serving, sprinkle some colorful toppings on the bars. This adds a festive look, especially for birthday parties or celebrations.
- Individual Servings: Cut the bars into smaller squares and place them in cupcake liners. This makes it easy for guests to grab and enjoy!
- Labeling: If you have different variations, use small labels to identify each type. This adds a personal touch and helps guests choose their favorites.
With these serving suggestions, your No-Bake Cookie Dough Bars will not only taste amazing but also look delightful on any dessert table. Enjoy sharing this sweet treat with family and friends!
Tips for Making the Best No-Bake Cookie Dough Bars
Creating the perfect No-Bake Cookie Dough Bars is all about attention to detail. With a few helpful tips, you can avoid common pitfalls and ensure your bars turn out delicious every time. Let’s dive into some essential advice for making the best bars possible!
Common Mistakes to Avoid
Even though making No-Bake Cookie Dough Bars is simple, there are a few mistakes you should watch out for:
- Skipping the Heat-Treatment: Always heat-treat your flour. This step is crucial for safety. Raw flour can contain harmful bacteria, so don’t skip it!
- Not Measuring Ingredients: Accurate measurements are key. Too much or too little of an ingredient can affect the texture and taste of your bars.
- Overmixing the Dough: When making the cookie dough layer, mix just until combined. Overmixing can lead to a tough texture.
- Insufficient Chilling Time: Don’t rush the chilling process. Allowing the bars to set properly in the fridge is essential for easy cutting and a great texture.
- Using the Wrong Pan Size: Make sure to use the correct size baking dish. A dish that’s too small can lead to thick bars, while one that’s too large can make them too thin.
By avoiding these common mistakes, you’ll be on your way to making perfect No-Bake Cookie Dough Bars every time!
Storage Tips for Freshness
To keep your No-Bake Cookie Dough Bars fresh and delicious, follow these storage tips:
- Refrigerate: Store the bars in an airtight container in the refrigerator. This helps maintain their texture and flavor. They can last up to a week when stored properly.
- Freezing: If you want to keep them longer, you can freeze the bars. Wrap them tightly in plastic wrap and then place them in a freezer-safe container. They can last up to three months in the freezer.
- Thawing: When you’re ready to enjoy your frozen bars, simply transfer them to the fridge for a few hours to thaw. Avoid microwaving, as this can change their texture.
- Cutting Fresh: If you plan to freeze the bars, consider cutting them into squares before freezing. This makes it easy to grab a piece whenever you want a sweet treat!
By following these storage tips, you can enjoy your No-Bake Cookie Dough Bars at their best, whether fresh or frozen. Happy snacking!
Breakdown of Time for No-Bake Cookie Dough Bars
Understanding the time needed to make No-Bake Cookie Dough Bars is essential for planning your dessert preparation. Here’s a simple breakdown of the time involved in creating these delicious treats.
Prep Time
The prep time for No-Bake Cookie Dough Bars is quite short. You’ll need about 15-20 minutes to gather your ingredients and prepare both the cookie crust and the cookie dough layer. This includes mixing, measuring, and assembling the layers. It’s a quick and enjoyable process that allows you to get creative!
Cooking Time
Since these bars are no-bake, there’s no actual cooking time involved. However, you will need to chill the bars to help them set properly. This chilling time typically takes around 2 hours. If you’re in a hurry, you can place them in the freezer for about 30 minutes, but be cautious not to freeze them solid.
Total Time
In total, you can expect to spend about 2 hours and 20 minutes from start to finish. This includes the prep time and the necessary chilling time. With such a quick turnaround, you can easily whip up these No-Bake Cookie Dough Bars for any occasion, whether it’s a family gathering or a last-minute dessert craving!
Nutritional Information for No-Bake Cookie Dough Bars
Understanding the nutritional content of your No-Bake Cookie Dough Bars can help you enjoy them mindfully. While these bars are a delightful treat, knowing their calories and macronutrients can assist in making informed choices. Here’s a breakdown of what you can expect:
Calories and Macronutrients
Each serving of No-Bake Cookie Dough Bars (approximately one square) contains the following nutritional values:
- Calories: About 200-250 calories per bar, depending on the size and specific ingredients used.
- Fat: Approximately 12-15 grams, primarily from the butter and chocolate chips.
- Carbohydrates: Around 25-30 grams, mainly from the graham cracker crumbs and sugars.
- Protein: About 2-3 grams, coming from the flour and butter.
- Sugar: Roughly 10-15 grams, depending on the amount of added sugar and chocolate chips.
These values can vary based on the specific brands and quantities of ingredients you choose. For a more accurate count, consider using a nutrition calculator with your exact recipe.
Health Considerations
While No-Bake Cookie Dough Bars are a tasty treat, it’s essential to enjoy them in moderation. Here are some health considerations to keep in mind:
- Portion Control: Due to their rich ingredients, it’s easy to overindulge. Stick to one bar to satisfy your sweet tooth without going overboard.
- Allergies: Be mindful of common allergens like gluten, dairy, and nuts. If you have allergies, make sure to use suitable substitutes.
- Balanced Diet: Treats like these should complement a balanced diet. Pair them with healthier options like fruits or nuts for a more nutritious snack.
- Homemade vs. Store-Bought: Making these bars at home allows you to control the ingredients. This can lead to healthier choices compared to store-bought versions, which may contain preservatives and artificial ingredients.
By keeping these nutritional facts and health considerations in mind, you can enjoy your No-Bake Cookie Dough Bars as a delightful part of a balanced lifestyle. Happy indulging!
FAQs about No-Bake Cookie Dough Bars
Can I use different types of chocolate chips?
Absolutely! You can use various types of chocolate chips to customize your No-Bake Cookie Dough Bars. Whether you prefer semi-sweet, milk chocolate, dark chocolate, or even white chocolate chips, feel free to mix and match. You can also try using mini chocolate chips for a fun twist. The choice is yours, and it can add a unique flavor to your bars!
How long do No-Bake Cookie Dough Bars last?
When stored properly, No-Bake Cookie Dough Bars can last up to a week in the refrigerator. Make sure to keep them in an airtight container to maintain their freshness. If you want to enjoy them for a longer period, consider freezing them. They can last up to three months in the freezer when wrapped tightly. Just remember to thaw them in the fridge before serving!
Can I freeze No-Bake Cookie Dough Bars?
Yes, you can freeze No-Bake Cookie Dough Bars! Freezing is a great way to keep them fresh for later enjoyment. Wrap the bars tightly in plastic wrap and place them in a freezer-safe container. When you’re ready to enjoy them, simply transfer them to the fridge for a few hours to thaw. Avoid using the microwave, as it can change the texture of the bars.
What can I substitute for butter in the recipe?
If you’re looking for a butter substitute, there are several options you can use. For a dairy-free alternative, consider using coconut oil or a plant-based butter. Both options will provide a similar texture and flavor. If you prefer a lower-fat option, unsweetened applesauce can work as a substitute, but it may alter the taste slightly. Experiment with these alternatives to find the one that suits your taste best!
Conclusion on No-Bake Cookie Dough Bars
In conclusion, No-Bake Cookie Dough Bars are a fantastic treat that everyone can enjoy. They are simple to make, require no baking, and are perfect for satisfying your sweet cravings. With their creamy cookie dough layer and crunchy graham cracker crust, these bars are sure to be a hit at any gathering. Plus, the ability to customize them with various mix-ins makes them even more appealing!
Why You Should Try Making No-Bake Cookie Dough Bars Today
So, why wait? Making No-Bake Cookie Dough Bars is a fun and rewarding experience. You can whip them up in no time, making them ideal for last-minute dessert needs. Whether you’re hosting a party, celebrating a special occasion, or simply treating yourself, these bars are the perfect choice. They are not only delicious but also versatile, allowing you to experiment with different flavors and ingredients.
Moreover, these bars are a great way to involve family and friends in the kitchen. Kids will love helping to mix the ingredients and press the crust into the pan. It’s a wonderful opportunity to create lasting memories while enjoying a sweet treat together.
So grab your ingredients, gather your loved ones, and start making your own No-Bake Cookie Dough Bars today! You won’t regret it, and your taste buds will thank you!