Introduction to No-Churn Cookie Butter Ice Cream
What Makes No-Churn Cookie Butter Ice Cream Special?
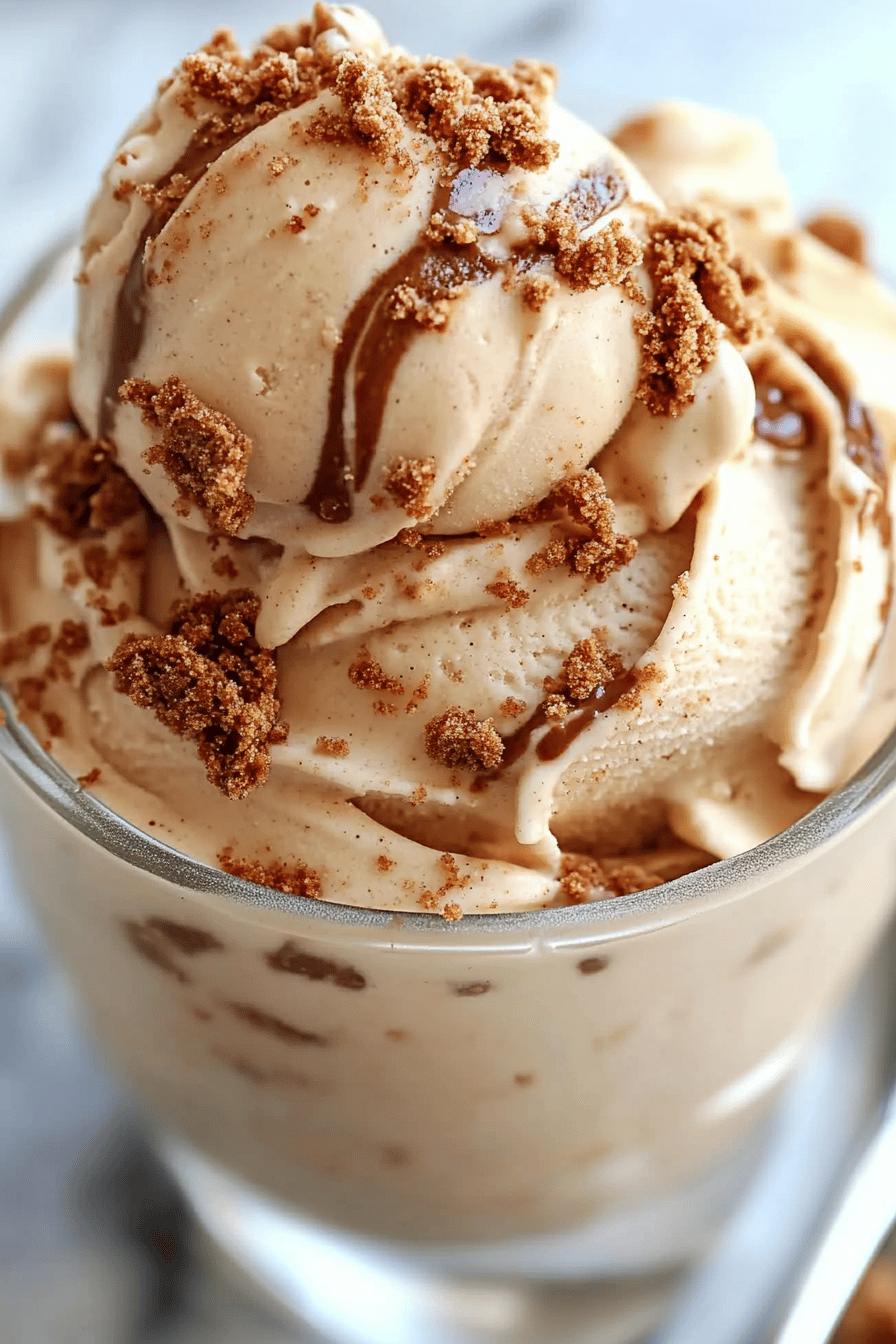
No-Churn Cookie Butter Ice Cream is a delightful treat that stands out for several reasons. First, it’s incredibly easy to make. You don’t need an ice cream maker, which means less hassle and more fun! Just a few simple ingredients come together to create a creamy, dreamy dessert. The star of this recipe is cookie butter, which adds a unique flavor that’s both sweet and slightly spiced. This ice cream is perfect for those who love the taste of cookies but want something a bit different.
Moreover, the combination of cookie butter and sweetened condensed milk creates a rich, velvety texture. Each scoop is a burst of flavor that melts in your mouth. Whether you’re enjoying it on a hot summer day or as a cozy winter treat, this ice cream is sure to please. Plus, it’s a fantastic way to impress friends and family with your homemade dessert skills!
The Joy of Homemade Ice Cream
Making your own ice cream is a joyful experience. It allows you to customize flavors and ingredients to suit your taste. With No-Churn Cookie Butter Ice Cream, you can experiment with different mix-ins or toppings. Imagine adding chocolate chips, crushed cookies, or even a swirl of caramel! The possibilities are endless.
Homemade ice cream also brings a sense of nostalgia. Many people have fond memories of making ice cream with family during summer vacations. This recipe invites you to recreate those moments in your own kitchen. Plus, there’s something special about serving a dessert that you made from scratch. It shows love and care, making every scoop even sweeter.
So, gather your ingredients and get ready to dive into the world of homemade ice cream. With No-Churn Cookie Butter Ice Cream, you’ll discover a new favorite dessert that’s easy to make and hard to resist!
Ingredients for No-Churn Cookie Butter Ice Cream
To create your own No-Churn Cookie Butter Ice Cream, you’ll need just a handful of simple ingredients. Each one plays a vital role in achieving that creamy, dreamy texture and delicious flavor. Here’s what you’ll need:
- 1 cup cookie butter: This is the star ingredient! It adds a rich, sweet flavor that makes the ice cream special.
- 1 can (14 ounces) sweetened condensed milk: This ingredient provides sweetness and creaminess, making the ice cream smooth and luscious.
- 2 cups heavy whipping cream: The heavy cream is essential for creating that fluffy texture. It whips up beautifully and gives the ice cream its body.
- 1 teaspoon vanilla extract: A splash of vanilla enhances the overall flavor, making it even more delightful.
These four ingredients come together to create a deliciously rich ice cream that’s sure to satisfy your sweet tooth. You can find cookie butter in most grocery stores, often near the peanut butter or specialty spreads. Sweetened condensed milk is usually located in the baking aisle. Heavy whipping cream is available in the dairy section.
Once you have gathered these ingredients, you’re ready to start making your No-Churn Cookie Butter Ice Cream. It’s a simple process that will yield a delightful treat for you and your loved ones!
Step-by-Step Preparation of No-Churn Cookie Butter Ice Cream
Step 1: Gather Your Ingredients
Before you start, it’s important to have everything ready. Gather your ingredients: cookie butter, sweetened condensed milk, heavy whipping cream, and vanilla extract. Make sure you have measuring cups and a mixing bowl handy. Having everything in one place makes the process smooth and enjoyable. Plus, it’s fun to see all the ingredients lined up, waiting to be transformed into a delicious treat!
Step 2: Mix the Base
Now, let’s create the base for your ice cream. In a large mixing bowl, pour in the heavy whipping cream. Using an electric mixer, whip the cream on medium speed until it forms soft peaks. This usually takes about 2-3 minutes. Soft peaks mean that the cream holds its shape but still has a smooth texture. This step is crucial because it gives your ice cream that light and fluffy feel!
Step 3: Incorporate Cookie Butter
Next, it’s time to add the star of the show—cookie butter! Gently fold in the cookie butter into the whipped cream. Use a spatula to combine them carefully. You want to keep the airiness of the whipped cream while mixing in the cookie butter. This will ensure that every scoop is packed with that delicious cookie flavor. The mixture should look creamy and slightly swirled, with hints of cookie butter throughout.
Step 4: Fold in Sweetened Condensed Milk
Now, add the sweetened condensed milk to the mixture. This ingredient is what makes your ice cream rich and sweet. Again, use a spatula to fold it in gently. Be careful not to overmix; you want to maintain that light texture. The sweetened condensed milk will blend beautifully with the cookie butter, creating a luscious mixture that’s hard to resist!
Step 5: Add Vanilla Extract
For the final touch, add the vanilla extract. This will enhance the flavors and give your ice cream a lovely aroma. Fold it in just like the previous ingredients. The vanilla will blend seamlessly, adding a warm, inviting note to your ice cream. It’s the little things that make a big difference!
Step 6: Freeze the Mixture
Now that your mixture is ready, it’s time to freeze it! Pour the ice cream mixture into a freezer-safe container. Smooth the top with a spatula to make it even. Cover the container with a lid or plastic wrap to prevent ice crystals from forming. Place it in the freezer for at least 4-6 hours, or until it’s firm. Patience is key here! The longer it freezes, the better the texture will be.
Once it’s frozen, you’ll have a delightful No-Churn Cookie Butter Ice Cream ready to enjoy. Just scoop, serve, and savor every creamy bite!
Variations of No-Churn Cookie Butter Ice Cream
Adding Mix-Ins for Extra Flavor
One of the best parts about making No-Churn Cookie Butter Ice Cream is the chance to get creative! You can easily add mix-ins to enhance the flavor and texture. Here are some fun ideas:
- Chocolate Chips: Add semi-sweet or dark chocolate chips for a delightful contrast to the sweetness of cookie butter.
- Crushed Cookies: Stir in crushed graham crackers or your favorite cookies for added crunch and flavor.
- Chopped Nuts: Walnuts or pecans can add a nice nutty flavor and a bit of crunch to your ice cream.
- Swirls of Caramel: Drizzle caramel sauce into the mixture before freezing for a sweet surprise in every scoop.
- Sprinkles: For a fun touch, add colorful sprinkles to make your ice cream look festive and inviting.
Feel free to mix and match these ideas! Just remember to fold in your mix-ins gently to keep the light and fluffy texture of the ice cream. Each addition will create a unique flavor experience that you and your loved ones will enjoy.
Alternative Bases for No-Churn Cookie Butter Ice Cream
If you want to switch things up, consider using alternative bases for your No-Churn Cookie Butter Ice Cream. Here are a few options:
- Greek Yogurt: For a healthier twist, substitute half of the heavy cream with Greek yogurt. This will give your ice cream a tangy flavor and a creamy texture.
- Coconut Cream: For a dairy-free option, use coconut cream instead of heavy cream. This will add a tropical flavor and a rich consistency.
- Almond Milk: If you prefer a lighter version, try using almond milk. Just keep in mind that the texture may be less creamy.
These alternatives can help you customize your ice cream to fit dietary preferences or simply to try something new. Each base will bring its own unique flavor and texture, making your No-Churn Cookie Butter Ice Cream even more exciting!
Cooking Note for No-Churn Cookie Butter Ice Cream
When making No-Churn Cookie Butter Ice Cream, there are a few important cooking notes to keep in mind. These tips will help ensure that your ice cream turns out perfectly every time.
First, make sure your heavy whipping cream is cold. Cold cream whips up better, creating a fluffier texture. If possible, chill your mixing bowl and beaters in the refrigerator for about 15 minutes before starting. This extra step can make a big difference in achieving those soft peaks!
Next, be gentle when folding in the cookie butter and sweetened condensed milk. The goal is to maintain the airiness of the whipped cream. Overmixing can lead to a denser texture, which is not what you want for a light and creamy ice cream.
Also, consider the freezing time. While 4-6 hours is the recommended time, for the best results, let your ice cream freeze overnight. This allows the flavors to meld beautifully and gives the ice cream a firmer texture.
Lastly, if you notice ice crystals forming on the surface of your ice cream, don’t worry! This can happen if the ice cream is not covered properly. Just give it a good stir before serving, and it will still taste delicious.
By following these cooking notes, you’ll be well on your way to creating a delightful No-Churn Cookie Butter Ice Cream that everyone will love!
Serving Suggestions for No-Churn Cookie Butter Ice Cream
Creative Ways to Serve
When it comes to serving No-Churn Cookie Butter Ice Cream, the possibilities are endless! Here are some creative ideas to make your dessert even more delightful:
- Ice Cream Sundae: Create a classic sundae by scooping the ice cream into a bowl and topping it with whipped cream, chocolate syrup, and a cherry on top. You can also sprinkle some crushed cookies for added texture.
- Cookie Butter Float: For a fun twist, pour a splash of cold milk or coffee over a scoop of ice cream in a tall glass. This makes a delicious float that’s perfect for warm days.
- Ice Cream Sandwiches: Use your favorite cookies to make ice cream sandwiches. Just scoop the No-Churn Cookie Butter Ice Cream between two cookies for a tasty treat that’s easy to hold and eat!
- Waffle Bowls: Serve the ice cream in waffle bowls for a crunchy, edible dish. You can even drizzle some chocolate or caramel sauce inside the bowl before adding the ice cream.
- Fruit Topping: Fresh fruits like bananas, strawberries, or raspberries can add a refreshing touch. Slice the fruit and place it on top of the ice cream for a colorful and tasty presentation.
These serving ideas not only enhance the visual appeal but also add layers of flavor to your No-Churn Cookie Butter Ice Cream. Get creative and have fun with it!
Pairing No-Churn Cookie Butter Ice Cream with Other Desserts
No-Churn Cookie Butter Ice Cream pairs wonderfully with a variety of other desserts. Here are some delicious combinations to try:
- Brownies: Serve a scoop of ice cream on top of warm brownies. The combination of rich chocolate and creamy ice cream is simply irresistible.
- Apple Pie: A scoop of cookie butter ice cream alongside a slice of warm apple pie creates a delightful contrast of flavors and temperatures.
- Pancakes or Waffles: Add a scoop of ice cream on top of pancakes or waffles for a decadent breakfast treat. Drizzle with maple syrup for extra sweetness!
- Chocolate Cake: Pair your ice cream with a slice of chocolate cake for a rich dessert experience. The cookie butter flavor complements the chocolate beautifully.
- Cheesecake: A scoop of No-Churn Cookie Butter Ice Cream on top of cheesecake adds a creamy layer that enhances the dessert’s richness.
These pairings not only elevate your dessert game but also create memorable moments for you and your guests. Enjoy experimenting with different combinations to find your favorite!
Tips for Perfect No-Churn Cookie Butter Ice Cream
Storage Tips
To keep your No-Churn Cookie Butter Ice Cream fresh and delicious, proper storage is key. Here are some helpful tips:
- Use an Airtight Container: Always store your ice cream in a container with a tight seal. This prevents air from getting in and helps avoid ice crystals forming on the surface.
- Cover with Plastic Wrap: For extra protection, place a layer of plastic wrap directly on the surface of the ice cream before sealing the container. This helps keep it creamy and fresh.
- Label and Date: If you’re making multiple flavors, label your containers with the flavor and date. This way, you’ll know what you have and when it was made.
- Store in the Back of the Freezer: The back of the freezer is usually the coldest spot. Storing your ice cream there helps maintain a consistent temperature, keeping it firm and delicious.
By following these storage tips, you can enjoy your No-Churn Cookie Butter Ice Cream for weeks to come. Just remember to take it out a few minutes before serving to let it soften slightly for easier scooping!
Serving Tips for Best Texture
To ensure your No-Churn Cookie Butter Ice Cream has the best texture when serving, consider these tips:
- Let it Sit: Before serving, let the ice cream sit at room temperature for about 5-10 minutes. This allows it to soften slightly, making it easier to scoop.
- Use a Warm Scoop: Dip your ice cream scoop in warm water before scooping. This helps the scoop glide through the ice cream smoothly, giving you perfect, round scoops.
- Serve in Chilled Bowls: For an extra touch, chill your serving bowls in the freezer for a few minutes before adding the ice cream. This keeps the ice cream cold longer and enhances the overall experience.
- Garnish Creatively: Add a sprinkle of crushed cookies, a drizzle of chocolate sauce, or a dollop of whipped cream on top of each serving. This not only looks appealing but also adds extra flavor and texture.
By following these serving tips, you’ll ensure that every scoop of your No-Churn Cookie Butter Ice Cream is as delightful as the first. Enjoy sharing this creamy treat with family and friends!
Breakdown of Time for No-Churn Cookie Butter Ice Cream
Prep Time
Preparing your No-Churn Cookie Butter Ice Cream is quick and easy! The prep time for this delightful dessert is approximately 15 minutes. During this time, you’ll gather your ingredients, mix the base, and fold in the cookie butter and sweetened condensed milk. It’s a simple process that allows you to enjoy the fun of making ice cream without spending hours in the kitchen!
Cooking Time
While there’s no actual cooking involved in this recipe, the freezing time is essential. After you’ve mixed all the ingredients, you’ll need to freeze the mixture for at least 4-6 hours. For the best results, consider freezing it overnight. This allows the flavors to meld beautifully and gives the ice cream a firmer texture. So, while the active time is short, the waiting is part of the excitement!
Total Time
In total, you can expect to spend about 15 minutes preparing your No-Churn Cookie Butter Ice Cream, plus the freezing time of 4-6 hours (or overnight for optimal results). This means you can have a delicious homemade ice cream ready to enjoy in just a few hours. It’s perfect for last-minute dessert plans or a fun summer treat!
Nutritional Information for No-Churn Cookie Butter Ice Cream
Calories and Macronutrients
Understanding the nutritional content of your No-Churn Cookie Butter Ice Cream can help you enjoy it mindfully. Here’s a general breakdown of the calories and macronutrients per serving (1/2 cup):
- Calories: Approximately 250-300 calories
- Fat: 18-22 grams
- Carbohydrates: 25-30 grams
- Sugars: 20-25 grams
- Protein: 2-4 grams
These values can vary based on the specific brands of ingredients you use. For instance, different cookie butters may have varying sugar content. It’s always a good idea to check the labels for the most accurate information. While this ice cream is a treat, it’s important to enjoy it in moderation, especially if you’re watching your calorie intake.
Health Considerations
While No-Churn Cookie Butter Ice Cream is a delicious dessert, it’s essential to consider its health aspects. Here are a few points to keep in mind:
- High in Sugar: The sweetened condensed milk and cookie butter contribute to the sugar content. If you’re monitoring your sugar intake, consider enjoying this treat occasionally.
- Rich in Fat: The heavy whipping cream provides a creamy texture but also adds saturated fat. If you’re looking for a lighter option, consider using Greek yogurt or coconut cream as alternatives.
- Allergens: This recipe contains dairy and may not be suitable for those with lactose intolerance or dairy allergies. You can explore dairy-free options to accommodate dietary needs.
- Portion Control: Enjoying a small serving can satisfy your sweet tooth without overindulging. Pairing it with fresh fruit can also add nutritional value and balance the sweetness.
By being mindful of these health considerations, you can enjoy your No-Churn Cookie Butter Ice Cream as a delightful treat while maintaining a balanced diet. Remember, it’s all about moderation and making choices that work for you!
FAQs about No-Churn Cookie Butter Ice Cream
Can I make No-Churn Cookie Butter Ice Cream without sweetened condensed milk?
Yes, you can make No-Churn Cookie Butter Ice Cream without sweetened condensed milk! If you prefer a healthier option, consider using a combination of Greek yogurt and honey or maple syrup. This will give you a creamy texture while reducing the sugar content. Just keep in mind that the flavor may be slightly different, but it will still be delicious!
How long does No-Churn Cookie Butter Ice Cream last in the freezer?
No-Churn Cookie Butter Ice Cream can last in the freezer for about 2-3 weeks when stored properly. To keep it fresh, make sure to use an airtight container and cover the surface with plastic wrap. This helps prevent ice crystals from forming and keeps the ice cream creamy. However, for the best taste and texture, try to enjoy it within the first week!
Can I use different flavors of cookie butter?
Absolutely! You can use different flavors of cookie butter to create unique variations of your ice cream. For example, try using chocolate cookie butter for a rich twist or speculoos cookie butter for a spiced flavor. Each type will bring its own special taste, making your No-Churn Cookie Butter Ice Cream even more exciting!
Is it possible to make No-Churn Cookie Butter Ice Cream dairy-free?
Yes, you can make a dairy-free version of No-Churn Cookie Butter Ice Cream! Substitute the heavy whipping cream with coconut cream or a dairy-free whipped topping. Additionally, ensure that the cookie butter you choose is dairy-free. This way, you can enjoy a creamy and delicious treat without any dairy ingredients!
Conclusion on No-Churn Cookie Butter Ice Cream
Final Thoughts on Making Your Own Ice Cream
Making your own No-Churn Cookie Butter Ice Cream is not just a fun activity; it’s a rewarding experience that brings joy to your kitchen. This delightful dessert allows you to indulge in creamy goodness without the need for fancy equipment. With just a few simple ingredients, you can create a treat that’s perfect for any occasion.
As you experiment with flavors and mix-ins, you’ll discover endless possibilities. Whether you stick to the classic cookie butter or venture into new flavor territories, each batch will be uniquely yours. Plus, sharing your homemade ice cream with family and friends adds a personal touch that store-bought options simply can’t match.
Remember, the key to a successful No-Churn Cookie Butter Ice Cream lies in the quality of your ingredients and the love you put into making it. So, gather your loved ones, roll up your sleeves, and dive into the delightful world of homemade ice cream. You’ll not only satisfy your sweet tooth but also create lasting memories in the process.
So, what are you waiting for? Grab your ingredients and start whipping up this delicious No-Churn Cookie Butter Ice Cream today. Enjoy every creamy scoop and the smiles it brings!
Relevant Recipes Link:
Craving more frozen dessert recipes to cool off this summer? Indulge in these delightful creations:
- Creamy Peanut Butter Ice Cream: A Must-Try Treat
- Cookie Dough Ice Cream: A Must-Try Dessert
- Homemade Peanut Butter Cup Ice Cream: A Delight
For more fantastic recipes and food inspiration, follow us on Pinterest!