Introduction to Red Velvet Brownies
What Makes Red Velvet Brownies Special?
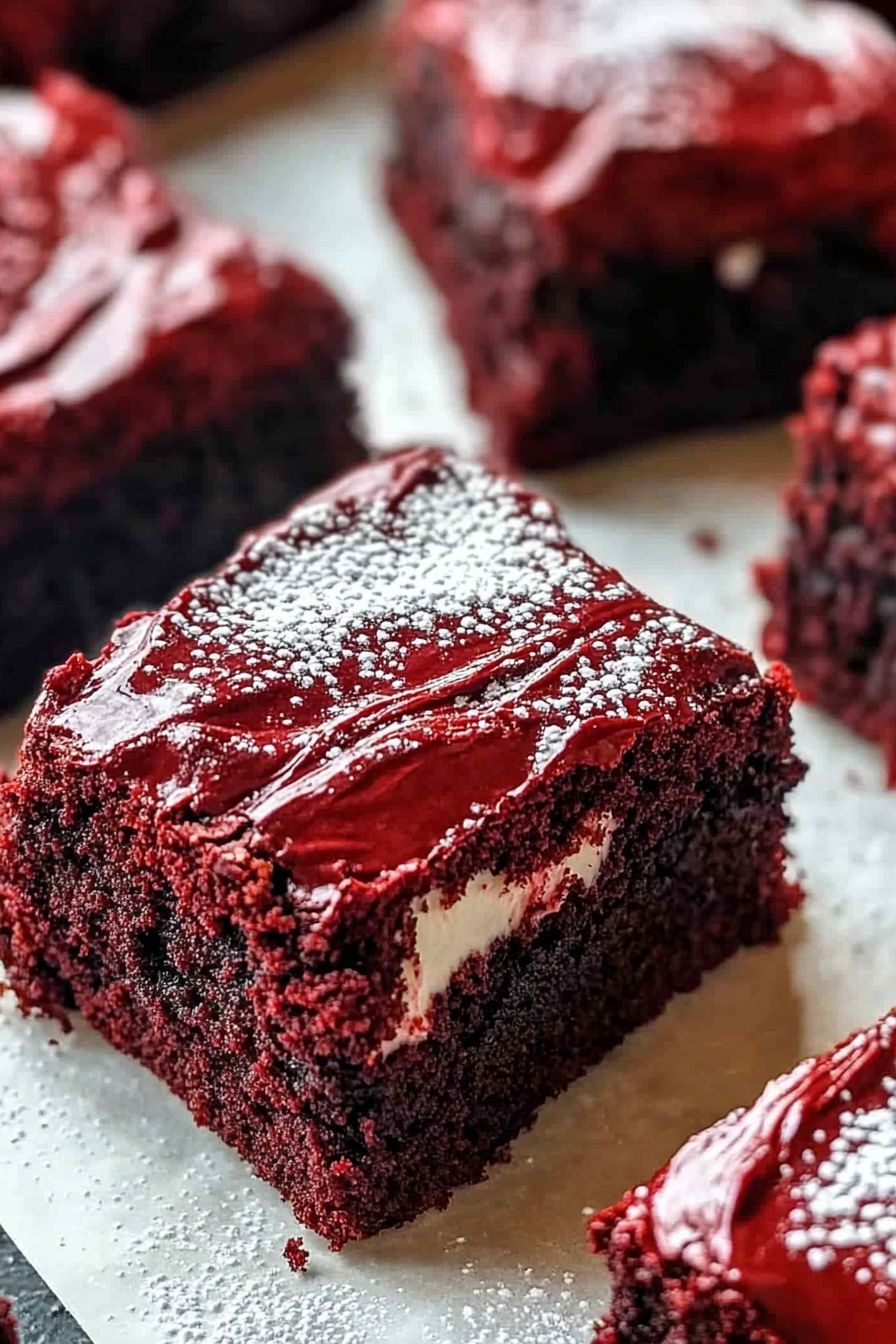
Red velvet brownies are not just your average dessert. They combine the classic flavors of red velvet cake with the rich, fudgy texture of brownies. This delightful fusion creates a treat that is both visually stunning and deliciously satisfying. The vibrant red color, often enhanced by a hint of cocoa, makes these brownies a feast for the eyes. Plus, the subtle tang from buttermilk and the sweetness of vanilla elevate the flavor profile, making each bite a delightful experience.
What truly sets red velvet brownies apart is their versatility. You can enjoy them plain, or you can add a swirl of cream cheese for a decadent twist. This unique combination of flavors and textures makes them a favorite among dessert lovers. Whether you’re celebrating a special occasion or simply treating yourself, these brownies are sure to impress.
The Perfect Treat for Any Occasion
Red velvet brownies are perfect for any gathering. They are a hit at birthday parties, holiday celebrations, and even casual get-togethers. Their eye-catching color makes them a standout dessert on any table. Imagine serving these delightful brownies at a Valentine’s Day party or a festive holiday dinner. They not only taste amazing but also add a pop of color to your dessert spread.
Moreover, these brownies are easy to make, which means you can whip them up quickly for unexpected guests. With just a few simple ingredients, you can create a dessert that looks and tastes like it took hours to prepare. So, whether you’re baking for a crowd or just for yourself, red velvet brownies are the perfect choice. Get ready to enjoy a treat that’s as fun to make as it is to eat!
Ingredients for Red Velvet Brownies
To create these scrumptious red velvet brownies, you’ll need a few simple ingredients. Each component plays a vital role in achieving that rich, fudgy texture and delightful flavor. Here’s what you’ll need:
- 1 cup all-purpose flour
- 1/2 cup unsweetened cocoa powder
- 1 cup granulated sugar
- 1/2 cup unsalted butter, melted
- 2 large eggs
- 1/2 cup buttermilk
- 1 tablespoon red food coloring
- 1 teaspoon vanilla extract
- 1/2 teaspoon baking powder
- 1/4 teaspoon baking soda
- 1/4 teaspoon salt
These ingredients come together to create a brownie that is not only visually appealing but also incredibly delicious. The buttermilk adds a slight tang, while the red food coloring gives the brownies their signature hue. The cocoa powder provides a rich chocolate flavor, making these brownies a true delight for chocolate lovers.
Feel free to customize your brownies by adding extras like chocolate chips or nuts. This way, you can make them your own! Now that you have your ingredients ready, let’s move on to the next step in our brownie-making adventure.
Step-by-Step Preparation of Red Velvet Brownies
Step 1: Preheat the Oven
Before you start mixing your ingredients, it’s important to preheat your oven. Set it to 350°F (175°C). Preheating ensures that your brownies bake evenly and achieve that perfect fudgy texture. While the oven warms up, you can prepare the rest of your ingredients. This step is crucial, so don’t skip it!
Step 2: Prepare the Baking Pan
Next, grab an 8×8 inch baking pan. To prevent sticking, line the bottom with parchment paper and lightly grease the sides with butter or cooking spray. This will make it easy to remove the brownies once they’re baked. A well-prepared pan is key to achieving those clean, beautiful brownie squares!
Step 3: Mix the Dry Ingredients
In a medium bowl, combine the all-purpose flour, cocoa powder, baking powder, baking soda, and salt. Whisk these dry ingredients together until they are well blended. This step helps to evenly distribute the leavening agents and cocoa powder, ensuring a consistent flavor and texture throughout your brownies.
Step 4: Combine the Wet Ingredients
In a separate large bowl, mix the melted butter and granulated sugar until smooth. Then, add the eggs, buttermilk, red food coloring, and vanilla extract. Whisk these ingredients together until they are fully combined. The mixture should be creamy and vibrant in color, showcasing that beautiful red hue!
Step 5: Blend Wet and Dry Mixtures
Now it’s time to combine the wet and dry mixtures. Gradually add the dry ingredients to the wet mixture, stirring gently with a spatula or wooden spoon. Be careful not to overmix; just blend until you see no more flour streaks. This will help keep your brownies soft and fudgy.
Step 6: Bake the Brownies
Pour the brownie batter into your prepared baking pan, spreading it evenly. Place the pan in the preheated oven and bake for about 25-30 minutes. To check for doneness, insert a toothpick into the center. If it comes out with a few moist crumbs, your brownies are ready. Remember, they will continue to cook slightly after you take them out!
Step 7: Cool and Cut the Brownies
Once baked, remove the brownies from the oven and let them cool in the pan for about 10-15 minutes. After that, lift them out using the parchment paper and place them on a wire rack to cool completely. Once cooled, cut them into squares. Enjoy the beautiful red color and the rich aroma that fills your kitchen!
Variations of Red Velvet Brownies
Adding Cream Cheese Swirls
If you want to elevate your red velvet brownies, consider adding cream cheese swirls. This addition brings a delightful tanginess that perfectly complements the sweetness of the brownies. To make the cream cheese swirl, simply mix 4 ounces of softened cream cheese with 1/4 cup of sugar and 1 egg until smooth. After pouring the brownie batter into the pan, drop spoonfuls of the cream cheese mixture on top. Use a knife to gently swirl it into the brownie batter. This creates a beautiful marbled effect and adds a rich flavor that everyone will love!
Incorporating Nuts or Chocolate Chips
For those who enjoy a bit of crunch, adding nuts or chocolate chips is a fantastic option. Chopped walnuts or pecans can add a lovely texture and nutty flavor to your brownies. Simply fold in about 1/2 cup of your chosen nuts into the batter before pouring it into the baking pan. Alternatively, you can mix in chocolate chips for an extra chocolatey treat. This variation not only enhances the flavor but also makes each bite even more enjoyable. Feel free to experiment with different types of nuts or chips to find your perfect combination!
Cooking Note for Red Velvet Brownies
When it comes to baking red velvet brownies, a few key tips can make all the difference. First, always measure your ingredients accurately. Baking is a science, and even a small variation can affect the final outcome. Use a kitchen scale for precise measurements, especially for flour and cocoa powder.
Another important note is to avoid overmixing the batter. Once you combine the wet and dry ingredients, mix just until everything is incorporated. Overmixing can lead to tough brownies, which is not what you want! Aim for a smooth batter with a few lumps remaining.
Additionally, keep an eye on the baking time. Ovens can vary, so start checking your brownies a few minutes before the recommended time. Remember, they will continue to cook slightly after being removed from the oven. If you want a fudgier texture, take them out when a toothpick comes out with a few moist crumbs.
Lastly, let your brownies cool completely before cutting them. This helps them set and makes it easier to achieve clean, even squares. If you’re in a hurry, you can place the pan in the refrigerator for a short time to speed up the cooling process. Enjoy your baking adventure, and get ready to savor these delightful red velvet brownies!
Serving Suggestions for Red Velvet Brownies
Pairing with Ice Cream
One of the best ways to enjoy red velvet brownies is by pairing them with ice cream. The warm, fudgy texture of the brownies contrasts beautifully with the cold, creamy ice cream. Vanilla ice cream is a classic choice, as its subtle flavor complements the rich chocolate notes of the brownies. However, you can also try pairing them with cream cheese ice cream for an extra touch of indulgence.
To serve, simply place a warm brownie on a plate and add a generous scoop of ice cream on top. Drizzle with chocolate or caramel sauce for an extra treat. This combination is perfect for special occasions or a cozy night in. Your friends and family will be impressed by this delightful dessert pairing!
Serving with Whipped Cream
If you prefer a lighter option, serving red velvet brownies with whipped cream is a fantastic choice. The fluffy texture of whipped cream adds a lovely contrast to the dense brownies. You can use store-bought whipped cream or make your own by whipping heavy cream with a bit of sugar and vanilla extract until soft peaks form.
To serve, cut the brownies into squares and place them on dessert plates. Top each brownie with a dollop of whipped cream. For an added touch, sprinkle some cocoa powder or chocolate shavings on top. This simple yet elegant presentation makes your brownies look even more inviting. It’s a great way to impress guests at dinner parties or family gatherings!
Tips for Perfect Red Velvet Brownies
Choosing the Right Cocoa Powder
When it comes to baking red velvet brownies, the type of cocoa powder you choose can make a big difference. There are two main types: natural cocoa powder and Dutch-processed cocoa powder. Natural cocoa powder has a strong chocolate flavor and is slightly acidic, which works well with baking soda. On the other hand, Dutch-processed cocoa powder is treated to neutralize its acidity, resulting in a smoother, milder flavor.
For red velvet brownies, using natural cocoa powder is often recommended. It enhances the rich chocolate taste and pairs beautifully with the buttermilk in the recipe. However, if you prefer a milder flavor, feel free to use Dutch-processed cocoa. Just remember that it may slightly alter the final taste and color of your brownies. Whichever you choose, make sure it’s high-quality cocoa for the best results!
Storing Leftover Brownies
After baking a batch of delicious red velvet brownies, you might find yourself with some leftovers. Storing them properly is key to keeping them fresh and tasty. First, allow the brownies to cool completely in the pan. Once cooled, you can cut them into squares and transfer them to an airtight container.
For short-term storage, keep the brownies at room temperature for up to three days. Just make sure to place a piece of parchment paper between layers to prevent sticking. If you want to keep them longer, consider refrigerating them. They can last up to a week in the fridge. For even longer storage, you can freeze the brownies. Wrap each square tightly in plastic wrap and place them in a freezer-safe bag. They can be frozen for up to three months. When you’re ready to enjoy them, simply thaw at room temperature or warm them in the microwave for a few seconds. This way, you can savor the deliciousness of red velvet brownies anytime!
Breakdown of Time for Red Velvet Brownies
Prep Time
Preparing your red velvet brownies is a breeze! The prep time typically takes about 15-20 minutes. This includes gathering your ingredients, measuring them out, and mixing the wet and dry components. If you have everything ready, you can whip up the batter in no time. Just remember to preheat your oven while you prepare the ingredients to save time!
Cooking Time
The cooking time for these delightful brownies is around 25-30 minutes. Keep an eye on them as they bake. Ovens can vary, so it’s a good idea to check for doneness a few minutes before the timer goes off. You want to pull them out when a toothpick inserted in the center comes out with a few moist crumbs. This ensures that your brownies remain fudgy and delicious!
Total Time
In total, you can expect to spend about 45-50 minutes from start to finish. This includes both prep and cooking time. With such a quick turnaround, you can enjoy these scrumptious red velvet brownies in no time. They’re perfect for when you need a sweet treat in a hurry or want to impress guests with minimal effort!
Nutritional Information for Red Velvet Brownies
Calories
When indulging in red velvet brownies, it’s good to know what you’re consuming. Each brownie typically contains around 200-250 calories. This number can vary based on the specific ingredients and portion sizes. While these brownies are a treat, enjoying them in moderation is key. They are rich and satisfying, so a small piece can go a long way in satisfying your sweet tooth!
Protein
Red velvet brownies also provide a modest amount of protein. Each brownie contains about 2-3 grams of protein. This comes mainly from the eggs and the milk used in the recipe. While brownies are not a significant source of protein, they can still contribute to your daily intake when enjoyed as part of a balanced diet. Pairing them with a protein-rich snack, like a glass of milk, can enhance the overall nutritional value!
Sodium
In terms of sodium, each brownie has approximately 100-150 milligrams. This amount is relatively low, making red velvet brownies a suitable dessert option for most people. However, if you are watching your sodium intake, be mindful of the other foods you consume throughout the day. Enjoying these brownies as an occasional treat can fit nicely into a healthy lifestyle!
FAQs about Red Velvet Brownies
Can I make Red Velvet Brownies ahead of time?
Absolutely! Red velvet brownies are perfect for making ahead of time. You can bake them a day or two in advance and store them properly. Just let them cool completely, then cut them into squares and place them in an airtight container. This way, they stay fresh and delicious. If you want to enjoy them warm, simply reheat them in the microwave for a few seconds before serving. This makes them a great option for parties or gatherings, allowing you to enjoy more time with your guests!
How do I store Red Velvet Brownies?
Storing red velvet brownies is simple! After they have cooled, cut them into squares and place them in an airtight container. You can keep them at room temperature for up to three days. If you want to keep them longer, store them in the refrigerator for up to a week. For even longer storage, consider freezing them. Wrap each brownie tightly in plastic wrap and place them in a freezer-safe bag. They can last up to three months in the freezer. When you’re ready to enjoy them, just thaw at room temperature or warm them in the microwave!
Can I substitute ingredients in the recipe?
Yes, you can substitute some ingredients in the red velvet brownie recipe! For example, if you don’t have buttermilk, you can make a quick substitute by mixing one tablespoon of vinegar or lemon juice with one cup of milk. Let it sit for a few minutes to thicken. You can also use a dairy-free butter alternative if you want a vegan option. Just keep in mind that substitutions may slightly change the flavor or texture of the brownies. Experimenting can lead to delicious new variations!
Conclusion on Red Velvet Brownies
Why You Should Try This Recipe Today
Red velvet brownies are a delightful treat that everyone should experience at least once. Their unique combination of flavors and textures makes them a standout dessert. Whether you’re a seasoned baker or a beginner, this recipe is easy to follow and yields delicious results. Plus, the vibrant red color adds a festive touch to any occasion!
Imagine serving these brownies at your next gathering. Your friends and family will be amazed by their rich taste and beautiful appearance. They’re perfect for celebrations like birthdays, holidays, or even a cozy night in. And let’s not forget how easy they are to customize! You can add cream cheese swirls, nuts, or chocolate chips to make them your own.
So, why wait? Gather your ingredients and start baking today! You’ll not only enjoy the process but also the delightful aroma that fills your kitchen. Once you take that first bite, you’ll understand why red velvet brownies are a beloved dessert. Treat yourself and your loved ones to this scrumptious recipe, and watch as they disappear in no time!