Introduction to Rich Homemade Chocolate Ice Cream
Are you ready to treat yourself to something truly special? Look no further than this Rich Homemade Chocolate Ice Cream! This delightful dessert is not just any ice cream; it’s a creamy, dreamy concoction that will satisfy your chocolate cravings. With just a few simple ingredients, you can whip up a batch that rivals any store-bought version. Plus, making ice cream at home is a fun activity for the whole family!
Why You’ll Love This Recipe
There are countless reasons to fall in love with this Rich Homemade Chocolate Ice Cream. First and foremost, it’s incredibly easy to make. You don’t need any fancy equipment or complicated techniques. Just gather your ingredients, and you’re on your way to a delicious treat!
Another reason to adore this recipe is its rich flavor. The high-quality cocoa powder gives it a deep chocolate taste that is simply irresistible. Each spoonful is a burst of chocolatey goodness that will leave you wanting more. Plus, the sweetened condensed milk adds a creamy texture that makes this ice cream extra special.
Moreover, this recipe is versatile. You can customize it to suit your taste. Want to add some nuts or chocolate chips? Go for it! Prefer a different sweetener? You can easily swap it out. The possibilities are endless, making this ice cream a perfect base for your creative ideas.
Finally, this homemade ice cream is a fantastic way to bring family and friends together. Whether you’re hosting a summer barbecue or enjoying a cozy movie night, serving this dessert will surely impress your guests. So, let’s dive into the ingredients and get started on this delightful journey of making Rich Homemade Chocolate Ice Cream!
Ingredients for Rich Homemade Chocolate Ice Cream
To create your own batch of Rich Homemade Chocolate Ice Cream, you’ll need a few simple ingredients. Each one plays a vital role in achieving that creamy, chocolatey delight you crave. Here’s what you’ll need:
- 2 cups heavy cream: This is the base of your ice cream, providing a rich and creamy texture.
- 1 cup whole milk: Whole milk adds creaminess and balances the richness of the heavy cream.
- 1 cup sweetened condensed milk: This ingredient sweetens the ice cream and gives it a smooth consistency.
- 1 cup unsweetened cocoa powder: High-quality cocoa powder is essential for that deep chocolate flavor.
- 1 teaspoon vanilla extract: A hint of vanilla enhances the overall flavor of the ice cream.
- Pinch of salt: Just a small amount of salt helps to balance the sweetness and enhance the chocolate taste.
These ingredients are easy to find at your local grocery store. Make sure to choose high-quality cocoa powder for the best flavor. Once you have everything ready, you’ll be just a few steps away from enjoying your homemade chocolate ice cream!
Step-by-Step Preparation of Rich Homemade Chocolate Ice Cream
Now that you have all your ingredients ready, it’s time to dive into the fun part: making your Rich Homemade Chocolate Ice Cream! Follow these simple steps, and you’ll be enjoying a delicious treat in no time.
Step 1: Gather Your Ingredients
Before you start, make sure you have all your ingredients measured and ready to go. This will make the process smoother and more enjoyable. You’ll need heavy cream, whole milk, sweetened condensed milk, cocoa powder, vanilla extract, and a pinch of salt. Having everything on hand will help you stay organized and focused.
Step 2: Mix the Base
In a large mixing bowl, combine the heavy cream and whole milk. Use a whisk to blend them together until they are well combined. This mixture will serve as the creamy base for your ice cream. Whisking helps to incorporate air, making your ice cream light and fluffy.
Step 3: Incorporate Cocoa Powder
Next, it’s time to add the star ingredient: cocoa powder! Gradually sift the cocoa powder into the cream mixture. This step is important because it prevents clumps from forming. Gently whisk the mixture until the cocoa is fully incorporated, and you see a rich, chocolatey color. The aroma will be heavenly!
Step 4: Add Sweetened Condensed Milk
Now, pour in the sweetened condensed milk. This ingredient not only sweetens your ice cream but also adds a creamy texture. Stir the mixture well until everything is combined. You’ll notice how the mixture becomes even smoother and richer. It’s hard to resist tasting it at this point!
Step 5: Blend in Vanilla Extract
To enhance the flavor, add the vanilla extract and a pinch of salt. The salt will balance the sweetness and bring out the chocolate flavor even more. Stir the mixture gently until all the ingredients are well blended. This step is crucial for achieving that perfect flavor profile.
Step 6: Churn the Mixture
Now comes the fun part! If you have an ice cream maker, pour the mixture into it and churn according to the manufacturer’s instructions. This process usually takes about 20-30 minutes. If you don’t have an ice cream maker, don’t worry! You can still make this ice cream by placing the mixture in a shallow dish and stirring it every 30 minutes until it reaches a creamy consistency.
Step 7: Freeze the Ice Cream
Once the mixture has reached a soft-serve consistency, transfer it to an airtight container. Smooth the top with a spatula and cover it tightly. Place the container in the freezer for at least 4 hours, or until the ice cream is firm. This final freezing step is essential for achieving that perfect scoopable texture.
And there you have it! Your Rich Homemade Chocolate Ice Cream is almost ready to be enjoyed. Just a little patience, and you’ll be indulging in a creamy, chocolatey delight that’s sure to impress!
Variations of Rich Homemade Chocolate Ice Cream
While the classic Rich Homemade Chocolate Ice Cream is already a treat on its own, there are many fun ways to customize it! By adding mix-ins or using alternative sweeteners, you can create a unique version that suits your taste. Let’s explore some exciting variations!
Adding Mix-Ins
Mix-ins are a fantastic way to add texture and flavor to your ice cream. Here are some delicious options to consider:
- Chocolate Chips: Fold in semi-sweet or dark chocolate chips for an extra chocolatey experience.
- Nuts: Chopped walnuts, almonds, or pecans add a delightful crunch.
- Marshmallows: Mini marshmallows can give your ice cream a fun, chewy texture.
- Fruit: Fresh raspberries or strawberries can add a fruity twist that complements the chocolate.
- Cookie Crumbles: Crushed cookies, like Oreos or chocolate wafers, can create a cookies-and-cream vibe.
To add mix-ins, simply fold them into the ice cream mixture just before you transfer it to the freezer. This way, they’ll be evenly distributed throughout your creamy treat!
Alternative Sweeteners
If you’re looking for a healthier option or have dietary restrictions, consider using alternative sweeteners. Here are some great substitutes:
- Honey: A natural sweetener that adds a unique flavor. Use about ¾ cup of honey for every cup of sweetened condensed milk.
- Maple Syrup: This adds a lovely caramel flavor. Use the same amount as honey.
- Agave Nectar: A sweeter option that can be used in place of sweetened condensed milk.
- Stevia: A zero-calorie sweetener that can be used to taste. Start with a small amount and adjust as needed.
When using alternative sweeteners, keep in mind that the texture may vary slightly. Experiment to find the perfect balance that suits your taste buds!
With these variations, you can make your Rich Homemade Chocolate Ice Cream even more delightful. Whether you prefer it classic or with a twist, the choice is yours!
Cooking Note for Rich Homemade Chocolate Ice Cream
When making your Rich Homemade Chocolate Ice Cream, there are a few important cooking notes to keep in mind. These tips will help ensure that your ice cream turns out perfectly creamy and delicious every time.
First, always use high-quality ingredients. The flavor of your ice cream largely depends on the quality of the cocoa powder and dairy products you choose. Opt for unsweetened cocoa powder that is rich and dark, as this will enhance the chocolate flavor. Additionally, using fresh heavy cream and whole milk will contribute to a smoother texture.
Next, be mindful of the mixing process. When combining the ingredients, whisk gently but thoroughly. This helps to incorporate air into the mixture, which is essential for achieving that light and fluffy texture. Avoid over-mixing, as this can lead to a denser ice cream.
Temperature is also crucial. Make sure your ice cream maker is pre-chilled if required. If you’re using the manual method, ensure your mixture is cold before placing it in the freezer. This will help it freeze more evenly and quickly, resulting in a creamier consistency.
Lastly, patience is key! Allow your ice cream to freeze for the recommended time. If you try to scoop it too soon, it may be too soft. On the other hand, if it becomes too hard, let it sit at room temperature for a few minutes before serving. This will make scooping much easier.
By following these cooking notes, you’ll be well on your way to creating the perfect Rich Homemade Chocolate Ice Cream that everyone will love!
Serving Suggestions for Rich Homemade Chocolate Ice Cream
Now that you’ve made your delicious Rich Homemade Chocolate Ice Cream, it’s time to serve it up! This creamy treat is perfect on its own, but with a few simple toppings, you can elevate it to a whole new level. Here are some delightful serving suggestions to enhance your ice cream experience.
Toppings to Enhance Your Ice Cream
Adding toppings can transform your ice cream into a gourmet dessert. Here are some tasty options to consider:
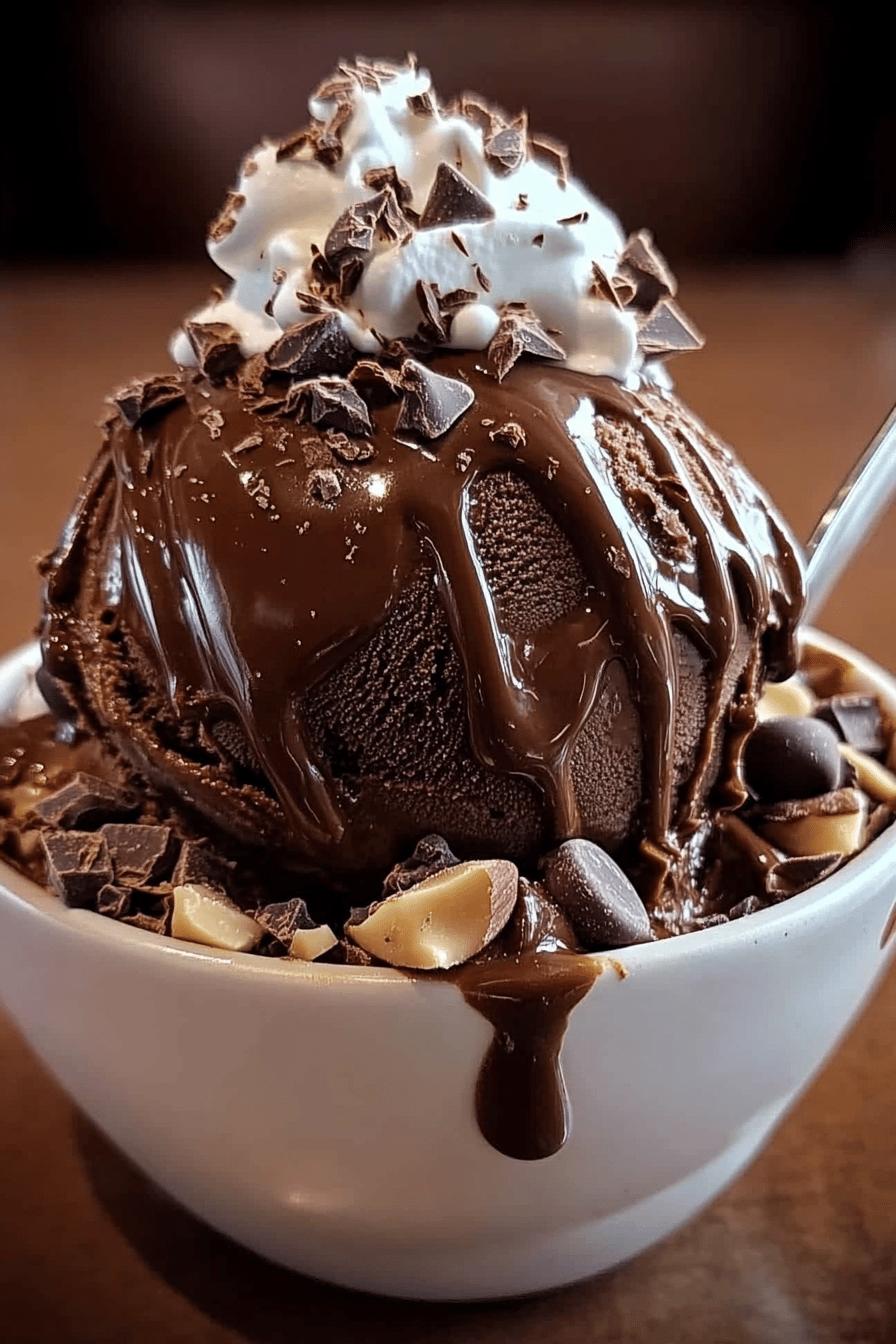
- Whipped Cream: A dollop of freshly whipped cream adds a light and airy touch to your chocolate ice cream.
- Chocolate Sauce: Drizzle warm chocolate sauce over the top for an extra chocolatey indulgence.
- Caramel Sauce: A swirl of caramel sauce can provide a sweet contrast to the rich chocolate flavor.
- Sprinkles: Colorful sprinkles can add a fun and festive touch, especially for kids.
- Fresh Berries: Raspberries or strawberries not only look beautiful but also add a refreshing burst of flavor.
- Chopped Nuts: Sprinkle some chopped almonds, walnuts, or hazelnuts for a crunchy texture.
- Shredded Coconut: For a tropical twist, add some toasted coconut flakes on top.
- Crushed Cookies: Crushed Oreos or chocolate wafers can add a delightful crunch and extra chocolate flavor.
Feel free to mix and match these toppings to create your perfect bowl of ice cream. You can even set up a toppings bar for parties, allowing guests to customize their own sundaes. This interactive element makes serving your Rich Homemade Chocolate Ice Cream even more enjoyable!
With these serving suggestions, your homemade ice cream will not only taste amazing but also look stunning. So grab a scoop, add your favorite toppings, and enjoy every delicious bite!
Tips for Perfecting Rich Homemade Chocolate Ice Cream
Creating the perfect Rich Homemade Chocolate Ice Cream is an art that can be mastered with a few helpful tips. Whether you’re a novice or a seasoned ice cream maker, these suggestions will ensure your dessert turns out creamy, flavorful, and utterly delightful.
First, always chill your mixing bowl and utensils before starting. This simple step helps keep the mixture cold, which is crucial for achieving a smooth texture. A cold bowl prevents the cream from melting too quickly, allowing for better incorporation of air during mixing.
Next, consider using a combination of cocoa powders. Mixing a high-quality dark cocoa powder with a lighter one can create a more complex flavor profile. This blend can enhance the richness of your chocolate ice cream, making it even more enjoyable.
When it comes to sweetened condensed milk, don’t hesitate to taste the mixture as you go. Adjust the sweetness to your liking by adding a little more or less, depending on your preference. Remember, the sweetness will mellow out once frozen, so aim for a slightly sweeter mixture before churning.
Another tip is to churn your ice cream mixture until it reaches a soft-serve consistency. This ensures that it’s well-aerated and fluffy. If you’re using a manual method, remember to stir every 30 minutes to break up ice crystals, which can lead to a smoother final product.
Lastly, patience is key when it comes to freezing. Allow your ice cream to freeze for at least 4 hours, or overnight if possible. This will help it achieve the perfect scoopable texture. If you find it too hard to scoop after freezing, let it sit at room temperature for a few minutes before serving.
By following these tips, you’ll be well on your way to perfecting your Rich Homemade Chocolate Ice Cream. Each batch will be a delicious testament to your ice cream-making skills, and you’ll be eager to share it with family and friends!
Breakdown of Time for Rich Homemade Chocolate Ice Cream
Understanding the time required to make your Rich Homemade Chocolate Ice Cream is essential for planning. Here’s a simple breakdown of the time you’ll need for each step of the process. This will help you manage your schedule and ensure you have enough time to enjoy your delicious creation!
Prep Time
The prep time for this delightful ice cream is quite minimal. You’ll need about 15 minutes to gather your ingredients, measure them out, and mix everything together. This includes whisking the cream and milk, incorporating the cocoa powder, and blending in the sweetened condensed milk and vanilla extract. It’s a quick and easy process that anyone can handle!
Cooking Time
Once your mixture is ready, the cooking time mainly involves churning the ice cream. If you’re using an ice cream maker, this will take approximately 20-30 minutes. If you’re opting for the manual method, you’ll need to stir the mixture every 30 minutes until it reaches a creamy consistency, which can take about 2-3 hours in total. So, keep that in mind when planning your ice cream adventure!
Total Time
In total, you should expect to spend around 4 hours and 45 minutes from start to finish. This includes the prep time, cooking time, and the necessary freezing time of at least 4 hours to achieve that perfect scoopable texture. If you can, consider making your ice cream a day in advance. This way, you can enjoy it fresh and cold whenever you’re ready!
With this time breakdown, you can easily plan your ice cream-making session. Whether it’s a special occasion or just a sweet treat for yourself, knowing how long each step takes will help you enjoy the process even more!
Nutritional Information for Rich Homemade Chocolate Ice Cream
Understanding the nutritional information of your Rich Homemade Chocolate Ice Cream can help you enjoy it guilt-free. While this dessert is a delightful treat, it’s always good to know what you’re indulging in. Here’s a breakdown of the key nutritional components per serving (approximately ½ cup):
Calories
Each serving of this creamy chocolate ice cream contains about 250 calories. This number can vary slightly based on the specific brands of ingredients you use. While it’s a rich treat, it’s perfect for satisfying your sweet tooth without going overboard.
Protein
In terms of protein, you can expect around 4 grams per serving. The combination of heavy cream and whole milk contributes to this protein content, making it a more filling dessert option. While it’s not a high-protein food, it does provide a little boost to your daily intake.
Sodium
As for sodium, each serving contains approximately 80 milligrams. This is a relatively low amount, especially for a dessert. The pinch of salt added during preparation helps enhance the chocolate flavor without significantly increasing the sodium content.
Overall, while Rich Homemade Chocolate Ice Cream is a delicious indulgence, it’s important to enjoy it in moderation. Knowing the nutritional information allows you to savor each scoop while being mindful of your dietary choices. So go ahead, treat yourself to this delightful dessert, and enjoy every creamy bite!
FAQs about Rich Homemade Chocolate Ice Cream
Can I use regular milk instead of sweetened condensed milk?
While you can use regular milk, it won’t provide the same creamy texture or sweetness as sweetened condensed milk. Sweetened condensed milk is thicker and adds a rich flavor that regular milk lacks. If you want to substitute, consider using a combination of whole milk and sugar to mimic the sweetness and creaminess. For every cup of regular milk, add about ⅓ cup of sugar to achieve a similar effect.
How long can I store homemade ice cream?
You can store your Rich Homemade Chocolate Ice Cream in the freezer for about 2-3 weeks. To keep it fresh, make sure to store it in an airtight container. This will help prevent ice crystals from forming and keep your ice cream creamy. However, for the best flavor and texture, it’s recommended to enjoy it within the first week!
What can I do if my ice cream is too hard?
If your ice cream turns out too hard, don’t worry! Simply let it sit at room temperature for about 5-10 minutes before scooping. This will soften it enough to make serving easier. You can also try stirring it gently with a spoon to break up any ice crystals, which can help improve the texture.
Can I make this recipe without an ice cream maker?
Absolutely! You can make Rich Homemade Chocolate Ice Cream without an ice cream maker. After mixing your ingredients, pour the mixture into a shallow dish. Place it in the freezer and stir every 30 minutes for about 2-3 hours. This manual method helps break up ice crystals, resulting in a creamy texture. Just be sure to keep an eye on it as it freezes!
Conclusion on Rich Homemade Chocolate Ice Cream
In conclusion, making your own Rich Homemade Chocolate Ice Cream is not only a rewarding experience but also a delightful way to indulge in a creamy, chocolatey treat. With simple ingredients and easy steps, you can create a dessert that rivals any store-bought option. The rich flavor from high-quality cocoa powder, combined with the sweetness of condensed milk, makes every scoop a heavenly experience.
Whether you enjoy it on a hot summer day or as a comforting dessert during a cozy movie night, this ice cream is sure to please everyone. Plus, the ability to customize it with mix-ins or alternative sweeteners means you can tailor it to your taste preferences. From chocolate chips to fresh fruit, the options are endless!
Remember to follow the tips and cooking notes provided to ensure your ice cream turns out perfectly every time. With a little patience and creativity, you’ll be able to impress family and friends with your homemade creation. So, gather your ingredients, roll up your sleeves, and get ready to enjoy a delicious bowl of Rich Homemade Chocolate Ice Cream!
Now that you have all the knowledge and tools, it’s time to make this delightful dessert. Treat yourself and your loved ones to a scoop (or two) of this creamy goodness. Happy ice cream making!
Looking to indulge in more creamy and delightful ice cream recipes? Try these must-try options:
- Homemade Coconut Ice Cream: A Creamy Delight
- Ruby Rapture Chocolate Ice Cream: A Must-Try Flavor
- Decadent Chocolate Ice Cream: A Must-Try Treat
For more fantastic recipes and food inspiration, follow us on Pinterest!